Adobe RoboHelp 7: New UI – Part 1
One of the mjor advancements in Adobe RoboHelp 7 is the new **Highly Customizable UI. **Today, I shall dive deep into this and talk about finer features that we have implemented in RoboHelp 7.
RoboHelp has always been known for its author-friendly usability and we didn’t want to compromise on the same. So it was a difficult task to design the new UI and thus we formulated a set of guide lines:
- In no way, would be compromise on the ease of use of RoboHelp
- The UI should not be dramatically different from our older UI, so that our existing customers don’t feel out of place.
- Reduce the total number of clicks. So, essentially a user should be able to access and use a functionality using the new UI, in exactly the same or lesser number of clicks as he could in Adobe RoboHelp 6
- Ease of discoverability of functionality – intutive UI.
- Provide as much customization as possible to the customer
Apart from customization, we also wanted to enable RoboHelp’s UI to handle multiple documents. Now using Adobe RoboHelp 7, you can simultaneously opne, edit, and work upon multiple open topics without saving them. Adobe RoboHelp 7 fully supports Multiple Document Interface (MDI).
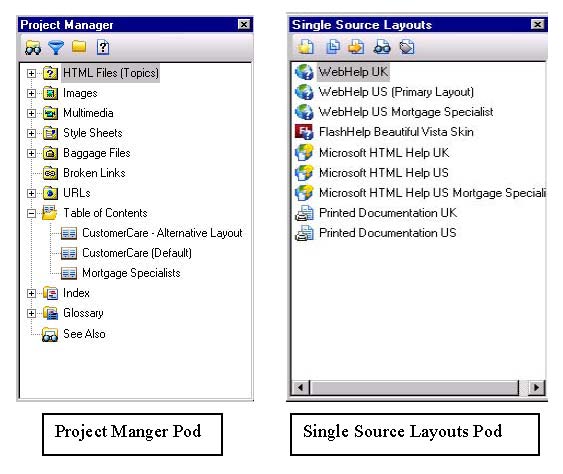
We added a couple of new UI elements. I shall now try to explain the new elements. We have grouped functionality based on workflow into different Pods. A Pod can be moved around in application, even outside the application window, and even to a different monitor. There are a number of Pods in RoboHelp. Some can be directly accessed from View Menu ->Pods, however there are a few other Pods like TOC, Index, Glossary that come up when you double click a TOC under “Table of Contents”, or an Index under “Index” or a Glossary under the “glossary” folder under “Project Manager”.

https://blog.adobe.com/media_e196c8c6aba4d1931504806bfdc11246a6fcc0d2.gif
A Pod has three states – Dockable, Hide and Floating. When in Dockable state, a Pod can be grouped along with other pods in a Pane. However, you can change the state to Floating and move it around in the RoboHelp HTML application, even outside the application to another monitor etc. Activating the Hide mode will cause the Pod to disappear. You can view the Pod again by accessing it from View Menu -> Pods and selecting the required Pod.
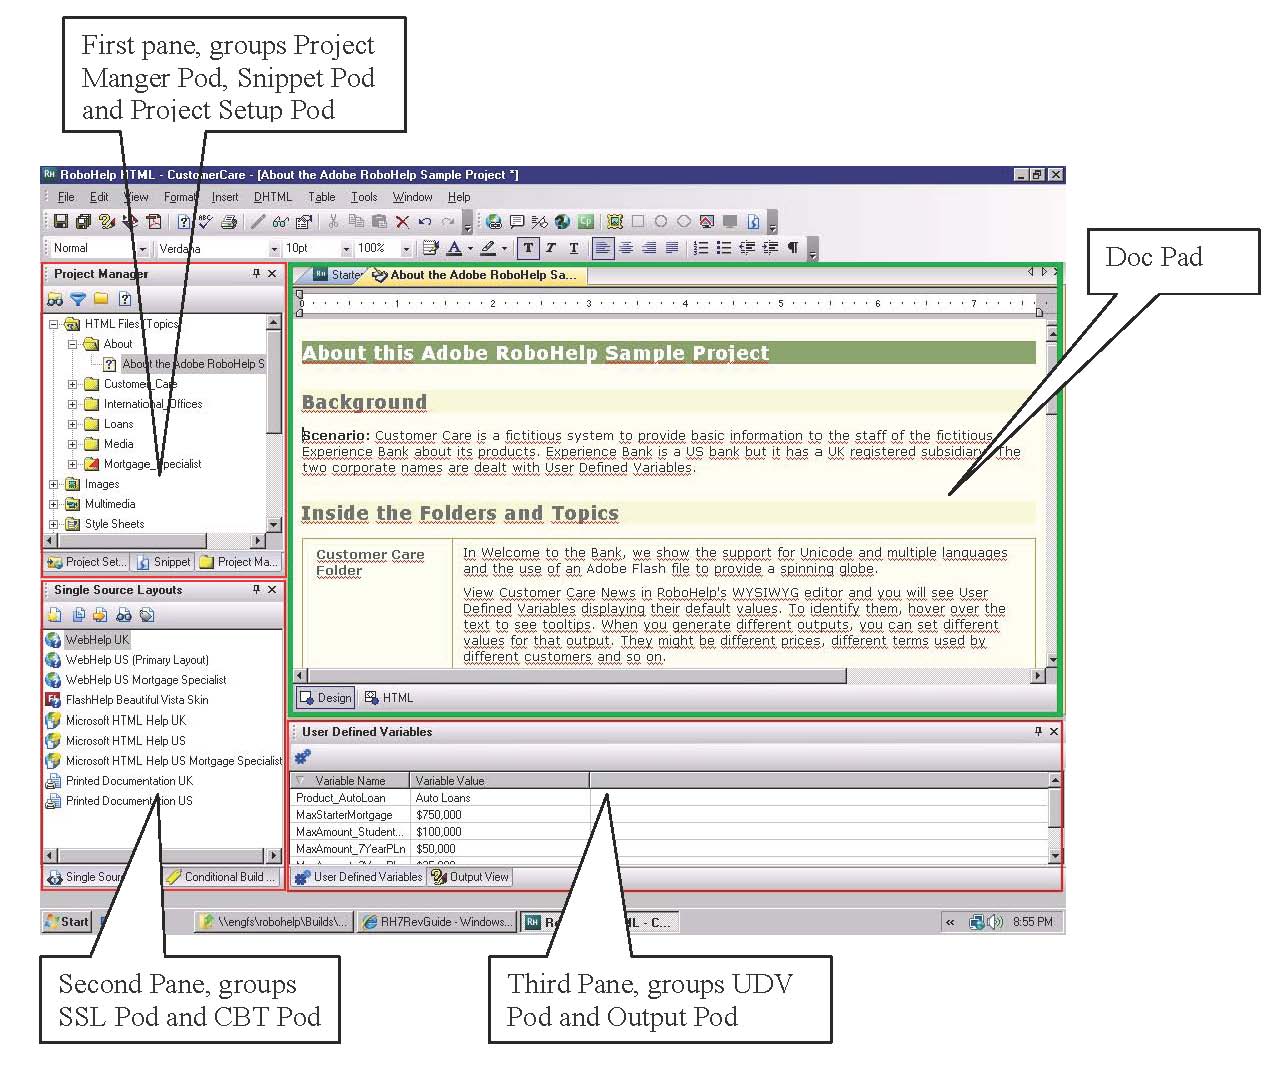
Adobe RoboHelp 7 provides the functionality of grouping Pods together in Panes. When you group two different Pods, a Pane is automatically generated that contains both the Pods. By default, RoboHelp 7 UI has three Panes – two on the left side of the application and one at the bottom. A Pane can contain as many Pods as you wish.

https://blog.adobe.com/media_24b7dcd03f1da65faa9852559da01c77d337cb77.gif
A Pane has an added functionality to Auto Hide. When you activate this property, all the Pods in that particular Pane will squeeze and you would just be able to see the Pod names along the edge of the application. As soon as you however mouse over the Pod name, that particular pod would fly out. As soon as you click outside the area of the fly out Pod, it will again collapse.
Apart from these UI elements, we have a large area to view and edit topics, called **Doc Pad. **All topics open up in the Doc Pad. Doc Pad supports functionality of breaking up into multiple vertical and horizontal Doc Pad groups.You can also dock a Pod in the Doc Pad. It might be useful to move the Topic List Pod from the bottom Pane and dock it in the Doc Pad as shown in the image below:

https://blog.adobe.com/media_41b751f6c21a56dd857be8fccb0a6b310ace85c3.gif
Ah! I thought I would be able to cover the New UI in a single post, but I was wrong. I shall modify the title of the blog and add Part 1 to it. I shall talk about this more in my next post.
Akshay
pageTracker._initData();