Adding a Thumbnail of a PDF Page to a PowerPoint Presentation
PowerPoint is a tool that attorneys use to present their arguments in mediation or the courtroom.
Since documents are a key aspect of the argument, presentations may need to include large thumbnails of key pages from the case— often from PDF files.

Several methods may be used to take turn a PDF page into an image which can then be placed into PowerPoint or other applications:
- Export the PDF as a TIFF, JPEG or other image format
- Use a screen shot utility to “grab” a portion of the screen.
- Print the PDF to a TIFF file
- Use the PDF as an OLE object
I find that the methods above are multi-step and cumbersome.
In this article, I’ll show you how the Snapshot Tool can place a page thumbnail into PowerPoint in one simple step!

Read on to learn how to use the Snapshot Tool.
What does the Snapshot Tool do?
The Snapshot Tool captures to the clipboard either:
- The visible portion of a PDF page
- Part of a PDF page
Where is the Snapshot tool?
Here’s how to access the Snapshot Tool:
- Right-click the Hand tool in the Acrobat toolbar
-
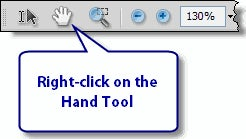
- Choose Snapshot tool from the menu:
-

The Snapshot tool is part of the Select and Zoom toolbar which is normally visible in Acrobat. If this toolbar is not visible, choose View—>Toolbars—>Select and Zoom.
Taking a Snapshot of a Page
Here’s how to take a picture of your PDF document:
- Open a PDF and set the view as desired.
I generally choose a 50% or 60% view. - Select the Snapshot Tool
-
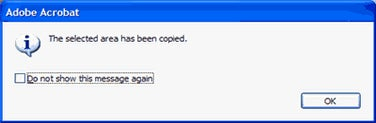
- Click once right in the middle of the PDF document
Alternately, you can click and drag to marquee a portion of the screen. - You’ll see this message:
-
Using the PDF Page Thumbnail in PowerPoint
Switch to PowerPoint and choose Edit—>Paste.
An image of your page will appear on your PowerPoint slide.
Once the image is in PowerPoint, you may wish to size or style the pasted image.
Adding a border and drop shadow helps your audience recognize the document in your presentation:

Here’s how to adjust and style the image in PowerPoint:
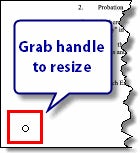
- Scale it
Grab a handle and scale to the appropriate size -
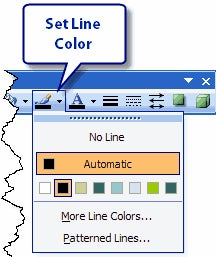
- Add a border
Use the Drawing toolbarto change the line color to black. -
- Add a drop shadow
Use the Drawing toolbar to set a drop shadow -

Creating a Link to the original PDF
Adding a hyperlink from the PDF thumbnail to the original PDF will allow you to quickly show relevant portions of a document.
Here’s how to create the link in PowerPoint:
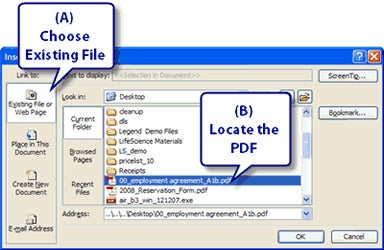
- Right-click on the PDF thumbnail and choose Hyperlink
- In the Insert Hyperlink window:
A) Choose the Existing File option
B) Find your PDF and choose it. -
Try it! When you enter slide show mode in PowerPoint, a single click will open the original PDF. Alt-Tab to get back to PowerPoint.
How much is the Snapshot tool capturing? Further Reading for Technical Savants
The number of pixels captured by the Snapshot tool depends on the the pixel resolution of your display. If you run a higher resolution display, you will capture more pixels.
1024 X 768
1280 X 1024
Image Width
436
632
Image Height
586
851
Summary of output image sizes from Snapshot Tool. PDF magnification set to Fit in Window.
Generally, you don’t need to worry about this “geeky” stuff if you intend to show your slide deck on a digital projector.
Acrobat has a preference which allows you to set a higher resolution for Snapshot images. However, I found that even after I pasted these high-resolution images into PowerPoint (I used PowerPoint 2003) that they were reduced to screen resolution.
A workaround is to export a TIFF file from Acrobat and then place that in your PowerPoint file.
In Acrobat, choose File—>Export—>Image—>TIFF. In the Export Options window you can choose your desired resolution.
Adobe applicationa such as Photoshop deal properly with all the data on the clipboard.
For those who wish to experiment with this:
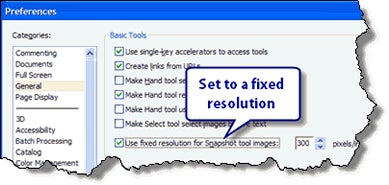
- Choose Edit—>Preferences and click on the General tab
- Check “Use Fixed resolution for Snapshot tool images”
-
The best choice will depend on theresolution of your output device. Note that setting the resolution very high slows image capture and places a lot of data on the clipboard.
Visit the Legal PowerPoint Guru
Craig Ball is a litigator and electronic discovery expert who also lectures on the legal applications of PowerPoint. Craig has some terrific tips available on his website at http://www.craigball.com. (opens in a new window). Make sure to download the free 41-PagePowerPersuasion Material.