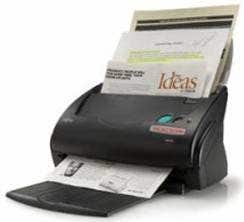
Using the Fujitsu S510 ScanSnap with Adobe Acrobat
My sister Sue is seven years older than me and— as she occasionally will point out— seven years wiser.
Sue is a family therapist and works with a number of clients. She’s been in practice for well over twenty years and consequently has a a large number of paper files. The state where she works mandates that she must keep these files for seven years.
Thus, it wasn’t surprising when I received an e-mail from her asking if I could suggest ways for her to go paperless.
It immediately occurred to me that Sue’s needs might not be unlike those of the typical solo attorney or small firm.
My suggestion was to use an inexpensive Fujitsu ScanSnap scanner to scan in her client files. Fortunately, I just happened to have a ScanSnap S510 sitting in my office. This would be the perfect test environment to develop a workflow and best practices for scanning in client records..
At about $400, the S510 comes with a full version of Acrobat Standard (that’s worth $299 right there) and has a rated scanning speed of 20 double-sided pages per minute.
Perhaps this is not the most elegant way to describe this device, but it is sort of a beginner’s scanner. Unlike more expensive devices, you cannot control the S510 directly from Acrobat or other applications because it lacks a TWAIN or ISIS driver.
The lack of TWAIN doesn’t mean that this isn’t a useful device. The ScanSnap S510 is a great scanner, but you do need to understand how to use it to best advantage.
The ScanSnap S510 has since been replaced by the S1500. The Fujitsu ScanSnap S1500 Deluxe Bundle includes Acrobat 9 Standard and updated versions of the applications mentioned in this article.
Read on to learn how to set-up and use the scanner. I’ve even included a downloadable PDF version of this article.
Setting up the Scanner
For the most part, follow the instructions in the Quick Start Guide which comes with the scanner.
I installed the following products which were included with the software bundle:
- Acrobat
- ScanSnap Manager/Organizer
- Abby ScanSnap Edition OCR
You can set-up the S510 in about 30 minutes. Twenty-eight of those minutes will be spent installing the software. The installers do seem oddly dependent on having Internet Explorer as your default browser. the ABBY software installer opened up a Firefox window. When I clicked on the setup.exe it downloaded it to my desktop! I was able to open the CD and drill down to the setup.exe file to install it.
The ScanSnap driver installer had a link on it to the documentation which also did not work. I was able to explore the CD and get.
Get the Documentation Although there is a printed manual, it is not the same as the manual on the CD. Make sure you drag the ScanSnapManual.pdf file off the CD.
Setting up the Scanning Software
Out of the box, the scanner is a bit confusing to use. As configured, you get a lot of options.
I was most interested in creating a simplified workflow to:
- Scan in 300 dpi Black and White
- Scan to a specific folder
- Prompt to name the file
- Open the file in Acrobat for review
Follow the steps below to create this workflow:
- Create a folder on your computer where you want to save your client files.
Tip: Where should I put the folder?I’d suggest creating a folder inside your My Documents folder such as:C:\Documents and Settings\Administrator\My Documents\Client Files
-
Right-click the “S” icon (scanner icon) in the task bar in the lower right corner of the screen:
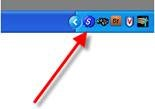
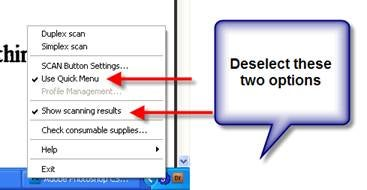
- Deselect
- Use Quick Menu
- . Right-click again to deselect
- Show Scanning Results
-
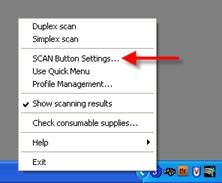
- Right-click and choose
- Scan Button Settings
-
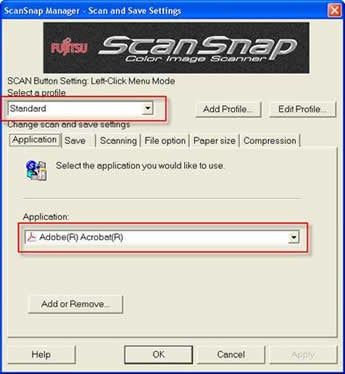
- Click the Application tab.
- Choose the Standard Profile,,Set the Application toAcrobat
-
- Click the Save tab.
A)Make sure the - Standard
- profile is selected.
B)Click - Browse
-
button
Locate the folder where you want to store your files
e.g. _C:\Documents and Settings\Administrator\My Documents\Client Files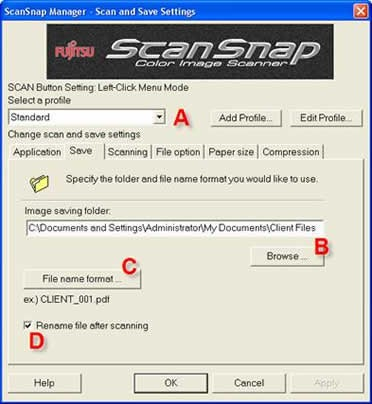
Click the **Custom File Name Format **radio button
Enter CLIENT_
Click **OK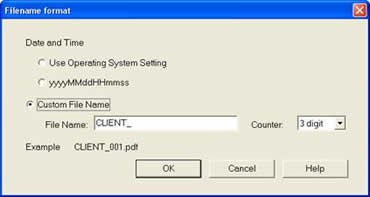
- Rename File after scanning
- is checked
- Click the Scanning tab
A)Change the Quality to **Better (Faster) **for 400 dpi or leave it on Standard for 300 dpi.B) Change the color mode to B&W -
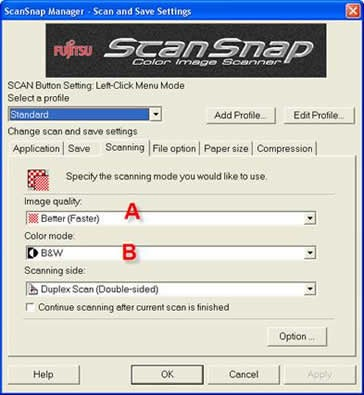
Tip: What resolution is that?Normal = 300 dpi Better = 400 dpi Best = 600 dpi Excellent = 1200 dpi Tip: Handwritten Pages If you have a lot of handwritten pages, you might find scanning in color to work better for you. Color scans are much larger, however, at about 200-300K per page compared to about 40K per page for B&W.
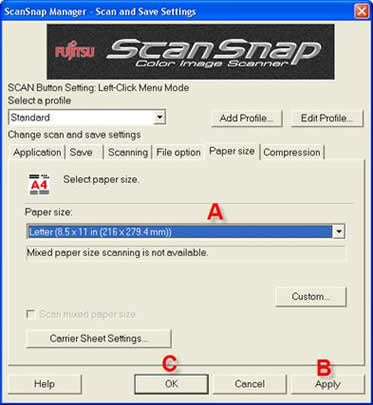
- Click the Paper Size tab
If the documents you scan are all 8.5 by 11, it is a good idea to preset the paper size.
A)Choose - Letter
- from the Paper Size menu
B)Click **Apply
**C) Click OK -
Scanning using the ScanSnap S510
Follow these steps for successful scanning:
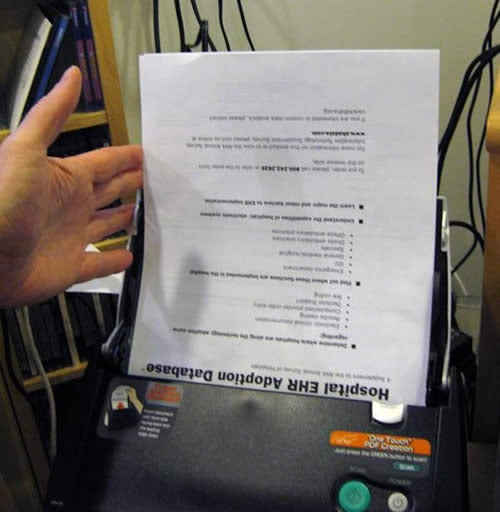
- Remove staples, fan paper and place in the scanner input hopper.
- The paper goes top down, face to the back of the scanner.
- Adjust the scan guides so they are pretty tight against the side of the paper:
-

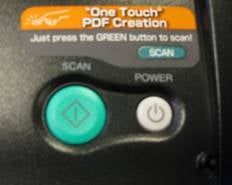
- Click the green SCAN button on the front of the scanner:
-
- I found that the S510 sometimes jams on the last page of the scan run. You can help guide the paper to prevent this.
- Place your hand on the left side of the pages to keep the pages aligned as they run through the scanner:
-
- When the scan is complete, you will be prompted to rename the file:
-
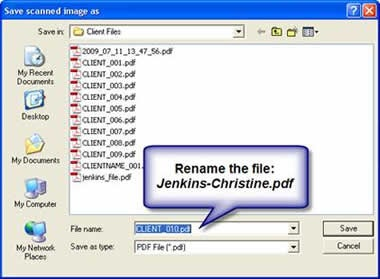
Tip: Naming Files Use a consistent naming scheme that will allow you to identify files quickly.If you scan different types of files related to a client, you might consider Jenkins-Christine_notes.pdf and Jenkins-Christine_insurance.pdf as file names.
About Scan Profiles
A scan profile captures a setting such as dpi, color, application and location that you can re-use.
For example, perhaps you have five or six active cases going. You could scan directly into specific folders by setting up a different profile for each matter or client.
The ScanSnap comes with several profiles preset. You can add more or delete the existing ones.
You can access up to twelve different scan profiles by left-clicking the in the task bar:
Creating a Scan Profile
Here’s how to create a new Scan Profile:
-
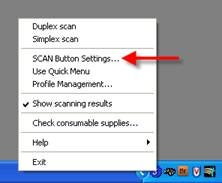
Right-click the

Choose - Scan Button Settings
-
-
The Profile window opens. Click the Add Profile button:
Give the profile a name and click OK.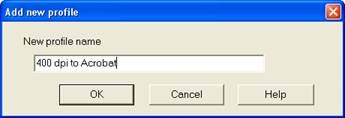
-
Choose any settings you desire among the various tabs in the window:

- Click OK when finished.
Managing Profiles
Oddly, you can’t rename or re-order profiles from the same window where you create them.