Adobe offers new Online Digital Signing Service
Print. Sign. Scan. Fax or email. Repeat.
Print. Sign. Scan. Fax or email. Repeat.
If that sounds familiar to you, you’ll want to try Adobe eSignatures, an online electronic signature service.
This service is an easy to use, cross-platform, guided service that is easy enough for anyone to use. The service is in Beta (testing) right now and is free.
Here’s how it works:
- You upload a document to the Adobe eSignatures website
- Through the service, you invite people to sign the document
- Signers create a free account on the service (Your standard Adobe ID is all you need)
- Signers sign online, in the browser
- You are alerted when all parties have signed the document
- A digitally signed PDF is returned to you (and your signers) with a signature page appended to the document (see below).
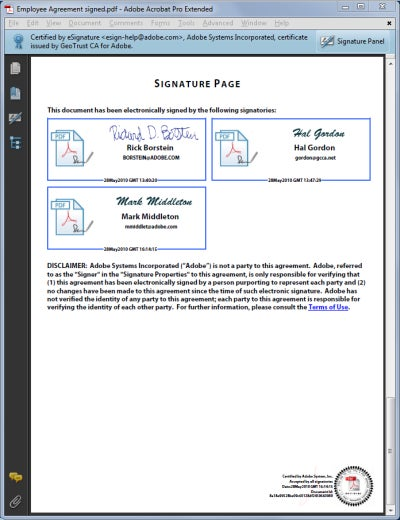
Since the file is digitally signed, once completed, no changes are possible to the document.
Further, the document is time-stamped and certified:
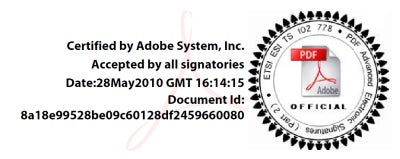
In this article, I’ll offer a quick walk-through of the service and offer some additional tips and thoughts.
Currently the service is free, so give it a whirl.
Adobe eSignatures: How it works
Most everybody is comfortable signing a document with a pen … a "wet signature”. Can you be comfortable using the Adobe eSignatures service?
Yes!
Trust is the key element of any transaction. Adobe eSignatures establishes trust via email. Every day, lawyers send documents via email, trusting that the email address belongs to the recipient.
To digitally sign a document, you and other signatories must create a free Adobe ID. An Adobe ID is tied to an email address.
When your recipient creates an account, they receive a verification link at their email address proving that the document can only be received by them.
Further, the recipient creates a unique log-in used to access the system which means that only the email owner can access the document.
If you are reading this blog, there is a good chance that you already have an Adobe ID. If you’ve registered software with Adobe or used any of our online services (e.g. Acrobat.com), you’re good to go.
Your First Digitally Signed Document
I found using the Adobe eSignatures service to be very easy.
I tested the service by sending a contract authored on my PC to someone on a Mac.
I’ve included some screenshots below, but it is actually a lot simpler in practice.
The entire process is wizard-based with Next and Back buttons to guide you through:

Here’s how to use the service.
- Log into Adobe eSignatures with your Adobe ID.
- Upload your PDF document by clicking the Browse button.
Enter a short description of the document. -
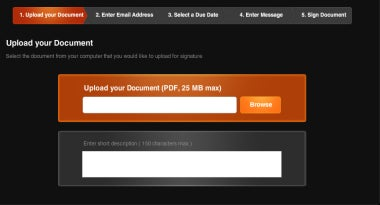
- Enter the email addresses for your recipients:
-

- Enter the Due Date for signing the document:
-

- Enter a message for your intended recipients:
-
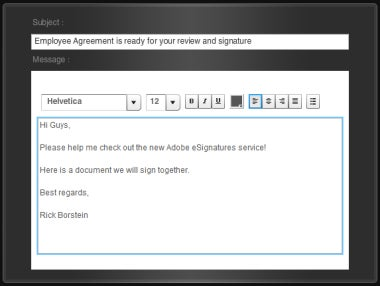
- Digitally sign the document. You can choose whether you will be the first to sign the document or the last to sign.
-
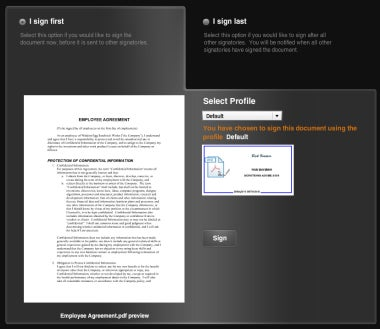
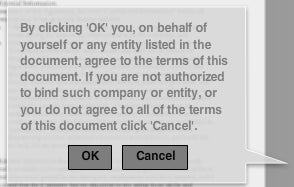
- Once you click the Sign button, you will see the following message:
-
What do recipients need to do?
The signing process is simple for your recipients.
First, each of your recipients receives an email:
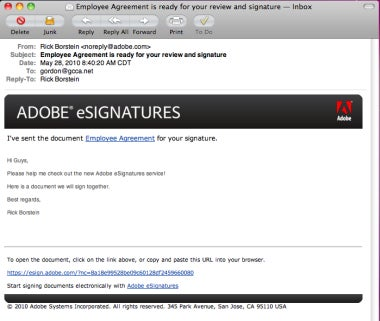
The recipient clicks on the link in the message which takes them to the Adobe eSignatures site. They will need to create an Adobe ID if they have not previously done so.
The signing page allows the recipient to view the document and scroll through it prior to signing, The recipient can also see who has already signed the document.
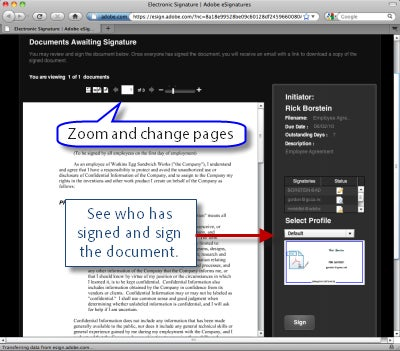
The recipient sees the same signing message that the initiator does:

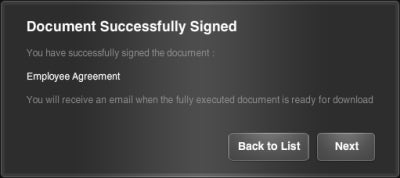
Once signed, the recipient receives a message that lets them know they will receive a link to the final, executed version:
Adobe eSignatures Tip: Add Your Real Signature
You can create multiple signature profiles including your actual signature.
Here’s how:
- Log into the Adobe eSignatures site.
- Click on the Signature Profiles link at the top of the window.
- Click the Add New Profile button
- Browse to upload a GIF or JPEG of your signature.
Other Thoughts and Tips
A few thoughts about using the the Adobe eSignatures service:
- If you’re wondering if your recipient signed the document, you can click on Document Status and look at all of the documents you have out for signing.
- If you have elected to be the last person to sign a document, it won’t show up in your status until it is your turn to sign the document.
- You may need to prepare your documents a bit differently. Since a signature page is appended to the document, you no longer need to add name/date lines to your document.
- Since Adobe sends your recipients a link to the document, it is possible that the message will go into their junk mail folder. You might wish to send or forward the link from the email confirmation message you receive to your client or tell them to allow email from adobe.com.