Code Obfuscation for Patent and Court Filings
If your firm does IP work for technology companies, or is involved in cases involving software source code, you may be obliged to submit your client’s source code to the USPTO, a court or third party.
Since source code is considered a trade secret, most regulatory agencies use a “50%” rule. Source code submitted is obscured so that it cannot be used as-is.
Curiously, some law firms use a paper-based process for this. One law firm I visited created a series of diagonal bars on transparency film, then photocopied thousands of pages.
As you can guess, that workflow was time-consuming and expensive.
Fortunately, the process is easy to automate in Acrobat X. Not only can we hide the code, we can completely delete the hidden code so it can never be recovered.
Step 1: Create a Code Mask
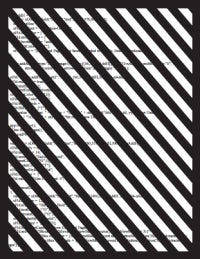
A Code Mask is an overlay on your document which hides the underlying text or images. The mask must have transparent areas where codes shows through and opaque areas which hide the text. You can create a mask using a graphics program like Adobe Illustrator or Adobe InDesign.
**Tip: Use a Vector Code Mask **Although you could use a bitmap image as a mask, I have found you get much better results using a vector illustration program. Instead of pixels in the PDF, the lines are drawn electronically which scales nicely to various page sizes.
You can download a sample Code Mask below.
sample_code_mask.pdf (37K) (letter size 8.5 by 11)
Step 2: Convert Source Code to PDF
If your client did not supply PDFs, you’ll need to convert the source code files. Most often, you’ll receive plain text files.
Check your court rules or eFiling guidelines to see if your court requires specific font sizes or margins. You can open the source code text file in a word processor and print to PDF.
Alternately, you can convert the text to PDF directly in Acrobat. Simply open the text file in Acrobat and— poof— you’ve got a PDF.
Want more control over text conversion in Acrobat? You can change the Text conversion settings. Here’s how:Choose File> Create> PDF from Web Page and click the Settings button_To change the font:_ Adjust the File Type to Text and click the Settings button to change the font used. Click OK when done.To change the page margins Click the Page Layout tab in the Settings window and adjust the margins.
Step 3: Add the Code Mask to the document
You will use the Watermark feature to add the Code Mask to the document.
-
Start watermarking . . .
A) Click the Tools panel
B) Open the Pages section
C) Click the Watermark menu and choose Add Watermark
- The Watermark window opens.
Here’s what to do:
A) Click the Browse button and locate the Code Mask file. (You can use my sample above)
B) Set the Scale relative to target page to 100% -
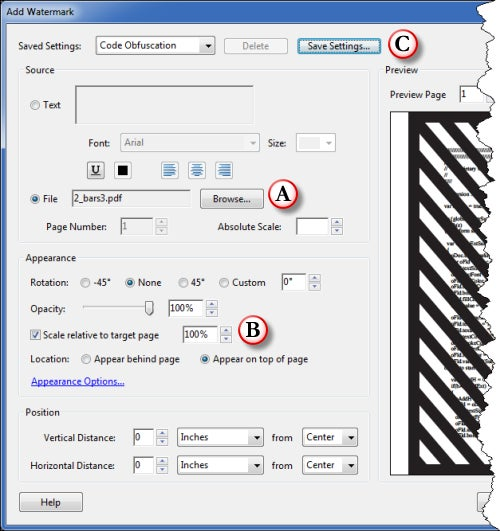
- Click OK
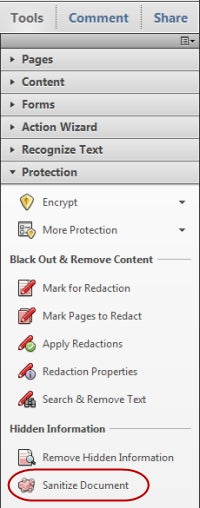
- Open the Protection section of the Tools panel, and choose Sanitize Document.
-
-
The Sanitize alert opens. Click OK.
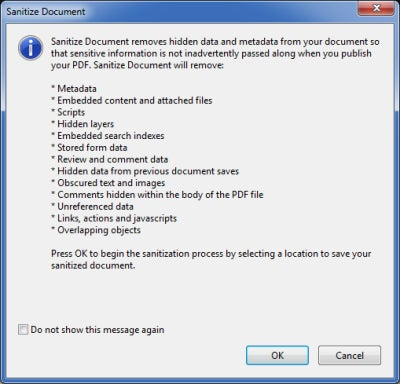
**What does Sanitize Document do? **Sanitize Document is a robust metadata removal function in Acrobat. Sanitize will rasterize the document turning it into an image so that the underlying code cannot be recovered. Functionally, it does in one step what Remove Hidden Information does with all options set to ON.
-
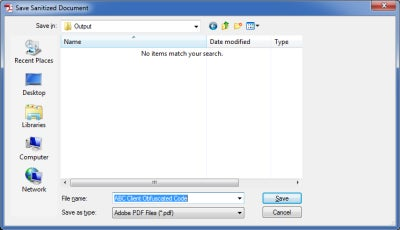
Give the file a name and click the Save button.
Automate the Process using an Action
With an Action in Acrobat X, you can automate the process above across:
- A file open in Acrobat
- Any number of txt or PDF files you want to combine, then obfuscate
- Multiple individual files
- Grab an image from your scanner and obfuscate.
I’ve created an Acrobat X Action you can use to automate the process. This action:
- Asks you to locate the code files (can be PDF or TXT files)
- Asks you for the destination for the obfuscated files
- Obfuscates the code as shown with a watermark
- Sanitizes the document removing all code underneath the code mask
- Saves the file as an Acrobat 5 (PDF 1.4) level file
- Adds the suffix _obfuscated to the file name (e.g. mycode_obfuscated.pdf)
Because the watermark action requires a file local to your file system, you’ll need to tweak the Action a bit. Don’t worry, it’s easy! Here’s how:
- Download the Acrobat X Code Obfuscation Action (2K)
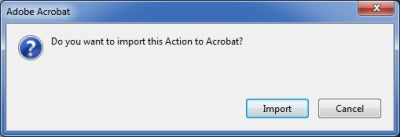
Note: This file is stored on Acrobat.com. Click the download button after the page loads. - Double click the Code Obfuscation Action.sequ downloaded in Step 1.
Click the Import button to add it to your Actions panel. -
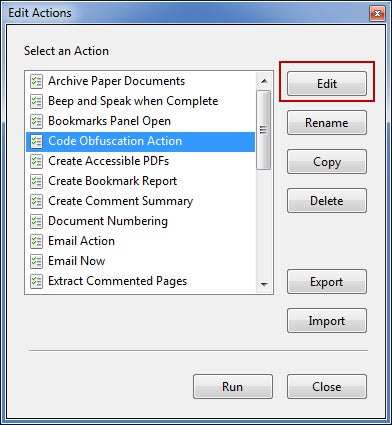
- The Edit Actions window appears.
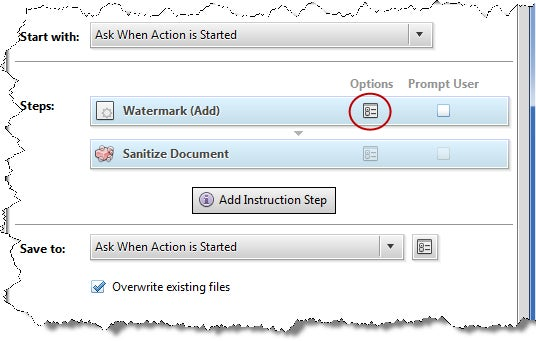
Make sure the Code Obfuscation Action is selected and click the Edit button. -
- Click the Options button next to the Watermark step of the Action.
-
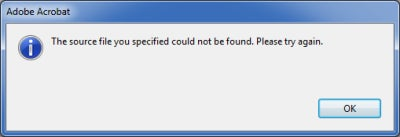
- Acrobat won’t be able to find the Source code mask file, so you will see an error message. Click OK.
-
- .
- The Watermark Window appears. Click the Browse button and locate the watermark file, following the steps noted above in the Watermarking section.
- Click OK then Save the Action.
**Tip: Save your code masks in a location that won’t change **Since the watermark function in Acrobat references a specific code mask file, if you rename it or change the location. you’ll get an error message. Save the file in a location and leave it alone . . .
Running the Action
Running the Code Obfuscation Action is simple!
- Open the Tools panel in Acrobat and then open the Actions Wizard section
- Click the Code Obfuscation Action
-

- Click Add Files button and add the files you wish to process.