Publishing your first project on RoboHelp Server 9
Once you have created a help project, you can choose a layout between Flash Help Pro and Web Help Pro for publishing on your RoboHelp server. The server only supports these two SSL types for publishing.
You will have to add the server location and specify the context name for which you would like to publish.
Let’s look at the configurations required for RoboHelp Server in Web Help Pro:
Click the image to enlarge it.

https://blogsimages.adobe.com/techcomm/files/2012/11/RoboHelp-Server-details-for-WebHelp-Pro.png
RoboHelp server details for WebHelp Pro
- Configure all settings for your project like TOC, Index, Search, and additional navigation.
- Select New on the Publish Window and add your Server details.
-
- Descriptive Name: Name you would like to associate with your Server (like Production, Development etc.)
- Server Name: URL of the machine where RoboHelp server is located. Use the following syntax:
**<Machine-URL:port>/ContextName/Server
**Example: http://10.40.166.153:8080/robohelp/server
Note: Before you configure these details, ensure that the Apache Tomcat Service on your RoboHelp Server machine is running. - Provide credentials for the context in use, which were configured in RoboHelp Server Configuration Manager.
- You can use the Refresh button to populate the list of Areas from the context in subject.
- Select OK once completed.
- Click Save and Generate to compile the output and choose Publish option to write these files on the Server machine.
Viewing Output on the Server
- Open a Web Browser and log on to the RoboHelp Server.
- Click the image to enlarge it.
-
-
- RoboHelp server login screen
-
- After logging on to the Server, go to Project Tab, choose your Published Project and View project from the Server.
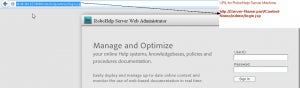
Click the image to enlarge it. -

- RoboHelp server web admin screen
Notes:
- You may see limited number of tabs on the Server based on the privileges provided to your account by the admin.
- Click the Reload button, in case your project is not reflecting.
Submitted by: Anjaneai Srivastava, Tech Support Consultant