Rule-based Classifications (Part 3: How to build rules)
This is Part 3 in a multi-part series describing the new classifications rule builder in Adobe Analytics. If you missed any of the previous installments they can be found here:
Overview of the classifications rule builder
In today’s post I will talk in detail about the user interface for the classifications rule builder and explain how classification rules are constructed and activated. To start with I need to introduce some basic terminology:
- Rule set. A rule set is a container for a list of one or more rules. Each rule set applies to one user-specified variable within a report suite, but a rule set can be applied to the same variable across multiple report suites.
- Rule. A rule comprises two parts: A matching condition and a classification action.
The basic process for using the rule builder to automatically classify a variable is pretty straight forward. You begin by creating a new rule set. When creating the rule set you specify which variable you want to classify (e.g. campaign) and which which report suites you want the rule set to apply to. Then you create a list of rules in the rule set. When you are done building rules you test them using sample keys (e.g. sample tracking codes, sample search terms, or whatever you are classifying.) When you are satisfied your rules work the way you want them to you then activate the rule set.
One activated the rule set will run automatically on a regular schedule. (To start with we are running rules once/day. This may change in the future.) Each time the rules run the system will look for new unclassified keys (e.g. new unclassified tracking codes) that have been passed into Adobe Analytics over the last month or so. Each unclassified key is evaluated against every rule in the rule set, and the appropriate classification columns are set based on those rules.
In a nutshell this relieves you from the tasks of downloading, managing, and uploading classifications files. They system does the work for you. Let’s look at the steps in more detail.
Of rule sets…
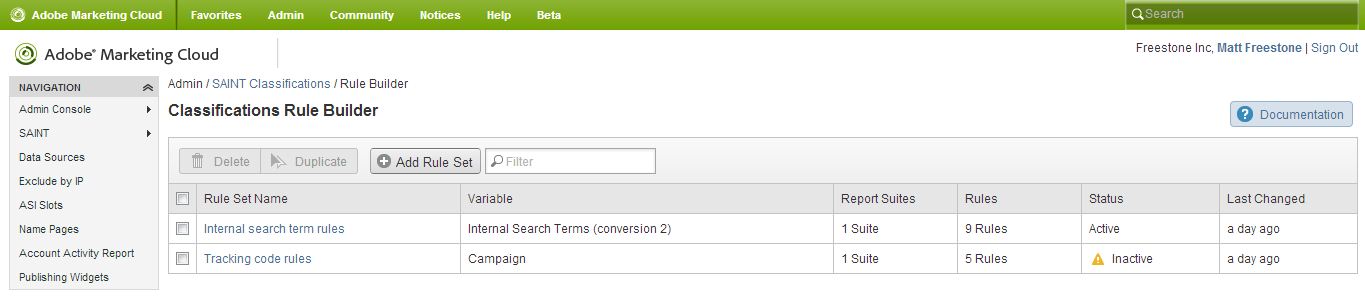
When you open the rule builder you are presented with a list of rule sets (assuming you’ve already built some):
https://blog.adobe.com/media_814f1cd6596fad7ca16c0c5a13988afcf3413d62.gif
You can see various useful information about each rule set:
- Which variable is being classified
- # of report suites the rule set applies to
- # of rules in the rule set
- Status
- Date the rule set was last changed
From this screen you can add, edit, delete, and duplicate rule sets, and you can see a nice overview of everything. The order of the rule sets listed in the table is unimportant because each rule set runs independently of all other rule sets. But you can click on the column headers to sort what you are seeing and you can use the filter to find what you are looking for.
..,And of rules
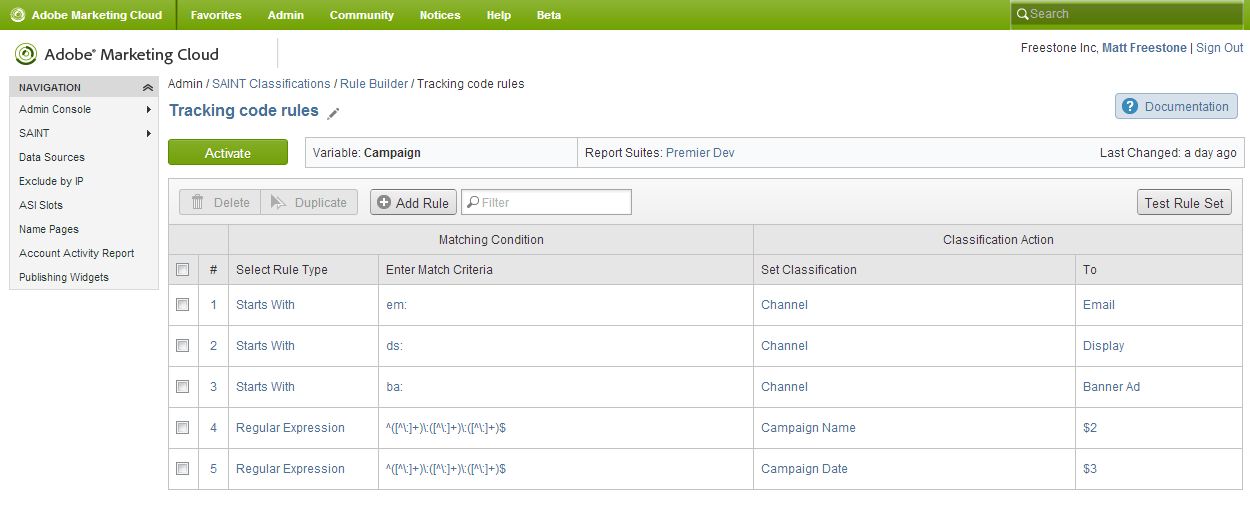
When you add or edit a rule set you are presented with the list of rules in that rule set:
https://blog.adobe.com/media_4879442a85612b24c852143843d61cba0b9f51d0.gif
From this screen you can add, edit, delete, duplicate and rearrange the order of rules within the rule set. Each rule comprises a matching condition and a classification action. There are four different possible matching conditions:
- Starts With
- Contains
- Ends With
- Regular Expression
The first three matching conditions are pretty self-explanatory. You use these to create simple rules such as “If the string starts with ’em:’ then set Channel to ‘Email’.” Regular expressions are a very powerful and advanced method for creating complex matching conditions. For example, you can use regular expressions to create a rule such as “If the second section of this 3-section string which is delimited by the colon (:) character contains ‘Blue’ or ‘Brown’ then set Color Type to ‘Standard Colors’.” Regular expressions are not for the faint of heart but they provide all sorts of useful functionality. I’ll touch more on regular expressions in my next blog post.
Within the rule set the order of the rules matters. Once the rule set is activated the rules will be evaluated in the order displayed. It is important to keep this in mind because in some situations a given key may match more than one rule. Matching more than one rule may or may not be desirable based on what you are trying to accomplish. When a key matches more than one rule and both rules impact the same classification column, the last rule wins (the rule with the higher number.)
Testing and activating rules
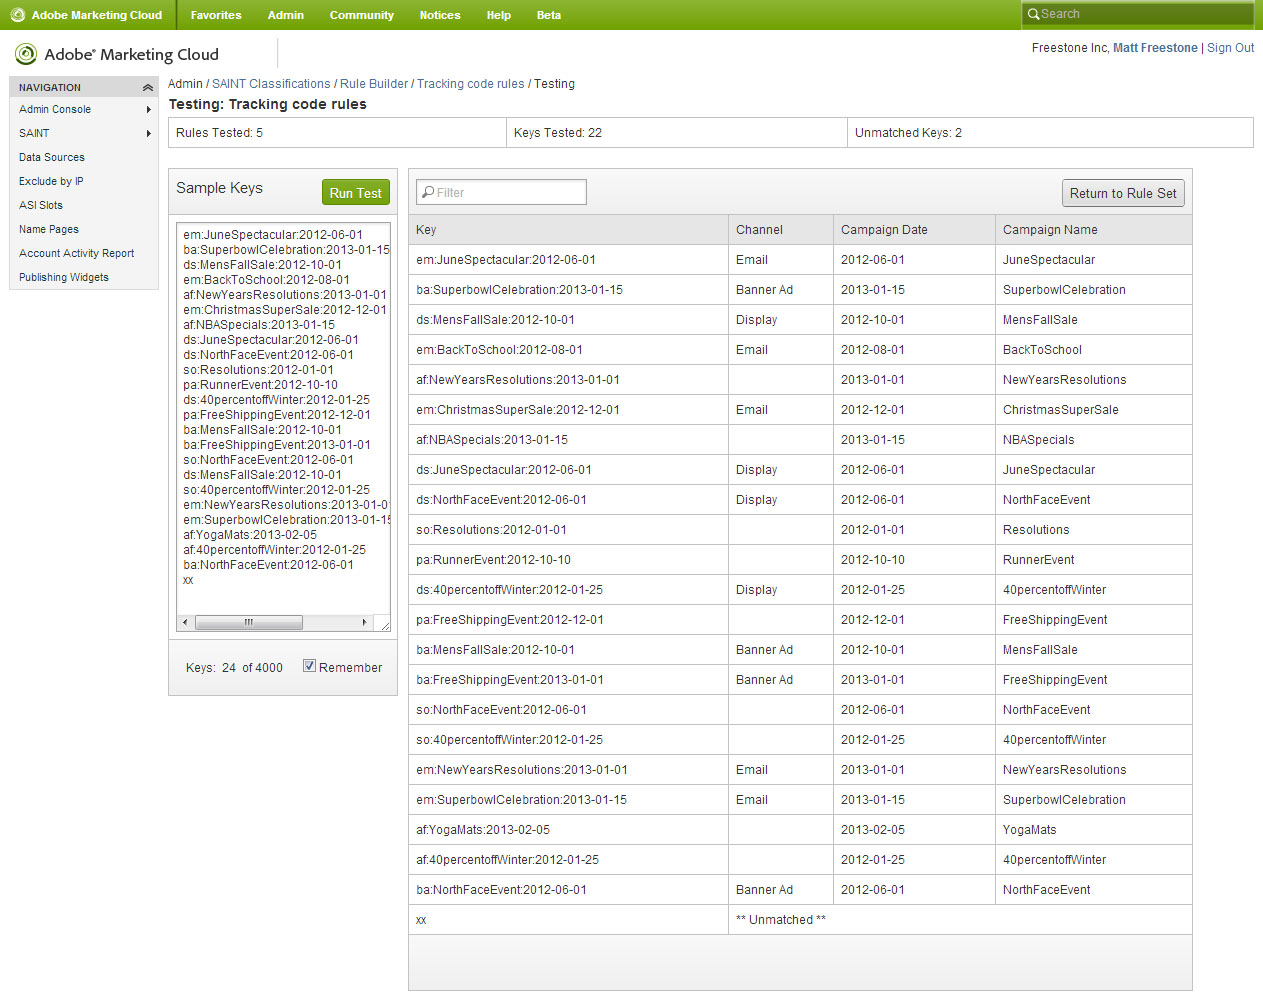
From the list of rules you can also ACTIVATE the rule set, or put it back in DEACTIVATED mode. But before activating the rule set you should test your rules using the rule builder’s built-in tester:
https://blog.adobe.com/media_9b25838b9ddaa1ab2e667d55fdbd7fb84991d387.gif
The basic idea is that you can enter a list of sample key values on the left-hand side of the screen and then run all your rules against those keys to validate that your rules will set classifications correctly. If you notice something is awry then you can go back and edit your rules and test again. While using the tester you can hover over each cell to see which rules affect that cell. Once you are done testing you activate the rule set from the screen that shows you the list of rules.
Important – keep these few things in mind
Before I close this post there are a few other important things I need to to tell you that you should keep in mind:
- By default classification rules will only be evaluated against unclassified keys. This means rules will not be evaluated against a given key if it previously has had any classifications applied. That said, there is an option that can be specified at the time you activate the rule set that will allow you (the next time the rule set runs) to override classifications for keys that have come in up to 6 months in the past.
- The classifications import/export tool (formerly SAINT) can be used to reclassify any key that was previously classified through the rule builder. This is a handy way to fix errors.
- Only standard text classifications can be classified using the rule builder. Date-enabled, Numeric, Numeric 2 and child classifications cannot be classified with the rule builder.
- Rules are tied to the text name of the variable being classified and the text name of the classification column specified. This allows you to classify the same variable and classification column in multiple report suites.
Up next
Okay that is plenty for today’s post. Next time I’m going to talk a little more about the power and advantages of using regular expressions in your classification rules.