Report Builder Power User Series: Create Auto-Refreshing Workbooks
Fast on the heels of the latest report builder release, I wanted to kick off a new series of blog posts that focuses on the power users of Excel and report builder—and hopefully help general analysts become power users in the process. With the recent introduction of real-time reports, there is a greater need for users to create Excel workbooks that can auto-refresh. Imagine creating a fully customized and visualized dashboard of data in Excel that refreshes at regular intervals without needing to engage in consulting or heavy software development. The potential added value and cost savings could be tremendous. So let’s dive in on how this can be done today.
Report Builder and Macros
Earlier this year, report builder introduced support for performing simple commands such as refresh via Excel VBA macros. Now if you use macros to perform bulk tasks or basic automation, you can include report builder functions in that workflow with some simple commands. For security reasons, you cannot scheduled macro-enabled workbooks for regular delivery from Adobe Analytics, but you can still save and use them locally. For the purposes of our objectives, we will leverage the “RefreshRequestsInCellsRange” along with the “Application.OnTime” function calls in VBA. A complete set of the example code can be found at the end of this post.
Step 1: Gather Parameters for the Refresh Process
There are three things we need to know to create an auto-refreshing dashboard:
- The range of cells that include the relevant requests, unless in rare circumstances you refresh all requests using the “RefreshAllRequests” function.
- The interval at which you want to refresh the requests. It is important to prevent your macro from refreshing too often to avoid throttling issues.
- The initial start time for the process to begin. This is not necessary if the refreshing needs to begin immediately.
You can either manually code these parameters into your macro, or you can utilize input boxes to gather this information when the macro is run. The latter is a more complicated approach, so I will show how this could be done.
First, we need to launch the Visual Basic editor and insert a new module into our workbook project.

Then, before writing any new functions, we need to create a couple of global variables to store our data parameters because we will be using multiple functions to accomplish our task.
Public range As String Public minstr As String
You can name these variables whatever you like, of course, but in this example, “range” will contain the cell selection values to indicate where the requests we want to auto-refresh are located. The “minstr” variable contains a value that represents the interval between each refresh; in this case it is minutes, but you can repurpose this to define an interval in seconds as well, depending on your needs. Next we need to create the initial function for collecting the parameters we need. First, we declare this function:
Sub autoRefresh()
Then, we ask the user to specify the range of cells that contains the requests we want to refresh:
On Error Resume Next Set rRange = Application.InputBox(Prompt:= _ "Please select a range that contains requests you wish to auto-refresh.", _ Title:="Specify Refresh Range", Type:=8) On Error GoTo ender:
An InputBox of type 8 indicates a cell-selection input that will be passed into the “rRange” variable. The last line is meant to deal with any errors we might receive by going to “ender:” which is an arbitrary line in the code at the end of the subroutine to simply exit the function. After this, we can collect the refresh interval:
On Error Resume Next minutes = Application.InputBox(Prompt:= _ "Please enter the delay between refreshes in whole minutes (01-59).", _ Title:="Specify Refresh Interval", Type:=1) On Error GoTo ender:
In this example, I capture the interval value as a number (i.e. Type:=1) so I can perform error checking, but you can choose to capture this value as a simple text value (Type:=2) if that works better for you. Lastly, we can ask the user to input the initial time for the auto-refresh process to start. This is particularly useful for timing your requests to refresh on specific marks, such as at the beginning of every hour.
On Error Resume Next fstrTime = Application.InputBox(Prompt:= _ "Please enter the first time you wish to run the refresh (hhss).", _ Title:="Specify Refresh Time", Type:=2) On Error GoTo ender:
Note that the format of the timestamp in this input (hhss) could also be applied when asking for the interval between refreshes. Now that I have all the information I need, I first extract the value of the selected cell range and translate the initial start time into a TimeValue object:
range = rRange.Address 'Set the next refresh time based on interval specified fTime = TimeValue(fstrTime)
Then, we take advantage of the Application.OnTime Excel function to set up the first refresh:
Application.OnTime fTime, "performRefresh"
The “performRefresh” part of this line of code refers to the function we will be creating in the next section and will perform the actual refreshing of the requests.
Step 2: Set up the Automatic Refresh Function
Create a new subroutine called “performRefresh” and, based on the documentation, invoke the necessary components to access report builder from a macro:
Sub performRefresh()
Dim addIn As COMAddIn Dim automationObject As Object Dim success As Boolean
'First step is to invoke the ReportBuilder COM Addin through its Product ID Set addIn = Application.COMAddIns("ReportBuilderAddIn.Connect") Set automationObject = addIn.Object
Now, using the range and interval values stored in the global variables you created earlier, invoke the refresh command and set up the application to recursively call this same function again at the next appropriate time:
success = automationObject.RefreshRequestsInCellsRange(range)
'Set the next refresh time based on interval specified dTime = Now + TimeValue("00:" & minstr & ":00") Application.OnTime dTime, "performRefresh"
As a reminder, this example illustrates specifying a minute-based interval, but this last piece essentially completes the work for an auto-refreshing workbook. As long as the application stays open, this macro will continuously run in the background until the file is closed.
Step 3: Test and Then Go
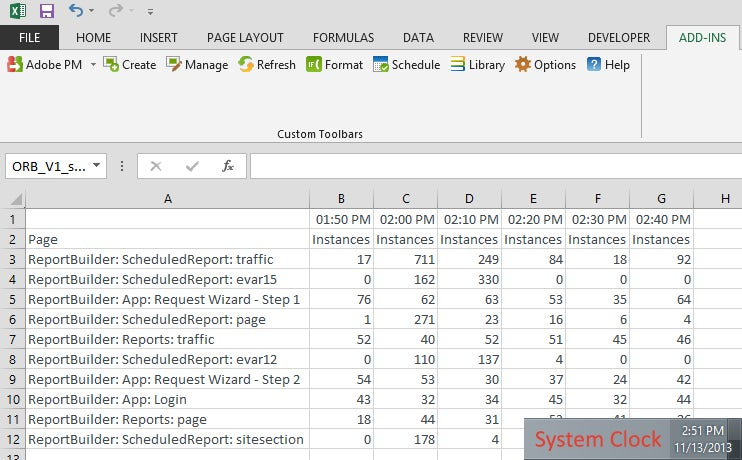
Because your computer’s local clock may differ slightly from the server system time, setting up your macro to run at the top of every hour may not return the data set from the desired time period. I would recommend you manually refresh your real-time requests a few times to understand how your computer clock differs and then account for that difference when you run this macro.
Hopefully, this article helps you understand some potentially useful applications of real-time data and macros in conjunction with report builder. Feel free to reach out to me or our consulting team to explore how you can best leverage report builder in your workflows.
Complete Example Module Code:
Public range As String Public minstr As String
Sub autoRefresh() ' autoRefresh Macro ' by Eric Hansen ' Copyright (c) 2013 Adobe Systems, Inc.
Dim minutes As Integer Dim errorMsg As String
On Error Resume Next Set rRange = Application.InputBox(Prompt:= _ "Please select a range that contains requests you wish to auto-refresh.", _ Title:="Specify Refresh Range", Type:=8) On Error GoTo ender:
On Error Resume Next minutes = Application.InputBox(Prompt:= _ "Please enter the delay between refreshes in whole minutes (01-59).", _ Title:="Specify Refresh Interval", Type:=1) On Error GoTo ender:
On Error Resume Next fstrTime = Application.InputBox(Prompt:= _ "Please enter the first time you wish to run the refresh (hhss).", _ Title:="Specify Refresh Time", Type:=2) On Error GoTo ender:
Application.DisplayAlerts = True
If minutes 59 Then errorMsg = errorMsg & "Invalid interval specified, must be between 1-59. " GoTo ender: Else If minutes
If rRange Is Nothing Then errorMsg = errorMsg & "Invalid range selected. " GoTo ender: Else range = rRange.Address 'Set the next refresh time based on interval specified fTime = TimeValue(fstrTime) Application.OnTime fTime, "performRefresh" End If Exit Sub
ender: MsgBox "Macro stopped due to error/cancel. " & errorMsg, vbOKOnly, "Macro Stopped" Exit Sub noError: End Sub
Sub performRefresh() ' performRefresh Macro ' by Eric Hansen ' Copyright (c) 2013 Adobe Systems, Inc.
Dim addIn As COMAddIn Dim automationObject As Object Dim success As Boolean
'First step is to invoke the ReportBuilder COM Addin through its Product ID Set addIn = Application.COMAddIns("ReportBuilderAddIn.Connect") Set automationObject = addIn.Object
' Once the Addin has been retrieved, invoke the RefreshRequestsInCellsRange() API command ' The cell range specified below points to the captured range from the autoRefresh() macro. ' The range expression is compatibile with all supported Excel Range expressions success = automationObject.RefreshRequestsInCellsRange(range)
'Set the next refresh time based on interval specified dTime = Now + TimeValue("00:" & minstr & ":00") Application.OnTime dTime, "performRefresh" End Sub