Getting Started with Adobe Dynamic Tag Management: Part 2
This is part 2 of a multipart series on Getting Started with Adobe Dynamic Tag Management. If you missed part 1, you can get caught up here.
In part 2 of this series of Getting Started with Dynamic Tag Management, we will cover activating and configuring Adobe Analytics.
In the first post in this series, we covered creating your first web property and deploying the embed codes, so your DTM account should be prepped and ready to activate Adobe Analytics and begin collecting data.
Step 1: Login to your DTM account and select the property that you would like to activate Adobe Analytics in.
Step 2: Select the “Add A Tool” button:
https://blog.adobe.com/media_78ddd96552b433b1da588ce2b5aeb0a1616001be.gif
Note: Dynamic Tag Management supports every single marketing tag and script in the marketplace today, and our open architecture ensures that any new or emerging scripts will be supported as well. We will cover these other tags in a future post.
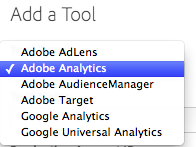
Once you have select the “Add a Tool” button you will be presented with a modal to select which of the major tools that you are ready to activate.
https://blog.adobe.com/media_462d689a9d71ec80efa46f798eff2ae54139041b.gif
Select the “Adobe Analytics” option and the modal will present you with the options for the initial setup for Adobe Analytics. You do not have to worry about getting this exactly right on the first try as you are always able to go back and adjust any of these settings at any time.
https://blog.adobe.com/media_79d1f84b18bd889f228f48fa8f7d10ae8a360a55.gif
Step 3: Set the basic configuration for Adobe Analytics****
Now that you have added an instance of a tool, specifically Adobe Analytics, into your DTM account we need to setup at least the basic configuration to get the default beacon to fire properly. To access the configuration screen for the newly added instance, click on the gear icon as indicated in the image below.
https://blog.adobe.com/media_5aba80f76aee1ba60511922203a4e593421e7175.gif
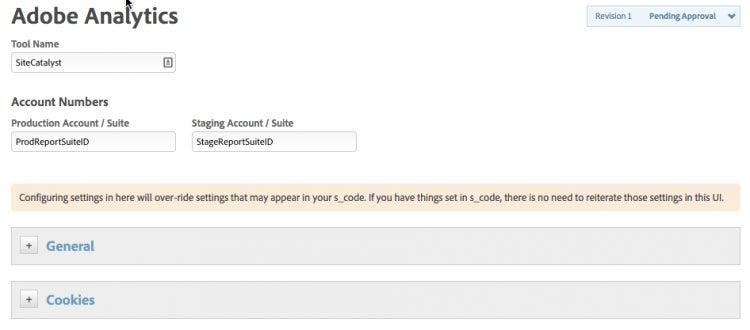
This will open the main Adobe Analytics Configuration options screen.
http://blogs.adobe.com/digitalmarketing/wp-content/uploads/2014/04/AnalyticsConfiguration.png
There are many options to work with and customize within in this section, but this blog post is going to stay focused on the minimum settings that you need to setup to get the initial data collection beacon to fire. In future posts, we will go deeper into the other options or you can refer to the additional resources links at the bottom of this post.
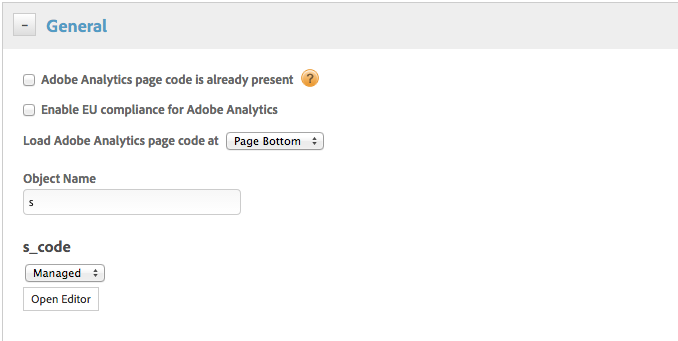
Expand the General section:
https://blog.adobe.com/media_b4e82c40b01d1b9055831c90f79f4018d4d637ad.gif
Select the “Open Editor” button
This will bring up an editor window that you are able to paste in either the main s_code file or the new app measurement library.

http://blogs.adobe.com/digitalmarketing/wp-content/uploads/2014/04/EditCode.png
With either selection you must make sure that the tracking server information is either in the editor window or in the “cookies” section as shown below.
http://blogs.adobe.com/digitalmarketing/wp-content/uploads/2014/04/EditCode1.png
That’s it!
http://blogs.adobe.com/digitalmarketing/wp-content/uploads/2014/04/baby.jpeg

Save the changes and publish the changes to see your Adobe Analytics beacon executing on your site. This whole process should only have taken 10 to 15 minutes at most. There are many more settings available to you that handle the most complex of the large-scale enterprise scale implementations, but you are well on your way to leveraging the full power of DTM.
For detailed specifications for deploying Adobe Analytics, that covers every possible setting you can refer to the DTM help section here.
Or if you prefer you can watch this video on DTM Web Propertied on the Adobe’s Enterprise TV Site.
Next Steps
In part 3 of this series of Getting Started with Dynamic Tag Management, we will cover activating and configuring Google Analytics. (Yes, you read that correctly!) If you just can’t wait to progress further with DTM, take advantage of all the other resources below:
Additional Resources
- Full Dynamic Tag Management Demo Video
- The full DTM help and documentation microsite with downloadable guides and more videos:
- Also, there are tons of great DTM videos on the Adobe Enterprise TV site under the Dynamic Tag Management category.