Audition Basics: Multitrack vs. Waveform editing. What is “Destructive” editing, anyway?
I’ve been meaning to start a blog series covering basic Audition workflows and tools for some time now. Our documentation and promotional teams do a great job showing off what’s new in each release, but we don’t offer a lot of in-depth training material for Creative Cloud members just getting started. It is my goal with this ongoing series to cover the topics that help our readers become masters with Audition and audio editing.
Audition is a deep application with a long history and a wide variety of users, so it’s no surprise that its terminology and interface can feel intimidating to artists and professionals from other disciplines. But apart from a few new words and slight conceptual differences with other production tools, crafting incredible-sounding audio with Adobe Audition can be a simple and fun experience!
WAVEFORM vs. MULTITRACK https://blog.adobe.com/media_b22ac595fec7b4fb8fc1054420d00edd40f87f0b.gif
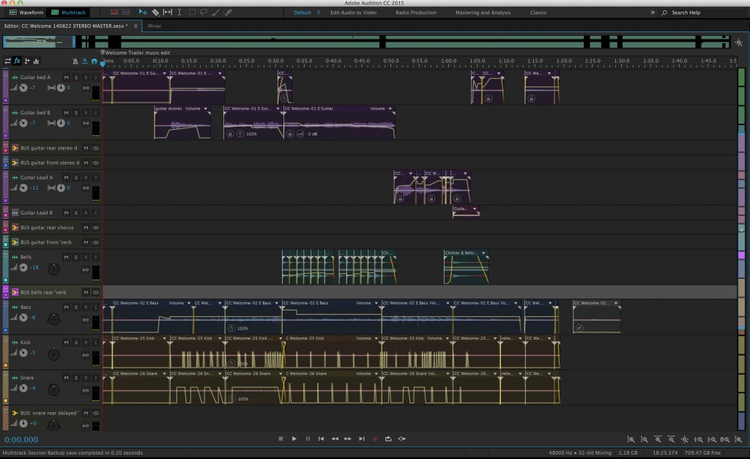
Audition has two primary editing environments. Multitrack offers a non-destructive clip-based workspace, where you arrange new or imported audio files on a timeline, blending and fading between tracks, and adding real-time processing effects like Reverb or Compression to your clips. (We’ll cover Compression in another post, so don’t worry about it yet.) Multitrack editors re-arrange pieces, modify timing, and adjust loudness levels for each piece until perfect, then render their project into a final audio file – often WAV or MP3. This workflow only uses existing media or creates new media, but never makes changes to the original files. Multitrack view is often the workspace of choice for video post-production, podcast and radio show creation, and musical composition.
Waveform view, on the other hand, is a destructive waveform editing workspace capable of in-depth analysis and sample-accurate selections and processing. Many effects and tools available in this workspace require multiple passes or are not real-time compatible, and result in changes to the actual data recorded in an audio file. This means that if you make a change to a file in Waveform view and click Save, you are usually overwriting the contents of the file you edited. This distinction can be tricky for users used to non-destructive NLE or DAW applications to wrap their heads around.

Now, why on earth would Audition support modifying your files? Surely someone must be off their medication to allow such a tool! Not really. One of earliest adopters of Audition (and its predecessor, Cool Edit Pro) were radio journalists under exceptionally tight deadlines. These folks had no time for creating multitrack projects, importing assets, or rendering a mixdown before exporting to the particular flavor of MP2 or WAV their playback automation system supports! Recording a single report quickly, deleting the “umm”s as fast as possible, and exporting directly to disk enabled them to work as fast as the news happened. In forensics and archival industries, Audition’s Spectral Frequency Editing environment allows selecting specific sounds and manipulating recordings as easily as using Windows Paint. Restoring bad recordings into usable or even good, clear audio files can mean proving an alibi in court, understanding Edison’s voice, or hearing a whale’s song.
These two worlds collide when double-clicking a clip in Multitrack opens it in Waveform view. You can make destructive edits to your assets in Waveform view, that directly change the content in Multitrack view. In most cases, this is good! Perhaps there’s a bad hum or background noise, or a production assistant’s cell phone chime occurred during the best take of a scene. Maybe you want to create an effect where a sound effect speeds up and slows down. Or you might need to remove some or all of the clicks and pops from a drum loop captured from an old vinyl record. If you make a change to an original file used in a Multitrack session, Audition will ask if you wish to save the edited file the next time you save your session.i
But if you want to avoid any possibility of destructively modifying your media files, consider working from backup copies of your assets, keeping the originals on a separate storage device. Then you can always restore the file and revert any changes made to an audio file. Also, before double-clicking a clip to open in Waveform view, right-click and choose Convert to Unique Copy. This will render the contents of the clip to a new file and relink the clip. (Similar to Render and Replace in Premiere Pro.) Any edits performed in Waveform view will only be applied to the copy.
Have a question about editing or mixing audio? Share it in the comments or via email to audbugs@adobe.com and we’ll try to answer it in an upcoming Audition Basics article.
