The Ins and Outs of Summarizing Comments

In my technical publishing workflow, I have done my very best to convince my clients of the beauty and efficiency of PDF commenting. And for those people who are my direct contacts, it works! They read my instructions, perhaps watch a quick tutorial video, and they are faithfully using the commenting tools to mark up the documents I send them. But then, comes the inevitable question: “How do I print out the document along with the comments?” While my client and I can see the comments just fine right within Acrobat, the backstory is that someone at his office (the boss) wants the hardcopy of the document, complete with comments.
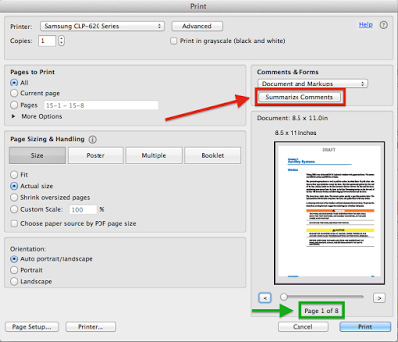
Option 1
“Print Comment Summary” is located inside the Print Dialog box. However, it offers no options whatsoever for customizing the comment appearance.
https://blog.adobe.com/media_8f6078ffe79b459a393f3a3b2b69fc20ff0543a6.gif
Option 2
A better choice is “Create Comment Summary,” which is tucked away inside the Comments Pane Option button.
The Create Content Summary dialog box gives you a variety of options to suit your needs. You can choose between four different layouts of how you want your comments displayed. Notice how the icons to the left of the bullet points change to illustrate each layout. The first two layouts include connector lines, and you can choose the connector line color and opacity.
https://blog.adobe.com/media_48871f729c0247915334ca0b1e578fe91b1f528e.gif
Choose a Layout
The Create Comment Summary dialog box gives you a variety of options to suit your needs. You can choose between four different layouts of how you want your comments displayed. You can even choose how large you want the font size of your comments to be.
https://blog.adobe.com/media_f23cf00527c39a33a8203ecc8cf885b521ffc44f.gif
For a detailed article on “Create Comment Summary, and the plethora of customizations it offers, head on over to AcrobatUsers.com and read my in-depth instructional article.