Using Animate CC HTML5 Canvas Templates with Multiple Publish Profiles
The ability to publish to HTML5 Canvas from Animate CC (and Flash Professional before it) is nothing new… however, with the release of Animate CC we now have a number of additional options when managing how a project gets published – especially in terms of how the HTML output is constructed.
HTML5 Canvas Output
When publishing to HTML5 Canvas from Animate CC, the resulting HTML file is hugely important in terms of the project’s ultimate destination. This can be clearly seen in terms of the differing specifications which ad distribution networks expect content producers to conform to when submitting their projects.

In the Properties Panel, we can easily see it specified that we are working on an HTML5 Canvas Document. You might also notice that the Publish Profile is listed as Default. This is an often overlooked features of Animate CC and we will be examining it later in this article.

Before moving on, if we go ahead and test our document in the web browser by choosing Control > Test, we’ll see the result of this Default Publish Profile. The canvas element which is our published project is aligned to the upper left and the HTML background color is a sad grey.
The good news is that it doesn’t have to be this way! Let’s now go ahead and click on Publish Settings in the Properties Panel to access all of our document publish options.
HTML5 Canvas Templates
The first thing to do if you want to create a template of your own is to export the default template in order to modify it to your liking. To do so, from the Advanced tab in Publish Settings, click the Export button and save the HTML file on your machine for editing. You will be prompted by Animate CC to give this file a name and location on your hard drive.

With the default template exported, you will now be able to open it up in Adobe Dreamweaver, Brackets, or any text editor of your choosing to customize the HTML, JavaScript, and CSS contained within. Perhaps you want to center your HTML5 Canvas content or add other elements like headers and descriptive text. This is all possible using Templates.
Editing the Template
Now that we have our Template file open within an editor, we can make whatever modifications we wish. In this example, I’ve styled the Body element to inherit the Stage background color as defined in our Animate project. I’ve also gone ahead and given some margin to the document, and have centered the Canvas element. That should make things a bit more balanced and lively!

One thing to make note of before we move on, is the availability of special tokens with the HTML Template which ca be used when customizing. For instance, tokens such as $BG, $WT, and $HT can be used in conjunction with custom logic and elements to adjust for sizing and background colors within your Template.
Here is a short list detailing some of these tokens, and what they represent:
$CANVAS_ID The ID of the Canvas element within your HTML document.
$TITLE The title of your project document.
$BG The background color of the Stage defined within the FLA.
$WT The width of the Stage defined within the FLA.
$HT The height of the Stage defined within the FLA.
These tokens are available for use within any Template and will be replaced by their appropriate values upon publication. Other tokens exist as well, and can be explored within the exported HTML Template file.
Using Ad Network Code within a Template
In this example, we’ve created a very visual Template in order to more easily express what can be achieved through this mechanism. However, we can also include non-visual elements within a Template as often required by various ad distribution networks.
Here, for example, is a bit of HTML to include in the HEAD of your Template in order to conform to DoubleClick ad campaign requirements.
var clickTag = “http://www.google.com”;
In the above code, we set the ad size though a META tag, and then expose a ClickTag variable for use within our Animate CC project. Within the actual Animate content, we can respond to user interaction by invoking the following:
window.open(window.clickTag);
This will allow the use of ClickTag events within out HTML5 Canvas project easily through the use of Animate CC Templates! The same sort of functionality can be enabled for a variety of ad distribution networks by creating a Template for each one.
Importing the Custom Template
When you are finished editing, save your HTML and return to Animate CC and the Advanced Publish Settings. Simply click the Import New… button and locate the edited HTML file to use it within your project. The selected template is now clearly indicated within the dialog.

Now, whenever you test or publish your HTML5 Canvas document, it will employ your custom Template in place of the default. If at any time you wish to use the default Template again, simply click the Use Default button.
Publish Profiles
What if you have a number of Templates which you wish to switch between when publishing your content? It would be a pain to have to import Template files every time you need to switch. This is where Publish Profiles come into play.
To establish the Template just created as part of a Profile, you can click the gear icon and choose to Create profile.

A small dialog will appear, allowing you to provide a name for this profile. In this manner, you can define any number of Profiles in your document and easily switch between them.

With a custom Profile defined in the project, you can now switch between that and the default with ease by simply choosing it by name from the dropdown. Note as well that these can be exported and imported to share between projects!
Employing Templates by Swapping Profiles
Templates can be automatically applied to your content prior to publication by assigning a specific Template to a Profile, and then switching to whichever Profile you want to use. This action will employ the specific Template applied within that Profile to the document being published.
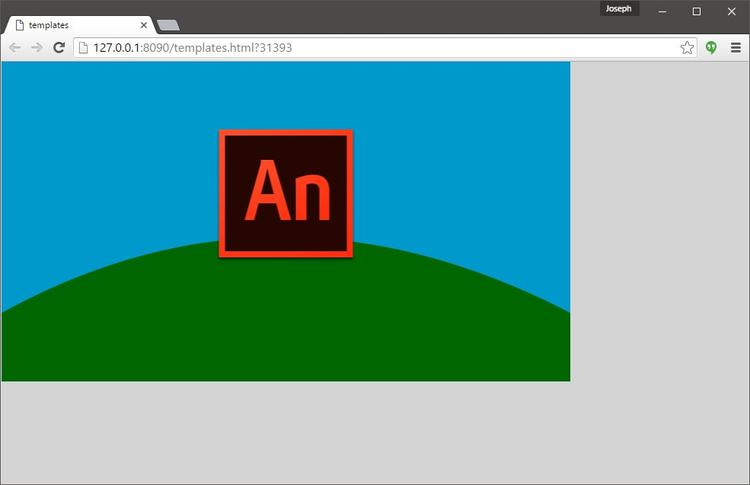
For the last part of this article, I’ll go ahead and switch my Publish Profile to new newly created “Center Content + BG” Profile by selecting it from the Profile dropdown in the Advanced tab of our Publish Settings dialog.

Clicking the OK button within our Publish Settings will apply the selected Profile and return us to the project document. Notice that the Properties Panel now reflects the selected Profile and no longer the default.

From here, we can once again test the project in the web browser by choosing Control > Test. The compiled HTML5 Canvas project will appear in a new browser window and the changes will become obvious with the entire background inheriting the Stage color chosen in Animate CC and the content itself perfectly centered – much nicer!

To return to the Default Profile or to manage and select other Publish Profiles, simply return to the Publish Settings dialog.
