New in Premiere Clip: Add Custom Branding to Your Videos

With the release of Versions 2.1 (iOS) and 1.1 (Android), Premiere Clip now allows you to add two types of branding to your videos.
A bumper is a clip that’s tacked onto the end of all or most of the published videos for a network or production company or the like. Typically only a few seconds long, bumpers are used to identify who created or distributed the video and often include contact information or the URL for a website.
The other type of branding that you can add to your Clip projects is a watermark, also known as a bug or logo. This is a small graphic, often semi-transparent, that’s rendered on top of your video, usually in one of the corners.
Premiere Clip makes it easy to have a watermark and bumper automatically added to all new projects. Asset selection and the setting for automatically applying the branding features are saved as user preferences. Also, at the level of the individual project, you can enable or disable each feature and update to a newly assigned asset.
**
Preparing Assets**
Bumper: You can use movies with an extension of .mov or .mp4 as bumper assets. We recommend encoding using the h.264 codec with frame dimensions of 1920×1080 and frame rate of 30p. If you’re creating the bumper video in Premiere Pro, set Format to h.264 and Preset to HD 1080p 29.97, and change the frame rate to 30.
Note: If a soundtrack is assigned to a project, it will end with the last asset in the timeline; the soundtrack will not continue through the bumper. Feel free to add audio to your bumper and remember it’s the last thing viewers will see!
Watermark: Save your watermark asset as a PNG. Premiere Clip positions the watermark in the upper left corner of the frame, with no offset. To get your graphic exactly where you want it, we recommend creating a 1920×1080 document with a transparent background and placing the bug in the desired location. Both Adobe Photoshop and Illustrator have presets ideal for this purpose. (In Photoshop, Document Type = Film & Video, Size = HDTV 1080p; in Illustrator, Profile = Video and Film, Size = HDTV 1080)
Posting Assets for Use
There are a few sites from which you can import the bumper and watermark files into Clip. Upload your branding assets to Adobe’s Creative Cloud or Dropbox. Android users have the additional option to use media from Google Drive.
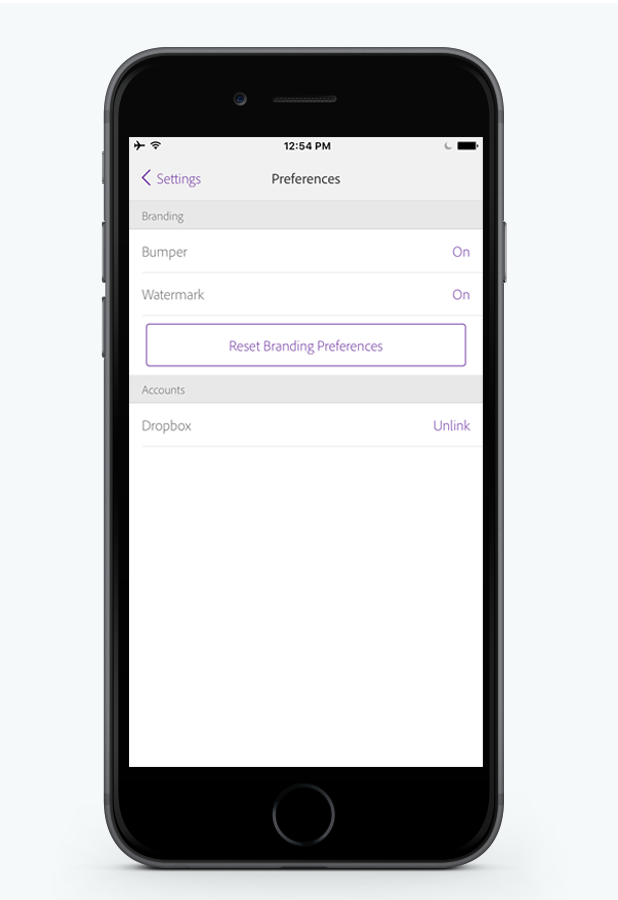
Setting User Preferences
To configure the branding features, tap the Clip icon in the upper left corner of the Project Browser, then Preferences, and then Bumper or Watermark.
https://blog.adobe.com/media_cc1a081dd65e91f6fea4f2e00bec328db9a166f7.gif https://blog.adobe.com/media_672135121f63b50c1fb39e7166ac880fb65adfec.gif
Bumper
To select a video, tap Premiere Clip to use the app’s default bumper or Custom to pick your own. Browse to the asset in your cloud storage, select it, and tap Open File or Add. Once the file has downloaded, you can preview it by tapping the thumbnail. If the preview shows just the Play button but no video, the selected clip mostly likely was encoded using an unsupported codec.
To have the bumper automatically included in all new projects, turn on the option “Append Video Bumper.” If using the bumper will be more the exception than the norm, you’ll want to leave this option off. Either way, you can enable or disable the bumper for each project individually by tapping on the gear icon in a specific project – more on that below.
Watermark
To select the logo graphic, tap Creative Cloud or Dropbox, browse to the asset, select it, and tap Open File or Add. Back in the Watermark dialog, the selected graphic will be shown relative to a 1920×1080 frame.
To have the watermark automatically enabled in all new projects, turn on the option “Apply Watermark.” As with the bumper, you’ll be able to turn the watermark on or off within each project.
Note that changes to user branding preferences have no direct effect on any existing projects. See the next section to learn about enabling/disabling each feature at the project level and updating to a new asset.
The branding preferences are saved to the user account much like your projects, so changes you make on one device will automatically sync across to other devices on which Clip is logged into the same account.
Working with Branding Features in Projects
When the Watermark feature is enabled for the project that’s open, you’ll see the logo rendered over the video in your timeline. The bumper is not appended when you preview a timeline within Clip, but you’ll see the total duration of your video with the bumper displayed in the editing workspace. To confirm that the desired asset was used, you can either check the filename displayed in Project Settings or export the project and review the resulting clip.
https://blog.adobe.com/media_df471718ac0d1985743d469196061326f967f9b1.gif
To enable or disable either branding feature for a specific project, open that project, tap the gear icon to open the Project Settings menu, then tap the switch for Video Bumper or Watermark. (If the Watermark control is grayed out, that means that no logo graphic is assigned in the user-level Branding Preferences.)
Updating the Asset Used in the Project: Each time you enable the bumper or watermark for a project, Clip pulls the currently assigned asset. So if the project is using the wrong asset for either feature—and you’ve already assigned the desired asset in Branding Preferences—you can update to the new asset by simply turning the feature off and back on in the Project Settings menu.
Troubleshooting
If the user-level branding preferences are not behaving as expected—for example, the settings are not the same on different devices using the same account—then the master preferences file in the cloud might have become corrupted. In that event, tap the Reset Branding Preferences button in Settings>Preferences. After doing so, wait two minutes to allow time for the reset process to complete before reconfiguring your branding preferences. Otherwise, your new settings may not get saved correctly.
We hope you enjoy these new branding features in the latest version of Premiere Clip! If you have any questions, need support or have feedback for the team, please visit the Premiere Clip support forum.
LEARN more about Premiere Clip
DOWNLOAD Premiere Clip for iPhone, iPad & Android Smartphones
FOLLOW @PremiereClip
WATCH a tutorial to get started