Time for a Coffin Break: Create a Dia de los Muertos Puppet

Dia de los Muertos, or the Day of the Dead, is here. On this day, the legend goes that loved ones who have passed are awakened to celebrate life with their families. To honor them, altars—or ofrendas—are erected to lead lost loved ones’ souls back to their families. The altars include symbolic items, such as marigolds, incense, and a special bread called pan de muerto. One of the most recognizable symbols of Dia de los Muertos is calavera, or skull, decorations.
Since we’re all still in the Halloween spirit as well, what better time to take a break and celebrate by creating your own paper calavera decorations!


**What you’ll need:
**Creative Cloud and Adobe Illustrator CC installed*
Download the Illustrator CC Project File “day-of-the-dead-cc.ai” here
Sync Your Creative Cloud Library hereBrads
Bamboo skewer
*If you don’t have Adobe software, download this nifty printable PDF, or try Creative Cloud for free.
Instructions:
- Open “day-of-the-dead-cc.ai” in Illustrator and go to Window > Libraries to access the assets you’ve synced. Select “Day of the Dead DIY” from the drop-down menu and browse through all the artwork.
If you haven’t used CC Libraries before, all you need to know is that it’s a collection of assets that you can create yourself, download from another Creative Cloud user, or collaborate on with a team. You can make any number of libraries to organize assets you use frequently. I use them every day for my work on tutorials, as well as for storing the colors, logos, and paragraph styles that make up my personal brand identity. Learn more about CC Libraries here.

2. Customize your calaca and calavera! Drag assets from the Libraries panel into your document. You can scale and rotate the assets as needed. If you hold the option key while dragging an asset from the library, you will create a raw copy of the artwork that will allow you to manipulate the colors or make any other edits you’d like.

3. If you want to make the most your printer ink and paper, group each piece of the puppet (including the decorative elements), then select all the artwork and scale it up. Rearrange the pieces to fit on a page, leaving some space between each element. If you don’t want your puppet to be poseable with brads, delete the letters from each piece and arrange them into a static pose. In my example below, I fit two smaller puppets on one page and changed the background color.
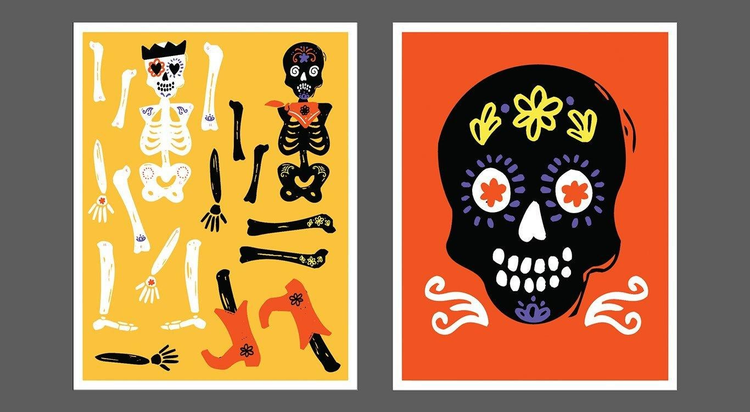
4. Print, then assemble! Cut out around each part of the puppet and arrange the limbs: match A to A, B to B, etc. Poke a hole through each of the letters (or where they would be if you covered them with decorations) and connect each matching end with a brad. If desired, attach a skewer to the back of the puppet. You can cut out the calavera, too, or leave it as-is for a neat little print to hang.

You’re done! Happy decorating!