#WeekofIcons – Optimize Icon Design with More Artboards

Now With 10X More Artboards
In October Illustrator CC unveiled an amazing new feature: support for 1,000 Artboards, a ten-fold increase from the previous 100 limit. This update is a big deal if you work on projects like an icon collection that work best using an iterative design approach.
Also in the latest release, Illustrator has added the ability to save exports into subfolders. Previously all of the exports were saved to the same root folder which you select as part of the export options. Illustrator CC 2015.3 introduced Export for Screens, Illustrator’s answer to the much-requested ability to export artwork in multiple sizes and file formats at once.
The combination of the new 1,000 artboard limit and Export for Screens solves a lot of problems for designers and makes a much more streamlined workflow possible. In this article we show you how to manage your design workflow using these new features. Our example will use a UI icon set by icon designer Ramy Wafaa, a. k. a. Roundicons, but the principles and steps can be applied to any design project.
Be sure to download your free copy of Ramy’s icon set. Also, to help you take advantage of these powerful new features with your legacy projects, we have included a link to the “Ai Merge” JavaScript Extension for Illustrator by Iconfinder. Ai Merge imports your SVG, AI, EPS, and PDF files to a single Illustrator document.
Defining an Effective Workflow
Your design workflow should allow you to efficiently perform creative tasks and quickly and painlessly generate the final deliverables. The creative process often includes ongoing maintenance, error correction, and generating new or alternate versions. We want a workflow that allows us to work on the collection in a single workspace and the ability to produce potentially thousands of finished artifacts in the form of individual files.
The dilemma is that in order to build a very large icon set with a consistent look, we need to be able to see all of the icons together on the screen in order to compare and refine and to reuse design elements such as design grids, line widths, rounded corners, etc as needed. But we also want to save the individual icons files in several sizes and file types including SVG, JPG, and PNG.
Ramy is very familiar with the workflow challenges of creating large icon sets. He has made his living for several years creating large, cohesive stock icon sets such as the Native Line & Solid icons from which the samples below are taken.
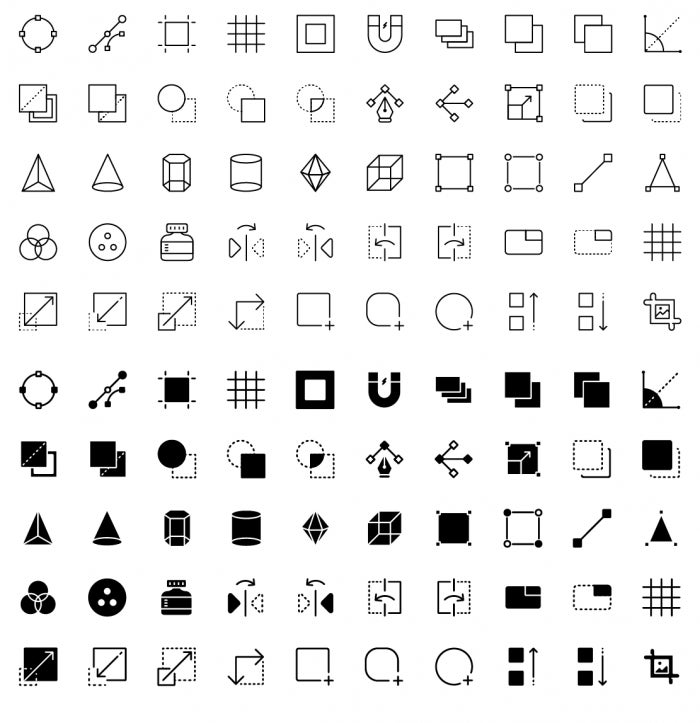
Ramy’s Native Line & Solid set contains 14,500 meticulously coordinated icons.
Ramy’s work is created in stages involving multiple people. Ramy, who acts as creative director, develops the look and feel of the set by creating pencil sketches on paper. Next, Ramy’s designers create the first draft of the icons quickly. The goal in this phase is to work out the sets in the collection, not to create pixel-perfect, finished icons. In a third phase Ramy and the designers go back through and refine the icons, cleaning up the paths, making each detail perfect, and reworking to insure consistency. The last step focuses on the finished files and involves naming the artboards, then exporting to the various sizes and formats that will comprise the final product.
Inefficiencies in the workflow have real, measurable costs. For instance, with the prior 100 artboard limit, icon sets had to be split over potentially dozens of files, which slowed down the design and production processes. Ramy’s Native Line & Solid set contains 14,500 icons. Before the update to the artboards, 141 files were required to manage the icons. Now the task can be done with only 15 files. And before Export for Screens was introduced, generating the different sizes and formats required a dedicated employee to manually create each format and each size or having a developer write a script to automate the tasks. In one instance, for another designer, Iconfinder even created a script to automate the process of exporting over 3,500 icons in two different formats at five different sizes, which resulted in over 30,000 individual files. These are not small jobs and the overhead costs can add up. Creating a set of just 1,000 icons can take months and costs thousands of dollars to create.
Ramy estimates that the combination of 1,000 artboards and Export for Screens will help him improve efficiency by several orders of magnitude. “The ability to export from Illustrator directly to the sizes and file types we need, already organized in sub-folders, will allow us to work on new products or even legacy products in a single, integrated process. Where we used to need dozens of files, with the new 1,000 artboards we can now create entire collections in only 1, 2, or 3 files. These time-saving features will allow us to get our products into the hands of customers much faster and our overhead costs will be a lot lower.”, Ramy said when he learned of the new features.
“These time-saving features will allow us to get our products into the hands of customers much faster and our overhead costs will be a lot lower”. — Ramy Wafaa
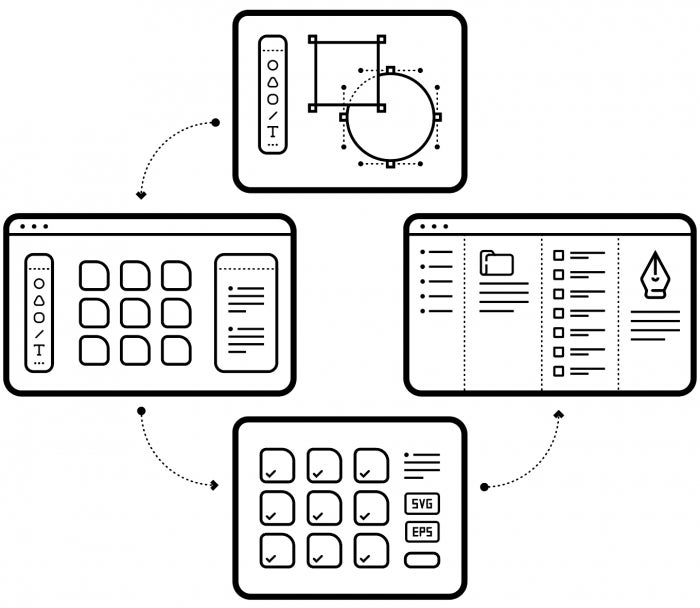
Design > Artboards > Export for Screens > Icon Files
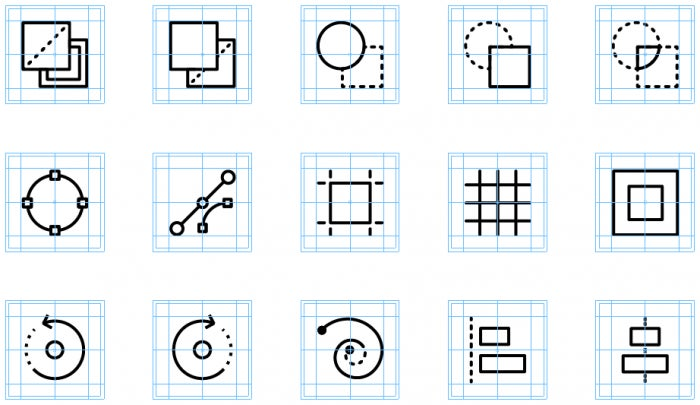
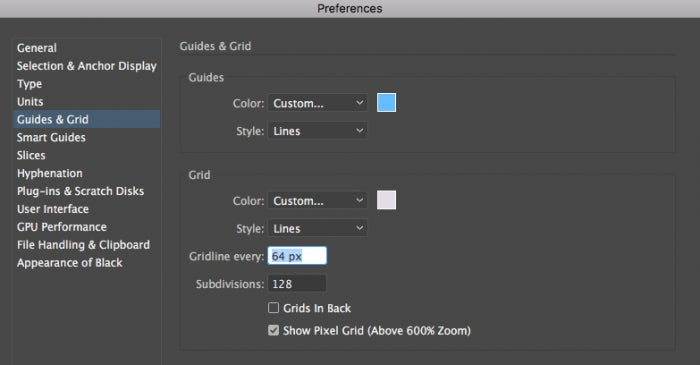
Set Up Guides & Grid
Whether or not to use a design grid is a hotly-contested issue for some icon designers. For this article we will use grids but they are not required. We will use a 128 pixel grid with thicker grid lines every 64 pixels. The exact number of grid divisions you use will depend on the target for your graphics. We like the 128px is that it is a good size to work on icons with a fair amount of details. It has the added benefit of having easy-to-remember multiples and divisors (16, 32, 64, 256, 512, 1024, etc.) for moving items around the document with Move palette.
Set up the Artboards
We prefer to set up our artboards when the document is created with the rows and columns evenly distributed. An easy way to calculate the number of rows and columns is to use a calculator to get the square root of the number of artboards and round down to the nearest whole number (i.e., the floor). So if you have 200 artboards and you want them evenly distributed over relatively equal numbers of rows and columns, sqrt(200) = 14.1421356237 or simply, 14. You will end up with 14 columns and 14 full rows and a 15th row with 4 artboards on it.
Name Your Artboards
For this workflow, naming your artboards will be an important step because it will save you a lot of time both when selecting which artboards to export if you want to export a subset, and the artboard names will end up being your file names. In another article this week where we talk about preparing icons for upload to Iconfinder, we will look at a more advanced use of artboards for file naming and automatic icon tagging when icons are uploaded to the marketplace.
No part of your workflow should be arbitrary. It is important to see the connections between the artwork, the meta data, and the process. Your artboard names will become your file names, which when named in a descending order of specificity of the subject in each icon, can help you find individual files much faster. For instance, if we are working on an icon set of user interface elements, we might name each artboard something like ui-editor-text-align-left, ui-editor-text-align-right, ui-editor-text-bold, etc. This approach has a few benefits. First it allows us to easily find related items just by the names. Second, when the files are exported, the resulting files will be automatically grouped in the file system when sorted by name.
Also, though it is beyond the scope of this article, the names of your files will also be automatically converted into tags on Iconfinder, so if you plan ahead, you can use your files names to pre-tag your icons and so save a lot of time during the upload process. We will go into much more detail on this concept in another blog post later in this series.
Export Your Artboards
Once you have set up your artboards, created your designs, and perfected them to your satisfaction, you are ready to export your finished artwork. Export for Screens and Artboards work together hand-in-hand to make this a painless process.
Set Your Export Presets
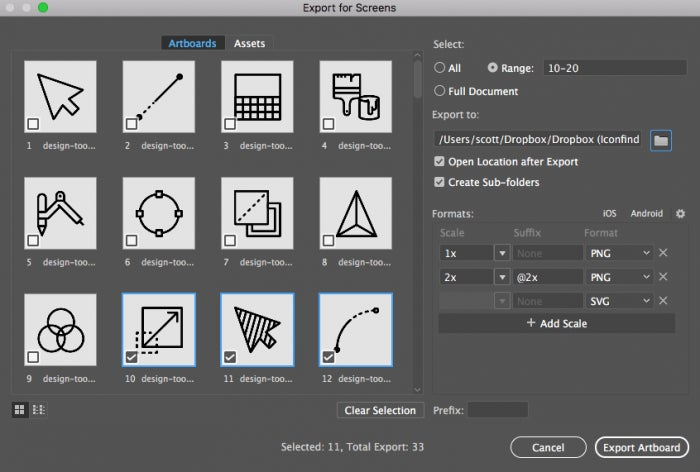
Access the Export for Screens palette by navigating to the File menu then to Export > Export for Screens. You can also type Command + Option + E to on Mac OS or Alt + Control + E on Windows to bring up the palette.
Choose The Artboards to Export
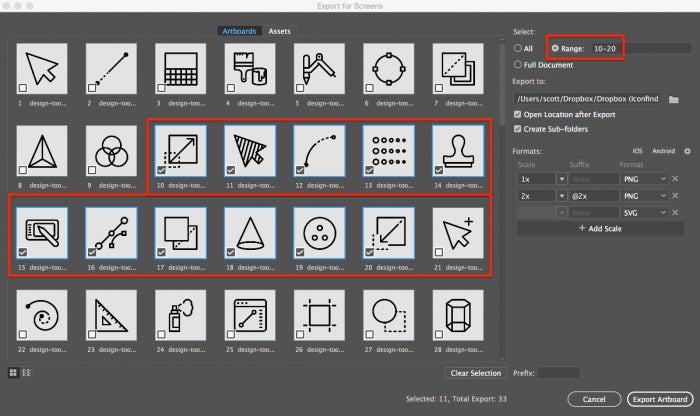
You can specify whether you want to export all artboards, a single artboard, a range or ranges of artboards, or your whole document. Note that if you select “Full Document” your entire document will be exported as a single file.
You can specify a range by entering the start and end artboard numbers in the format X – Z. Additionally you can specify multiple ranges by separating the ranges with a comma in the format A-B, D-F, X-Z.
Specify The Export Sizes and File Types
Using the buttons and selectors provided in the Formats section, you can specify any of PNG (8 or 24 bit), JPG (50 – 100 quality), SVG, and PDF file types. To specify the output size you can enter the value as a percentage or a scale in the format (1X, 1.5X, 3X or even 2.75X).
Also note that there are icon buttons for iOS and Android presets. Clicking either of these buttons will automatically configure the formats needed for iOS and Android device assets.
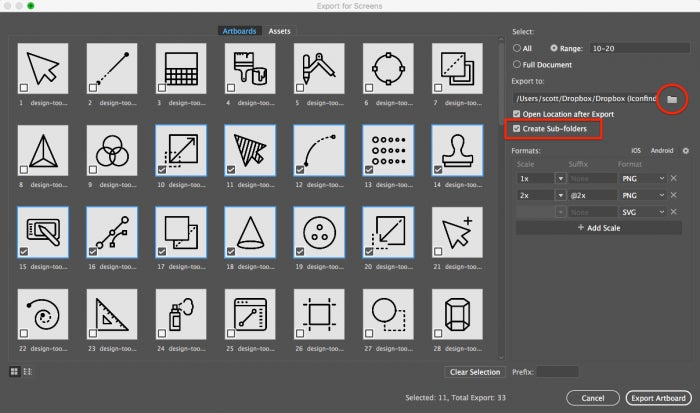
Select Your Output Folder
Using the Export To folder selector, you can indicate the location where the exported files should be saved. Be sure to create a new folder to contain your files once exported. Please be aware that at this time you cannot export different file formats to different locations, so all of the exported files will be saved to the same location.
Also, if you check the “Create Sub-folders” checkbox below the folder selector, Illustrator will arrange your exports into separate folders for each export size and format.
Perform the Exports
Once you have selected the artboards to export, selected the export location, and set the sizes and formats, you can perform the export. There really is not much more too it than that. It may take a few moments for the files to export depending on the number of artboards and the number of sizes and formats but the exports are pretty quick and certainly faster than doing it manually.
Verify Your Exports
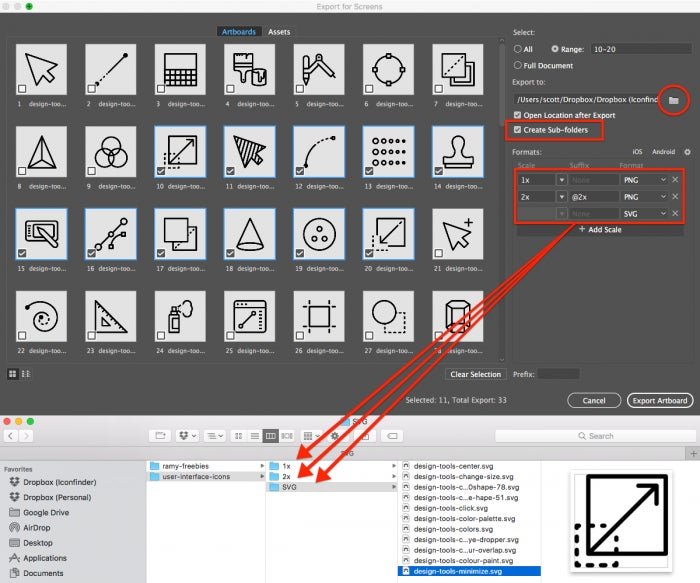
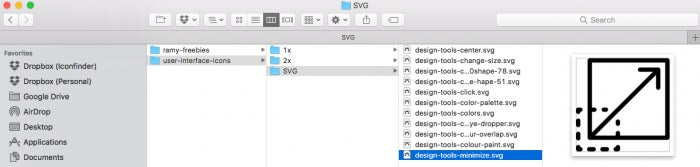
When you export your files you can check the “Open Location After Export” to have Illustrator automatically take you directly to your exported files. You can then view the individual files to verify that each artboard was exported and named according to the artboard name plus any format suffix and file prefix strings you specified.
Notice in the image below that Illustrator arranged our exports into folders corresponding to each export format and size: 1x, 2x, and SVG.
Backward Compatibility
The reader will be happy to learn that the new 1,000 artboards are completely compatible with older versions of Adobe Illustrator CC. You can open documents with more than 100 artboards in Adobe Illustrator, you just can’t create them. So your files created in Illustrator 2018 can still be opened in older versions and will keep the artboards fully intact. The only caveat is that if you delete any of the artboards, you won’t be able to add them back. The same 100 artboard limit applies when creating new artboards in older versions of Illustrator prior to Illustrator 2018.
What About my Legacy Projects?
Good question. All of these new features are well-and-good for new projects but what if you have an existing icon set of several hundred or even 1,000 icons? We have you covered. When the Export for Screens feature was first introduced, Iconfinder recognized that a great complement for a feature to get the artboards out of a document as individual files would be a tool to get individual icons into a document just as easily. So we created the Ai Merge JavaScript Extension plugin for Illustrator.
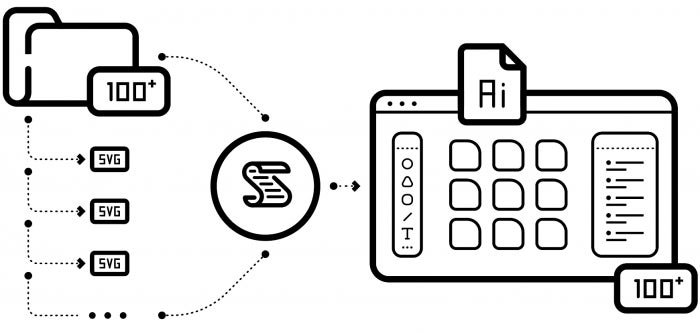
Import up to 1,000 SVGS, even from multiple folders, into a single Ai document.
We don’t want to go into too much detail about JavaScript Extension add-ons for Adobe applications but it might be helpful to know that all of Adobe’s products have built-in support for automating a lot of tasks using JavaScript Extension. It is basically JavaScript but with some additional tools built into the language to interact with Adobe’s Application Programming Interfaces and Object Model.
Learn more about scripting Adobe’s products, including Illustrator: https://helpx.adobe.com/illustrator/using/automation-scripts.html
Find more useful Scripts for Designers: https://github.com/iconfinder/scripts-for-icondesigners
View step-by-step instructions for installation and use of Ai Merge: https://youtu.be/x2x1oYRye9o
Download the Ai Merge script for Illustrator CC: https://github.com/iconfinder/ai-merge
Got something cool to share about icons? Share it with #WeekofIcons and we may retweet your work on Twitter!