April Lightroom and Adobe Camera Raw Releases: New Profiles and More
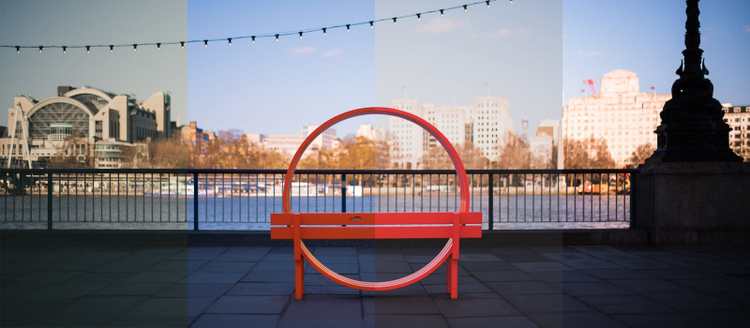
Today we’re announcing a big new feature in Lightroom Classic CC, our desktop-optimized photo app, Lightroom CC, our cloud-based photo service, and Adobe Camera Raw: a massive update to the Camera Profiles feature, now known simply as Profiles. We’ve also got even more updates in Lightroom Classic CC, Lightroom CC Desktop, Lightroom CC iOS, and Lightroom CC Android/ChromeOS.
Updated Profiles
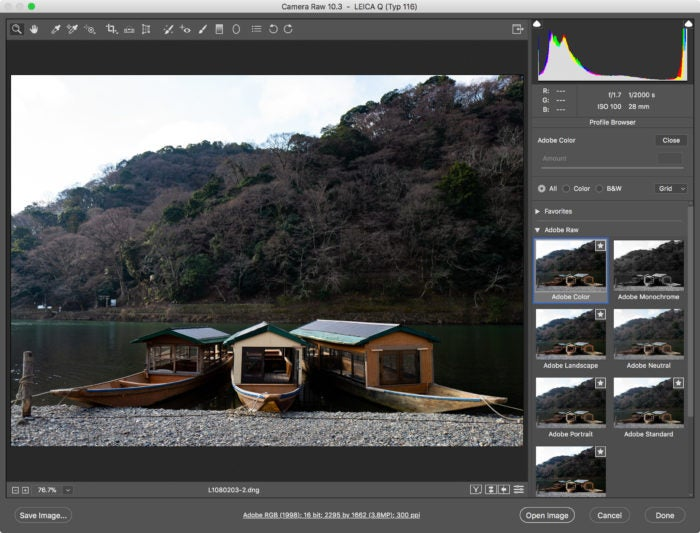
In this release, we’re making Profiles more discoverable by changing how you access them. In Lightroom Classic CC and Adobe Camera Raw, we’ve moved profiles from the Camera Calibration panel to the Basic panel and we’re now adding them into Lightroom CC (on Macintosh, Windows, iOS, Android, and ChromeOS) at the top of the edit panel.
We’ve also greatly expanded their capabilities with six brand new Adobe Raw profiles, over 40 new Creative profiles, and an all new Profile Browser that lets you quickly compare and select the best profile for your photo. Camera Matching profiles, which were previously available in Adobe Camera Raw and Lightroom Classic, are now available in Lightroom CC. Furthermore, we’ve also started working with a number of top preset creators to enable them to create their own unique profiles, some of which are available today.
What are Profiles?
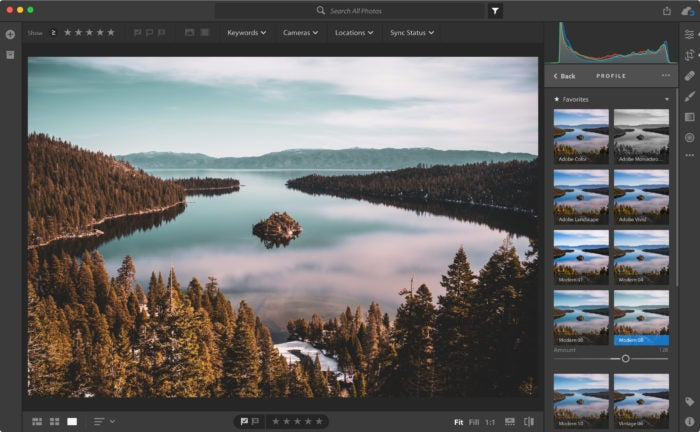
In photography and digital imaging, the term “profile” can mean many different things. There are color profiles, display profiles, printer profiles, working profiles, and so on. Within ACR and Lightroom, a profile is used to render your photograph, converting it from raw camera information into the colors and tones that we see.
For raw photographs, we build profiles for nearly every camera make and model we support (our DNG format enables camera manufacturers to build their own profiles). Our profiles incorporate deep imaging science and take into consideration the colors of the filters used on top of the sensors (the array of red, green, and blue filters that help an otherwise colorblind sensor “see” the colorful world around us), the specific sensitivity of the sensor used, the sensor’s characteristics in different lighting conditions and with different ISO values to interpret the digital 1s and 0s into images inside Adobe photography products.
For non-raw photographs (like JPEGs and TIFFs), a profile isn’t needed to render the photo, as all of the rendering was done already (either in another raw processor or within the camera itself). However, profiles can be used for creative purposes to change the look and feel of the photo.
Six brand new Adobe Raw Profiles
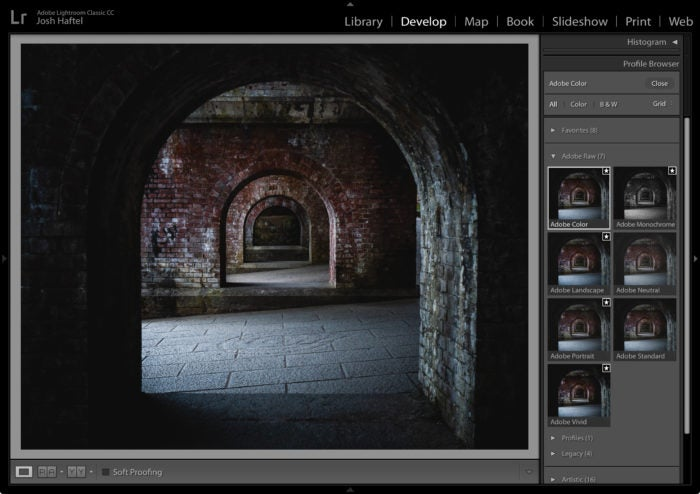
With this release, we’re adding six brand new Adobe Raw profiles, complementing the tried-and-true Adobe Standard. Adobe Raw profiles have existed for as long as Adobe has made raw rendering software (the first version being the plug-in version of Adobe Camera Raw in 2003). In ACR and Lightroom Classic, Adobe Standard was the lone Adobe Raw profile available, and within Lightroom CC (including the iOS, Android, ChromeOS, and Web versions), Adobe Standard was there and used, but you couldn’t change it. Now, we’re introducing six brand new Adobe Raw profiles, and providing access to them within ACR, Lightroom Classic, and Lightroom CC (including on the iOS, Android, and ChromeOS versions).
All of the Adobe Raw profiles, from Adobe Standard to the six new profiles, were created with the intention of providing a unified look and feel, regardless of which camera was used. This can be incredibly helpful when upgrading from one camera to another (you won’t have to spend a ton of time figuring out how make your new photos match your personal style) or if you’re using multiple cameras for the same shoot, you won’t have to worry about some photos looking totally different from the others.
Adobe Standard was designed to be a great starting point for your photos that would enable you to get the most of out them while editing, however it was also created nearly ten years ago. Over that time, we’ve learned a lot about what photographers want and have gotten great feedback on how we can make an even better starting point. From all of this feedback, a new default was born: Adobe Color.
Adobe Color was designed to greatly improve the look and rendering of warm tones, improving the transitions between certain color ranges, and slightly increasing the starting contrast of your photos. Since Adobe Color is the new default (but only for newly imported photos), it was designed to work on the widest range of photos and ensures that regardless of the subject, your photo will look great.
Adobe Monochrome has been carefully tuned to be a great starting point for any black and white photograph, resulting in better tonal separation and contrast than photos that started off in Adobe Standard and were converted into black and white.
Adobe Portrait is optimized for all skin tones, providing more control and better reproduction of skin tones. With less contrast and saturation applied to skin tones throughout the photo, you get more control and precision for critical portraiture.
Adobe Landscape, as the name implies, was designed for landscape photos, with more vibrant skies and foliage tones.
Adobe Neutral provides a starting point with a very low amount of contrast, useful for photos where you want the most control or that have very difficult tonal ranges.
Adobe Vivid provides a punchy, saturated starting point.
More accessible Camera Matching Profiles
Camera Matching Profiles were one of the most powerful raw tools found in Adobe Camera Raw and Lightroom Classic CC, but also one of the most difficult to find. Now, they’re easier to find and available for the first time in Lightroom CC. We created the Camera Matching profiles to match the different options often found in your camera, making it possible for you to match the color and tonality of your raw file with what you saw on the your camera’s LCD or the JPEG rendered by your camera, as closely as possible. The options available for any particular photograph will vary, depending on which camera the photo was captured with.
All new Creative Profiles
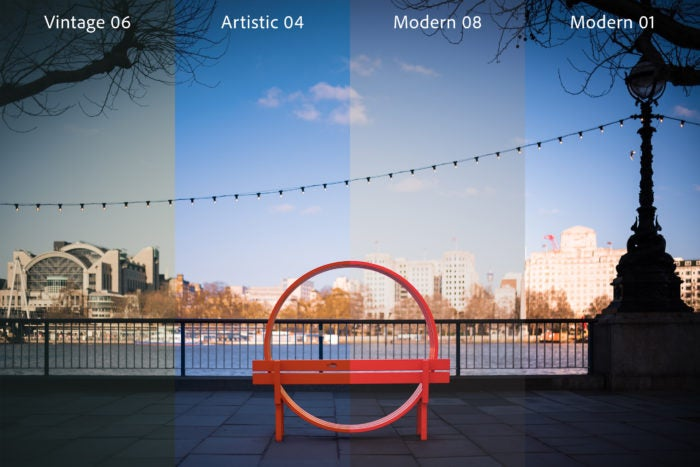
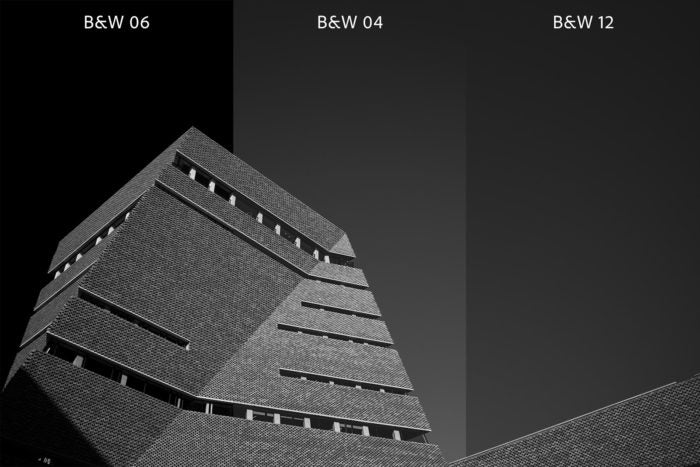
The profiles found in the four Creative profiles groups: Artistic, Black & White, Modern, and Vintage can be applied to any photo, both raw and non-raw. The Creative profiles were designed to create a look and feel in your photos and provide even more control thanks to the inclusion of a 3D Lookup Table (LUT) that can be included within a profile. LUTs have often been used by Photoshop and video professionals to add a color grading effect to the photo, with more options and precision than were previously possible in Lightroom. Creative Profiles also provide a new Amount slider, enabling you to increase or decrease the effect, tuning it to your taste.
How to use Profiles
The Power of Profiles in Adobe Camera Raw
The Power of Profiles in Lightroom CC
The Power of Profiles in Lightroom Classic
3rd Party Profiles
We’ve worked with a large number of 3rd party preset makers to help them create profiles, and a number of them have made sets available already. If you’re interested in exploring ways of expanding the range of Creative profile options, be sure to check out one of the companies below.
Lightroom Classic CC Updates
In addition to the new profiles, the incredibly powerful Dehaze control is now more accessible within the Basic Panel, the tone curve panel size has expanded for more precise adjustments, and we’ve optimized our face-tagging algorithms for more accurate detection of faces. For even more details and an overview of bug fixes, read the New Features Summary for Lightroom Classic.
Lightroom CC Desktop Updates
Beyond the profiles improvements, Lightroom CC for Macintosh and Windows has added support for network attached storage (NAS) devices as well as a new filter option, enabling you to filter by sync status. For even more details and an overview of bug fixes, read the New Features Summary for Lightroom CC.
Lightroom CC iOS Updates
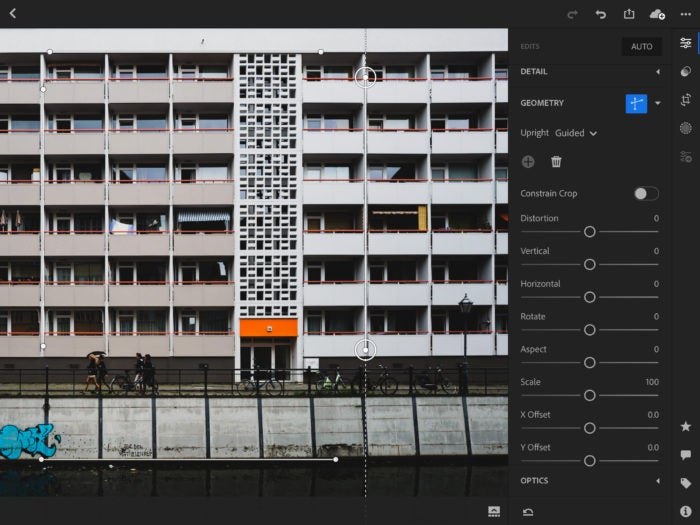
Lightroom CC for iOS gets a number of updates in addition to the new profiles feature, including:
- Geometry tab including Upright, Guided Upright & Geometry sliders making it possible to straighten skewed horizontal and vertical lines (premium feature)
- Grain options to introduce realistic film grain
- Left-handed editing mode for iPad
- Enhanced control over Lightroom CC Web shares providing the ability to enable downloads, showing metadata, and location information on shares made to lightroom.adobe.com
- Support for latest cameras and lenses found in the Adobe Camera Raw 10.3 release (the full list of cameras and lenses supported by Lightroom can be found at http://www.adobe.com/go/supported_cameras)
- iPhone X layout optimizations
Lightroom CC Android & ChromeOS Updates
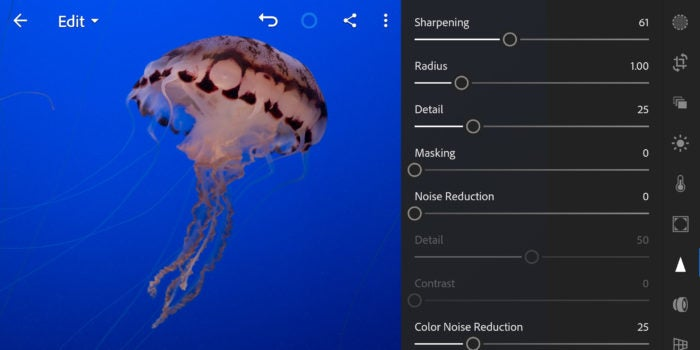
- Details tab providing sharpening and noise reduction options to adjust photographic detail
- Grain options to introduce realistic film grain
- Enhanced control over Lightroom CC Web shares, providing the ability to enable downloads, showing metadata, and location information on shares made to lightroom.adobe.com
- Support for latest cameras and lenses found in the Adobe Camera Raw 10.3 release (the full list of cameras and lenses supported by Lightroom can be found at http://www.adobe.com/go/supported_cameras)
Give us feedback!
Once you’ve updated, don’t forget to leave us feedback about your experiences. The quality of the Lightroom ecosystem wouldn’t be what it is today without our passionate and loyal customers around the world. Giving us regular feedback helps us to find and fix issues that we may otherwise not know about. We are listening.
Here are a few ways that you can provide feedback: