Newbies’ Guide to Comic Art

If a picture is worth 1,000 words, then comics must be worth a lot. And they are. No matter what you think of when you hear “comics,” you’re undoubtedly familiar with the medium. Sequential art brings together the visual impact of watching a movie with the quiet intimacy of reading a book.
Since you’re here, I’m going to guess you’re already a fan of comics. Maybe you love the chuckle of a quick gag or, perhaps, an alternative graphic novel touched your soul. Whatever your inspiration was, there’s an idea bouncing around in your brain and you’re ready to capture it with panels and speech bubbles.
While there isn’t one right way to make comics, most professionals tend to gravitate towards a basic order of steps. What are those steps, you ask? OK, calm down. Here they are.
Refine the idea
What kind of comic are you going to create? A four-panel funny? A single issue? An endless, intricate library of stories that somehow connect to form a universe transcending our own reality?

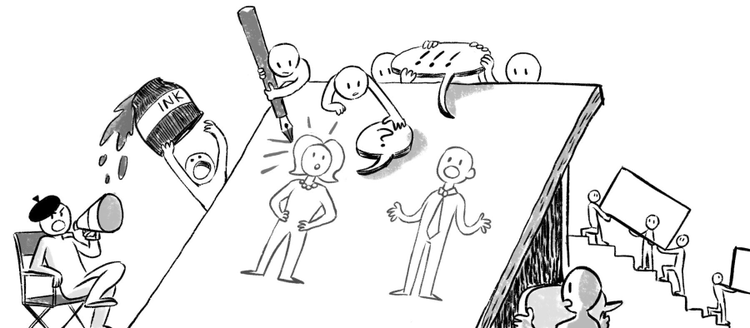
The comic artist in their natural habitat.
Regardless of what your goal is, it’s important to think about your comic as a complete product.
Considering the final format will help with preliminary decisions like page size and layout.
During this stage, a lot of creators find it useful to write a script for their story, or partner with a writer. Getting a high-level view of your concept before you dig into the art will save you bumps down the road.
Thumbnail it
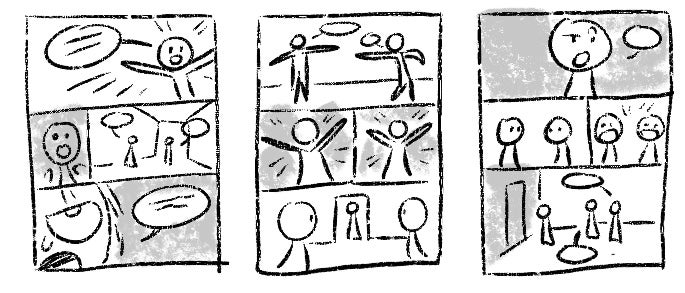
Script, done. Now it’s time for final, beautiful art, right? Wrong. Sit down. We still need to do our thumbnails. Thumbnails are quick sketches to plan your comic pages in advance. They’re a super helpful way to visualize your story without the commitment of fleshed-out drawings. Don’t try to make them the size of actual thumbnails, that’s ridic. But do keep them loose, simple, and to the point. You’ll have time for gorgeous illustrations later.

I usually create my thumbnails on a tablet, but sticky notes, loose leaf, and sketchbooks are great options too.
Laying it out
Now that we’re familiar with thumbnails, let’s focus on layout. When people talk about layout and comics, they’re referring to the arrangement of panels on a page. If you pick up your favorite comic book, you’ll likely notice that each page has a unique composition of panels. Take a moment to try and understand why the artist chose those particular shapes and sizes.
Does the scene have an thrilling climax that’s emphasized with a huge panel? Or maybe it’s a slow scene, and smaller panels filled with character interaction are more appropriate.

Since the castle is big and special, let’s give it a big and special panel.
If choosing layouts doesn’t come easily to you, don’t fret. Like everything else, practice makes perfect. Layouts are one of many aspects that separate comic making from illustration. Once you get a handle on it, a whole new, exciting world will open up.
The set up
We’ve knocked out the script, we’ve thumbed through our thumbnails, now we’re in the thick of it. It’s time to get our page set up. If you’re an old-school art maker, this step will likely involve rulers, pencils, and erasers. Personally, I’m all about digital, so let’s take a look at my own process.
First, open Photoshop and create layers called “Sketch,” “Panels,” “Text,” and “Final Art.”
- On the Sketch layer, I create a more detailed sketch of my thumbnail from earlier. I use a rounded brush, then lower the opacity to ink over it on the “Final Art” layer.

The floating, blue hands will show you the way.
- I prefer to create panels before text and final art so I know the boundaries I have to operate within. I like the personalized feel, so I usually hand-draw panels myself. If that sounds less than appealing to you, there’s a rectangle tool to quickly and easily create panels with the click of a button.

It doesn’t have to be a pain in the rear, I just choose for it to be.
- Time for text. Again, since I like the hand-drawn look, I usually write out the dialogue myself. This can be time consuming but luckily, the type tool can help speed up the process. If you still want a personal touch without the hassle, check out handwritten style fonts.
There are great tools for speech bubbles, too. Choose “Custom Shape Tool” and in settings, click “talk bubbles” for an assortment of premade shapes. Boom! You kids have it so easy.

Look at those sweet talk bubbles.
Final art
The moment we’ve been waiting for — it’s finally time to flex your skills as a talented artist and bring your story to life. I like to keep it simple and use one, rounded brush, but there are plenty of inking brushes to choose from. If you’re someone who already loves to draw, you probably have a specific style you’ve developed. That said, I encourage you to experiment around and try out a few different looks. Consider what would best fit the mood of your story and how sustainable your chosen style is.

Full color? Greyscale? Cubism?
Most importantly, have fun. This part is the most challenging, but also the most rewarding. If you enjoy watching your idea come to life, your readers will too.
Congratulations
You’ve graduated from comic blog post college. Now you can show your creation to the entire world! Or your mom.
If you’re hungry for a more detailed guide for creating comics, check out the comic bible “Understanding Comics: The Invisible Art” by Scott McCloud.