Create a Zoomable eCommerce Photo with XD and Adobe Stock

Image source: Adobe Stock / demidoff.
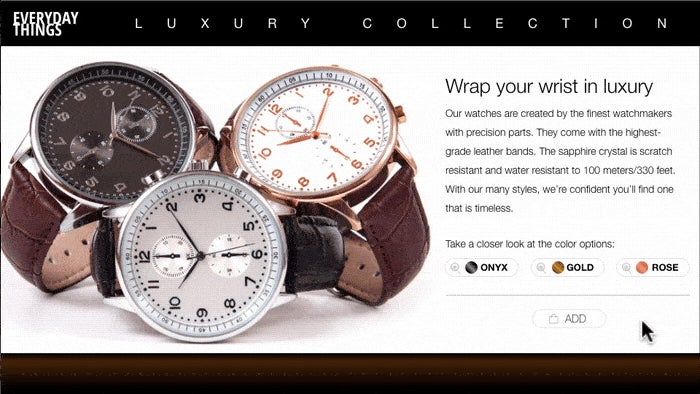
Combining high-resolution photography with the Auto-Animate feature of Adobe XD allows you to design more engaging experiences for your website. Use a high-quality product photo and an industry-leading prototyping tool to share your vision with clients and colleagues.
Search for a product shot on Adobe Stock
In order to demonstrate this design idea for our client, we’ll need a photo with enough resolution so we can “zoom” in on the image and maintain the image’s full quality within our design.
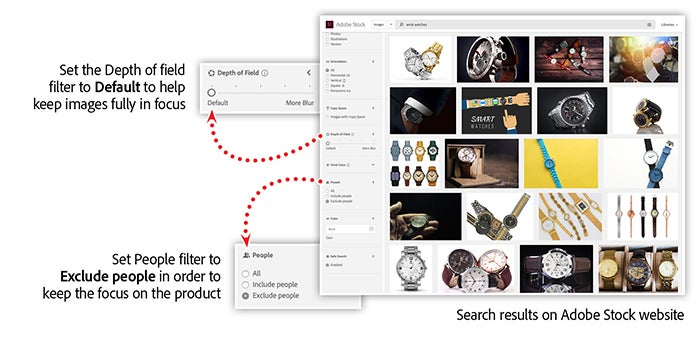
We’ll start in Adobe Stock by searching for the keywords “wrist watches.” After the initial set of results, click the view filters button in order to add additional search criteria. Adobe Sensei, which powers Adobe Stock’s search intelligence, will refine the search based on the new criteria. In the example above, I’ve lowered the depth of field setting order to keep as much of the image in focus as possible. Also, I have set the people filter to exclude people, which will help retrieve images that focus mainly on the product.
Once you find the perfect image, add it to your Creative Cloud Library and then launch Adobe XD in order to put the photo to work.
Creating an animated prototype link
The Auto-Animate action in XD create animations between elements that are shared across artboards. This feature works with text, art, and shapes drawn in XD, images, and symbols. To set up the artboards for the animation, we’ll import the same Adobe Stock image into two different artboards.
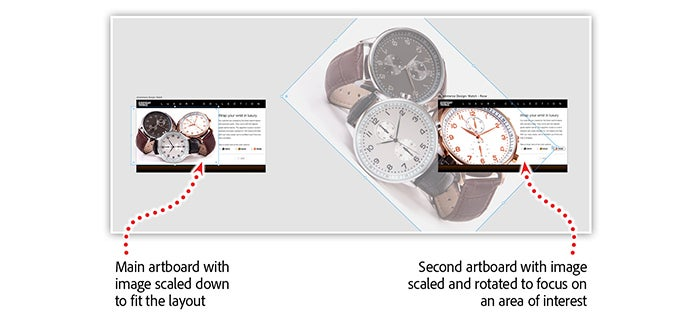
On the first artboard, we’ll scale the image down to fit into the layout. On the second artboard, we’ll scale the image up and rotate it in order to focus on a portion of the image. This view will give the users a detailed view of the product they would be interested in.

To create the animation, switch to the prototype workspace and select a button on the main artboard. Click and drag the blue arrow on the selected button and drag it to the second artboard. This will result in a link between the artboards when you preview the prototype. In the link options dialog box, select Auto-Animate under the action dropdown menu, then set the duration to two seconds (2s).
Then test your link by clicking the preview button in the upper-right side of the XD window, then clicking on your link.
Quick and easy licensing
When you are happy with animation and interactivity, the final step is to license the image. The full-resolution image will contain enough detail to make the zoom effect look amazing.
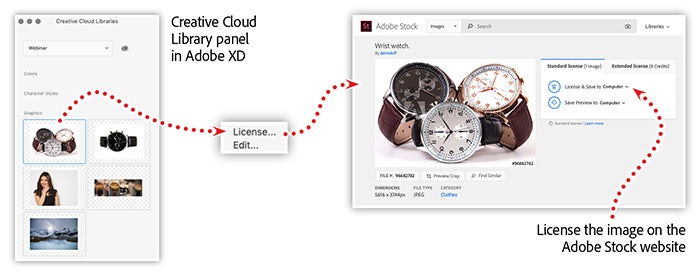
To license the image, right-click on the image in the Creative Cloud Library within XD and choose “license.”
Get started today with Adobe XD
Learn more layout and prototyping techniques in this e-learning webinar recording
XD allows you to prototype advanced interactive experiences with ease. Fixed elements, varied-sized art boards, overlays, and a built-in cloud service provide you with the tools you need to create, experience, and share your vision with anyone around the world.
Join us online and get a first-hand look at some advanced techniques that will help you bring your interactive visions to life.
In the Advanced Prototyping Techniques with Adobe XD webinar you’ll learn to:
- Go beyond the basics with the Repeat Grid.
- Control your navigation with a Google spreadsheet.
- Nest symbols to control layouts across artboards.
- Use Auto-Animate to create engaging prototypes.
- Create voice-driven prototypes.