How to create the perfect Instagram feed
Did you grow up getting taught to “never judge a book by its cover”? Well, throw that hypothetical book out the window. In the Instagram world, when someone new is viewing your profile for the first time, you have less than a second to grab their attention. That’s why it’s incredibly important to have a beautiful Instagram profile that will stop someone in their tracks.
An aesthetically pleasing and curated feed is key to showcasing your unique style online. Not only will a strong visual theme help you gain new followers, but it will also help build a powerful connection and community with your existing audience.
Throughout six years of content creation and sharing my images on social media, I’ve learnt some simple tricks that you can put into place to create the perfect Instagram feed. And you don’t need to be a professional either: if you’ve got a mobile phone and the Adobe Lightroom app, you’re ready to create magic!
When deciding on your visual theme for your Instagram, there are a few questions you have to ask yourself. What mood do you want to get across online? What colours are you most drawn to? What subject matter are you photographing? While it may seem overwhelming to define your personal style, I’ve got some easy tips that can help you develop it.
My top tips for creating a perfect feed all have an overarching theme of consistency. Consistency is crucial when creating a feed that flows perfectly together. Consistency doesn’t have to be boring either and there are many ways you can go about creating it.
Define your colour palette
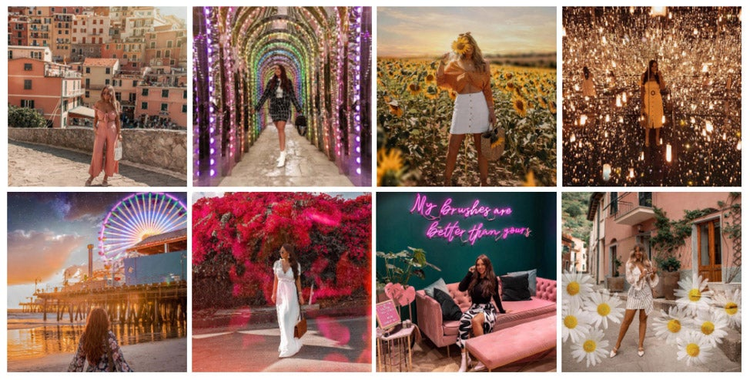
When taking your photos, try to choose a colour palette that reflects your personality and style. You can do this by using props and styling items of the same colour. If you’re a fashion blogger, you can accessorise with a feature colour (for example you can always complete your outfit with a red hat, handbag or shoe) or you can stick to neutral coloured outfits of ivory, beige and gray. If you photograph food, using the same coloured plates and cutlery will help create consistency even when the food you are capturing will vary in colour. When I’m snapping interior shots of my flat, I’m always styling with both pink/rust homewares and leafy greens with the aim of creating a colour theme.

Utilise your Location
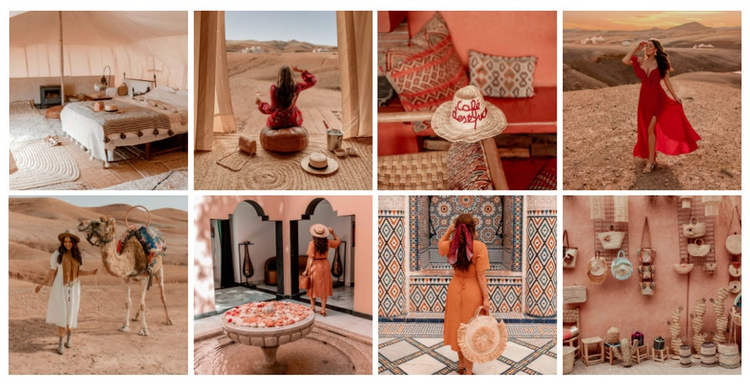
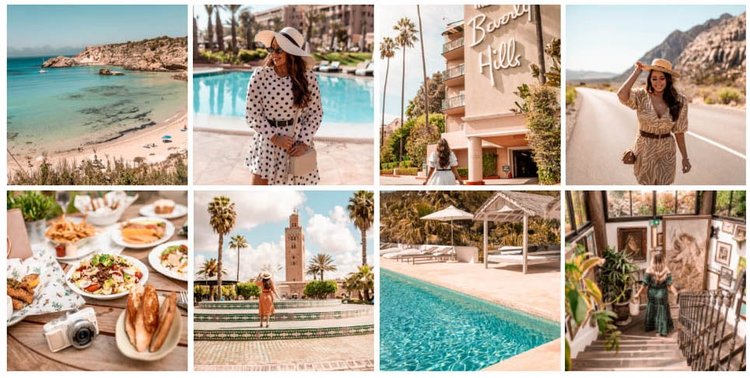
If you don’t use objects in your photos then another way to create a theme is with your location. A good place to start is your current city. Unless you’re a globetrotter, chances are you’re taking the bulk of your photos within a 10-mile radius of your home. You can make the most of your environment by drawing from your surroundings. For example, if you live in London, use the gloomy weather to your advantage by creating a dark and romantic theme. If you live in LA (lucky you!), then think bright peach sunsets and pinks from the bougainvilleas. As a travel blogger, my feed often changes locations but by posting these images in groups I can still keep a coherent style. Ibiza theme
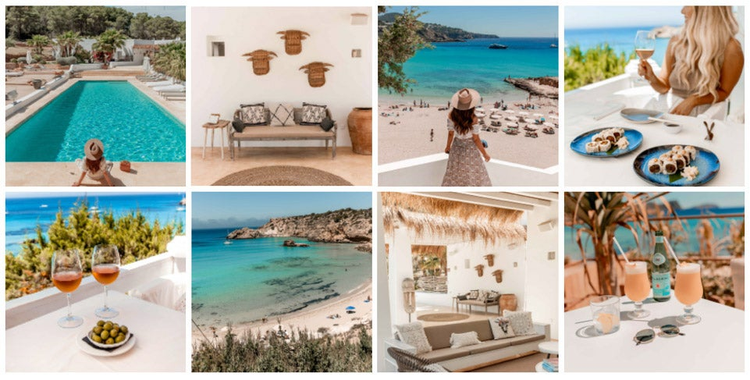
Morocco theme
Play with Negative Space
Are you a ‘less is more’ person or do you revel in abundance? Playing with negative space, or lack of, is a simple way to create an Instagram theme and I’ve personally dabbled in both ends of the spectrum. When I first started blogging, my feed was meticulously minimal. I used a lot of negative space and always photographed objects against a white backdrop. Nowadays as I focus more on travel, my photos are filled to the brim with colour and interest. Busy doesn’t necessarily mean better, but it can definitely result in a more dynamic photo. While minimal feeds allow the viewer to focus on one specific object and message. By creating photos with a similar amount of negative space you can already develop a visual theme before you start editing.
Minimal feed
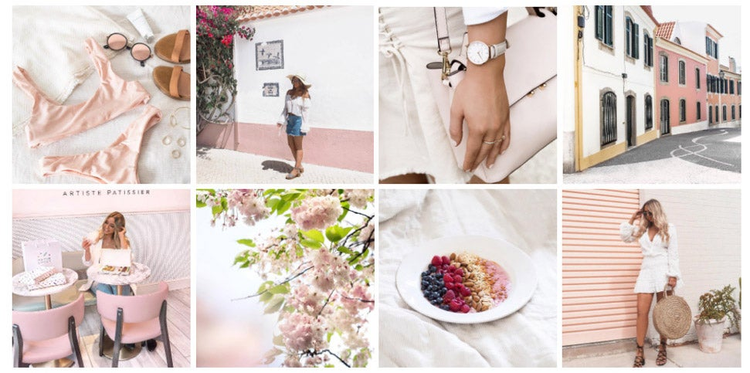
Busy feed
Edit Light & Colour
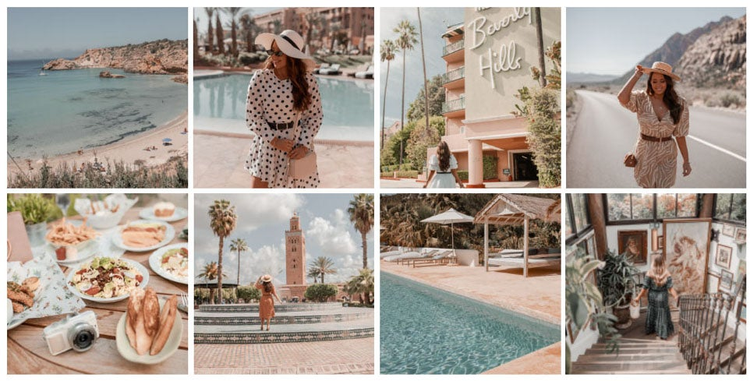
Editing can drastically change the look of an image. Take the below images as an example: two feeds with the exact same photos but two entirely different looks. The difference? It’s all to do with the edit. I always edit my photos in Adobe Lightroom as it’s the final and most important step in making my images feed-ready. My two favourite tools I recommend using to create your signature edit is Light & Colour.
The Light panel is where you can make your images bright and airy using Exposure. Otherwise, drag both the Blacks & Shadows sliders to the left for a dark and moody feel. You can take down the Highlights and the Whites to make the lighting more even and flat or slide these to the right to increase the contrast of an image.
With Colour, I recommend starting with the Temperature & Tint to either add warmth to your images or alternatively make them cool. My recognisable edit is to always add gold & pink tones to my image, I do this by moving both sliders slightly to the right.
Then the Colour Mix is hands down my favourite tool as that’s where I have the most control over the colours in my images. Here you can flick through the different colour channels. For example, I can make any reds more pronounced and saturated, I can easily change blue skies to appear in an aqua hue or completely desaturate any greens.
Edit style 1: High Contrast, Warm Toned & Saturated
Edit style 2: Low Contrast, Cool Toned & Desaturated
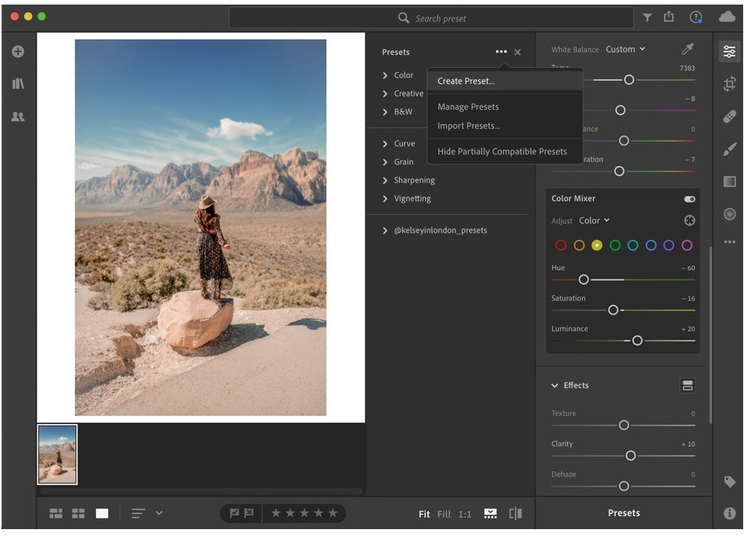
Create a Preset
My last tip for creating a perfect Instagram feed is to create a preset. Creating a preset in Lightroom is so easy to do and will save you so much time on editing which means more time doing the things you love. So what exactly is a preset? Presets are essentially just like Instagram filters (but a million times better, because honestly who even uses Valencia these days!). You can apply presets to your photos to make them look fabulous – in just 1 click!
Once you have defined your editing style using my guide above all you have to do is click the ‘…’ button in the ‘Presets’ panel and hit ‘Create Preset’. From there, give your preset a name and then you’re done. You can access your newly created preset from the ‘Presets’ panel when you open a new photo to edit.
I recommend creating a few presets so you have different options to apply when you’re editing on the go. I’ll usually create a preset for each location I travel to and name them accordingly ‘Paris’ ‘Italy’ ‘Morocco’ etc. Or I’ll create different presets for different looks ie ‘Moody’ ‘Vintage’ and ‘Pastel’.
With all my feed-curation tips in mind, it’s important to remember to enjoy the process and have fun experimenting. Don’t just take photos of things you think will receive the most amount of likes on social media, create images that move your soul and that will inspire others. There is no right or wrong way when it comes to content creation, however, I hope my tips help you develop and define your style with the aim of creating a drop-dead-gorgeous feed.
Kelsey has created a preset for Adobe Lightroom that will be available for free here.