Add Remarkable Lighting to a Photo with Photoshop and After Effects

Image by Codify Design Studio.
Learn to use the Light Burst effect in Adobe After Effects to dramatically enhance a photograph.
Create the “light” areas with Photoshop Quick Select
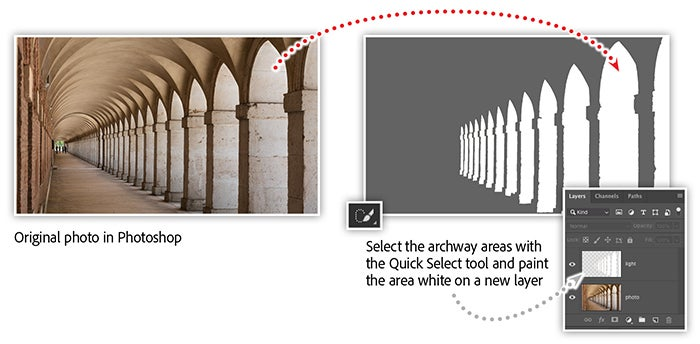
Open the original image in Photoshop and use the Quick Select tool to select the archway areas of the photograph. With the selection still active, create a new layer and fill the selection with white and name the layer “light.” The shape of the archways doesn’t need to be perfect. It will serve as the light source back in After Effects (as Figure 1 illustrates).
Save the layered image as a Photoshop file and start a new project in After Effects. Import the Photoshop file into After Effects using composition as the option for “Import Kind.” This will create a composition in After Effects and set up each layer from the Photoshop file as a layer in the timeline panel.
Applying the Light Burst effect
Open the Effects & Presets panel in After Effects and search for the Light Burst effect. Apply the effect to the light layer in the timeline panel, then open the Effect Controls panel to begin to make adjustments (Figure 2).

Adjust the ray length of the Light Ray effect to 30, then check the option to set color and choose a medium tan color to match the light color of the original photo. Finally, move the center of the effect off the right side of the composition in order to make the light burst into the image — matching the light direction of the original photo.
Using Adjustment Layers to make color corrections
Add an adjustment layer to the composition by selecting that option from the Layer menu. Once added, apply both the Hue/Saturation and Levels effects to the adjustment layer (as shown in Figure 3).
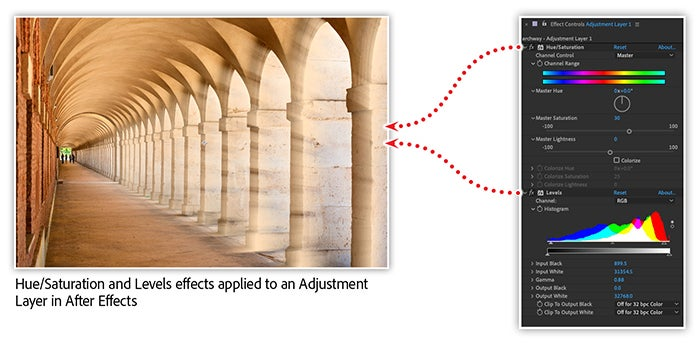
Set the master saturation of the Hue/Saturation effect to about 30. In the Levels effect settings, increase the input black value to about 800 and lower the gamma to about 0.88.
Learn even more techniques for enhancing photographs with After Effects
Looking to add a little “something extra” to a stock photo? Or reimagine a less-than-stellar photo? Join us for a completely new way to augment and stylize your photography.
Watch the recording of After Effects for Photography, which includes:
- Explore unique coloring techniques
- Add lighting effects
- Simulate natural phenomenon
- Create custom textures and patterns
Adobe Creative Cloud e-learning series
After Effects for Photography