Visualize Poster Designs in the Real World with Adobe Stock and Photoshop
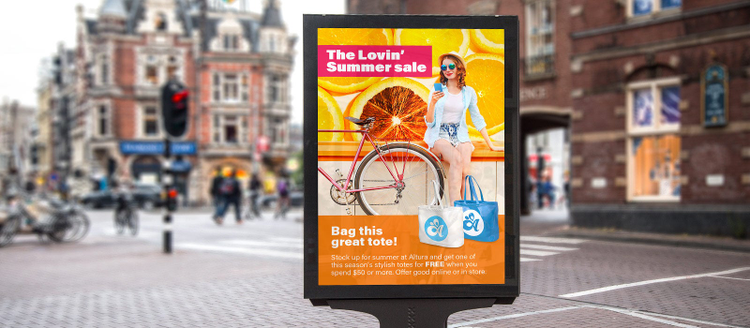
Image source: Adobe Stock / Graphic Burger.
Showcase your designs in real-life environments to get a better sense of how they’ll look out in the world. Give these techniques a try to see what’s possible when you combine Adobe Stock images and templates in Adobe Photoshop.
Step 1. Download assets from Adobe Stock
If you’d like to follow along with this tutorial, download the following sample poster and free Adobe Stock template. You can also watch this tutorial as part of the Enhance Your Portfolio with Unique Projects and Adobe Stock webinar.
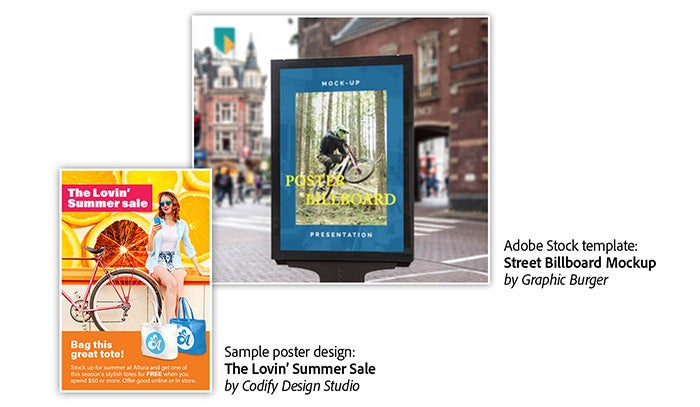
Right image: Sample poster — by Codify Design Studio, left image: Street Billboard Mockup — by Graphic Burger.
Step 2. Open the template
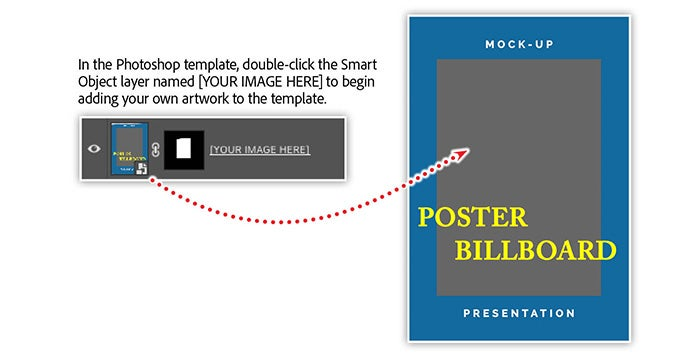
Open the Photoshop template, locate the layer [YOUR IMAGE HERE], and double-click to open the Smart Object.
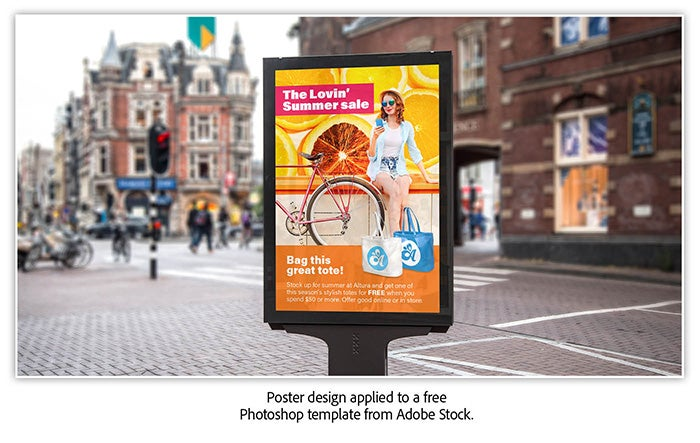
Step 3. Place the poster image into the Smart Object

Choose Place Linked from the File menu and locate the poster image. Position the poster layer at the top and hide the Placeholder Layer Group. Scale and position the poster Smart Object to fit the canvas, and then save and close the Smart Object file.
Step 4. Add an adjustment layer
Select the Reflection layer, and then select the Adjustment icon and choose brightness/contrast. The adjustment layer will be above the Reflection layer. Set the brightness to 0 and the contrast to -10.
Learn more about enhancing the projects in your portfolio
Ever wanted to try your hand at animation, see your poster design in a real-world setting, or create a double exposure? Join our webinar, Enhance Your Portfolio with Unique Projects and Adobe Stock. You’ll discover how to combine Adobe Stock assets with your existing projects to create never-before-seen images and animations that are sure to impress clients and employers.
You’ll learn how to:
- Use environmental templates to visualize your work in real-world scenes
- Add motion to your photographs with Adobe Stock videos
- Combine Adobe Stock images with your own photos for one-of-a-kind compositions
Adobe Creative Cloud e-learning series: Enhance Your Portfolio with Unique Projects and Adobe Stock
