Put your Data in Motion with Adobe Stock and Premiere Pro
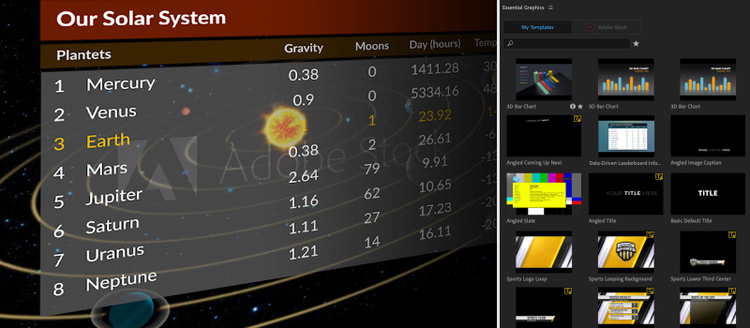
Image source: Adobe Stock / Flux VFX / Noel Powell.
Make your data come to life to tell a more persuasive story. Follow the steps below to add design and motion using Adobe Stock and Adobe Premiere Pro.
Step 1. Download assets from Adobe Stock
If you’d like to follow along with this tutorial, download the following sample data file, free Adobe Stock Motion Graphics template, and preview (watermarked) animation from Adobe Stock. You can also watch this tutorial as part of the Showcase Your Data with Adobe Stock Motion Graphics Templates webinar.
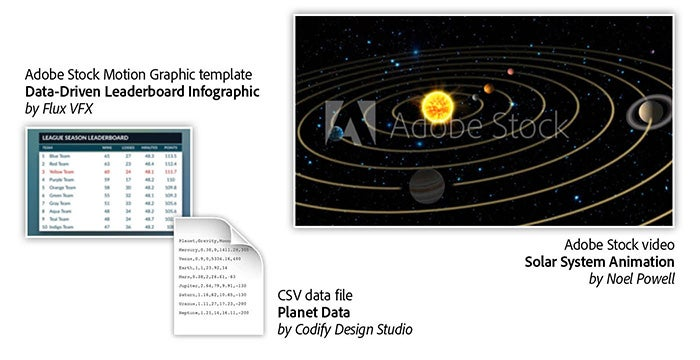
Left infographic: Planet Data CSV — By Codify Design Studio, center data file: Data-Driven Leaderboard Infographic — By Flux VFX, right video: Solar System Animation — By Noel Powell.
Step 2. Install the template
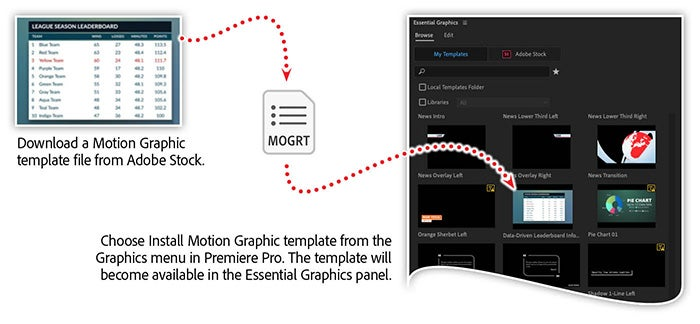
Open Premiere Pro and choose Install Motion Graphic Template from the Graphics menu.
Step 3. Drag the template into your Timeline
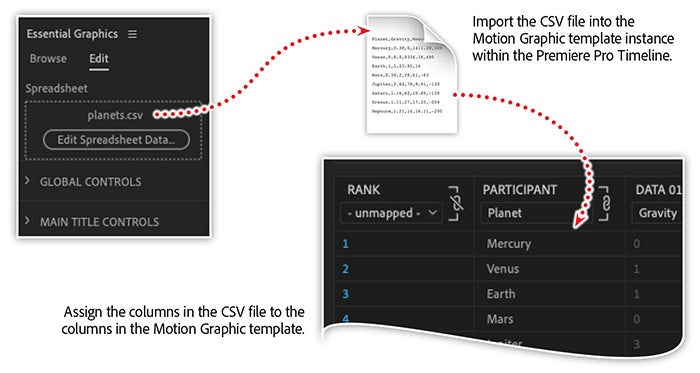
Locate the Motion Graphic template in the Essential Graphics panel and drag it into the Timeline panel. Then select the template layer, switch from the Essential Graphics panel to the Edit pane, locate the planets.csv file, and drag it into the Spreadsheet area. Name the columns Planet, Gravity, Moons, Day, and Temperature.
Step 4. Customize labels and colors
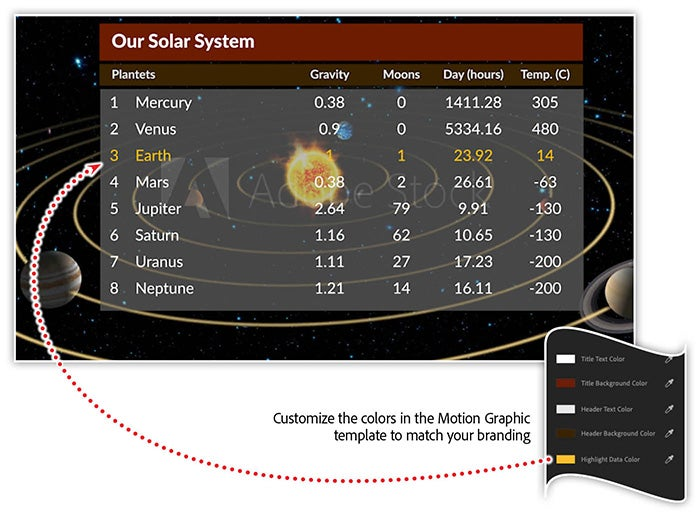
With the template layer selected in the Timeline panel, change the title in the Main Title Controls. Change the text in the Header Controls to match the CSV columns. Finally, lower the opacity for the background and the chart background properties in Background Controls.
Learn more about visualizing your data with Adobe Stock
It’s never been easier to enhance your creative projects with animation. Join our free webinar, Showcase Your Data with Adobe Stock Motion Graphics Templates, to discover how to make the most of Motion Graphics templates in both Premiere Rush and Premiere Pro.
The webinar also includes a 15-minute hands-on workshop to help you get started with Motion Graphics templates in Premiere Pro. You’ll need a video to complete the project, so you can use one of your own or download a preview video from Adobe Stock.
You’ll learn how to:
- Quickly add motion to your Premiere Rush and Premiere Pro projects
- Customize fonts and colors to match your branding or message
- Create compelling data visualizations by adding data to animated charts
- Reposition elements without disrupting your animation
Adobe Creative Cloud e-learning series: Showcase Your Data with Adobe Stock Motion Graphics Templates
