Hands-on Tutorial Creation Tool for Adobe Animate
We released a couple of hands-on tutorials with our MAX 2019 release and received rave reviews from animators, teachers, students, amateurs, and others.
Teachers and instructors wanted to use it for teaching concepts to their class, animators wanted to use it to share their unique workflows, extension developers wanted to show how their extensions work, and so on. In all cases, they wanted to create their own hands-on tutorials.

Figure 1: Tutorials released with Adobe Animate 2019.
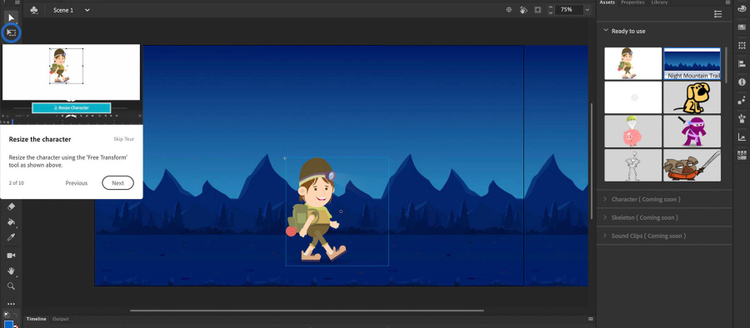
Owing to this popular demand, we are opening up our hands-on tutorial infrastructure for you to be able to create your own tutorials using our “Hands-on Tutorial Creator” extension available in the Windows menu. This will help you create tutorial cards as below:

Figure 2: Snapshot of a tutorial card.
The tool can be found here.

Figure 3: Location of the Tutorial Creator.
Let’s see how it works.
Tool Overview
You can start with a new tutorial or edit an existing tutorial.

Figure 4: Tutorial Start Screen.
There are essentially three things you need to add or edit:
- Tutorial level settings
- Card level settings
- Assets that go in the Asset panel
Tutorial level settings
The settings include the name of the tutorial, starter .fla, a preference file and optionally a pre- or post-script created with JSFL.

Figure 5: Tutorial Level Settings.
Please note that the Tutorial ID is auto-generated and can be use to link articles. More on that later in this article. You can also add an optional introduction video (MP4 or SWF) and a preview image/swf using the Additional options at the bottom of the screen.

Figure 6:Additional Settings.
Pressing next takes us to the card list where you can manage individual cards, add/delete them, reorder them, or preview them.

Figure 7: Card Sorting Screen.
The ‘Preview’ button above is very useful as it allows you to preview your cards in real time.
Card level settings
This is where you create and edit individual cards:

Figure 8: Card Level Settings.
Generating Anchor Node ID is fairly simple. First click on ‘Choose’ and then click on any tool in the Animate UI. It will automatically generate the Anchor Node ID for you. Additionally, you can open another tutorial or a link using the additional options. For additional tutorial, you will need to provide the Tutorial ID for the tutorial you want to link to. Similarly for link, you will need to provide the web link.

Figure 9: Card Additional Options.
Additional assets for the Assets panel
You can add additional assets that can go in the Assets panel. The Assets panel is a new panel that provides the opportunity to incorporate reusable assets either shipped with the product or generated by you.

Figure 10: Adding Additional Assets.
The tutorial once created will currently have a ‘zip’ file extension. Once saved it can be shared with others.
Importing a tutorial
A tutorial once created can be imported through the help menu as shown below. It will instantly be available in the menu. We are working on making these available in a dedicated panel.

Figure 11: Importing A tutorial.
Using a tutorial
Once imported, the tutorial will be available in the same menu:

Figure 12: Launching a Tutorial.
Conclusion
We are very excited to share this tool with you, and we hope you will leverage it to create some wonderful tutorials.
I am always interested in hearing more about your explorations. Please share your tutorials with me. As a team, we will certainly consider making your tutorials part of the product if they can benefit the larger animation community. You can always reach me at ajshukla@adobe.com.
