Inspiration is everywhere and has no boundaries — one may find it in nature, while others might be inspired by music, streets or even everyday objects. Designers too have an urge to transform digital images of actual physical objects to inspire their imagination directly on their desktop.
To transform inspiration into creativity, InDesign now features Adobe Capture that enables you to capture any image you like and generate creative elements like color themes, vector shapes, and type for your projects. It can be saved in the to be incorporated into your InDesign project and allows instant access in all of your favorite Adobe apps.
Get started with Adobe Capture extension
The extension can be accessed from three different entry points within InDesign, allowing to contextually extract color themes, shapes, or type, and save them to your Creative Cloud library.
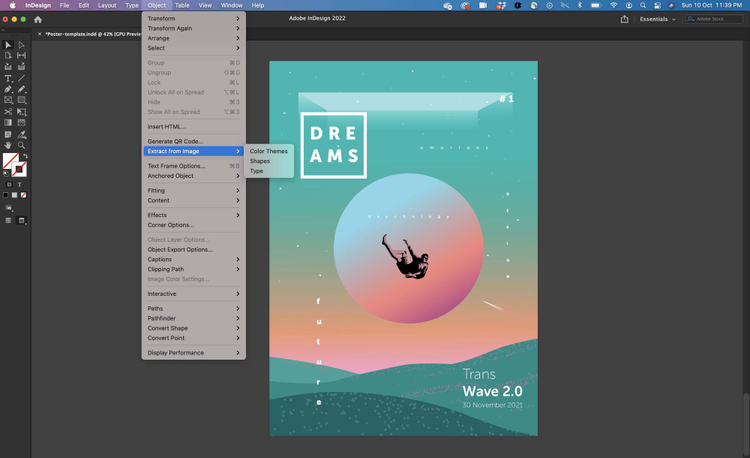
1. Select Object > Extract from image, and choose from Color Themes, Shapes, or Type
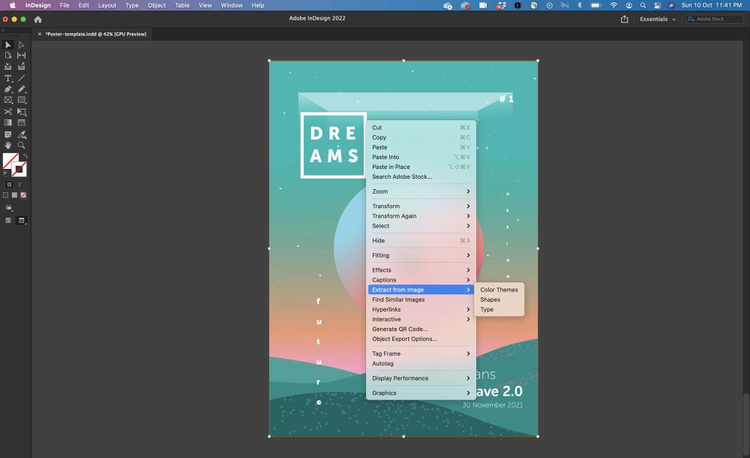
2. Right-click an image, select and choose from the options.
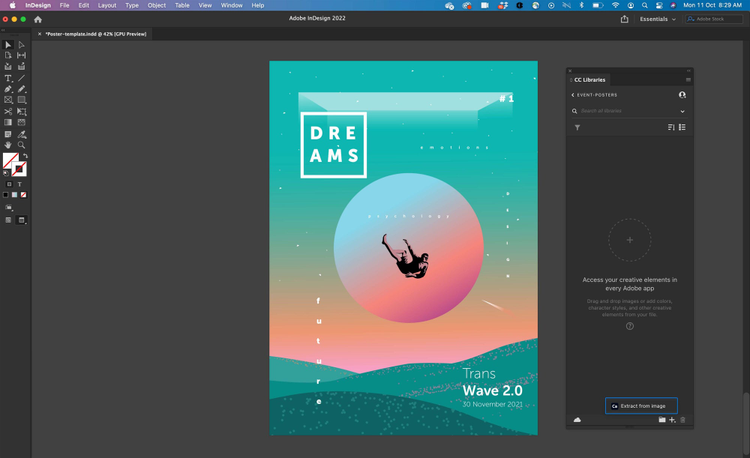
3. Open the CC libraries panel (Window > CC Libraries), click , select and choose from the options
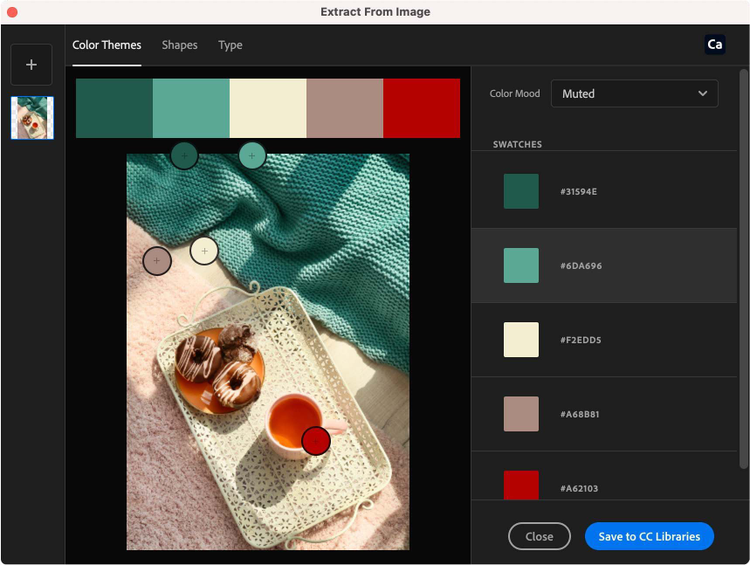
Once you have a collection of inspiration images and you proceed to decide what to use, the Capture extension is very handy feature that allows creation of themes with harmony rules. One can start by extracting themes using color mood filters, and moving the color drops in the image. To bring it to the next level of awesomeness, add swatches to CC Libraries and readily use them in InDesign files or access in any of the Adobe apps through Libraries ecosystem.
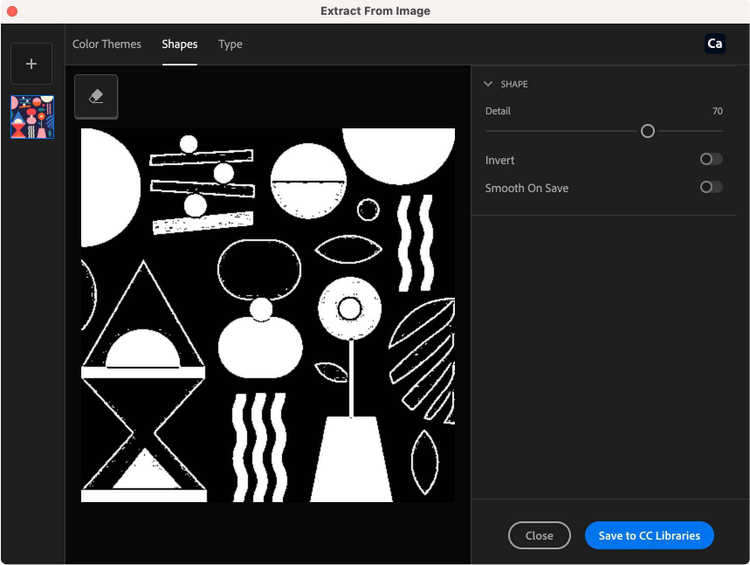
Tired of using pen tools too much or for too long? InDesign is here for your rescue — now you can vectorize directly in InDesign within the Capture extension. Use the slider to select the level of detail and invert the image to vectorize it. Not only that, you can also modify and apply smoothing to reduce path points. To turn the vectorized images into creative elements, just add them to your Creative Cloud Libraries and bring in the vector shapes in your InDesign file.
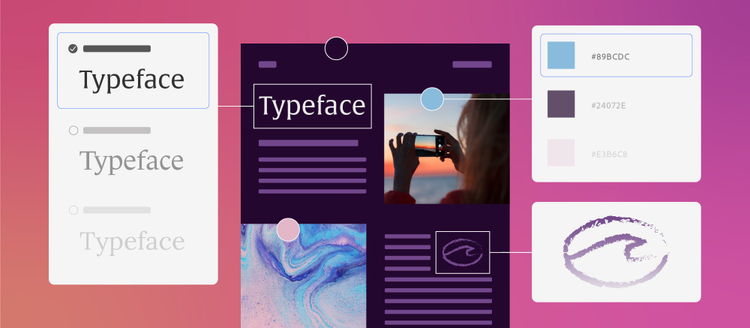
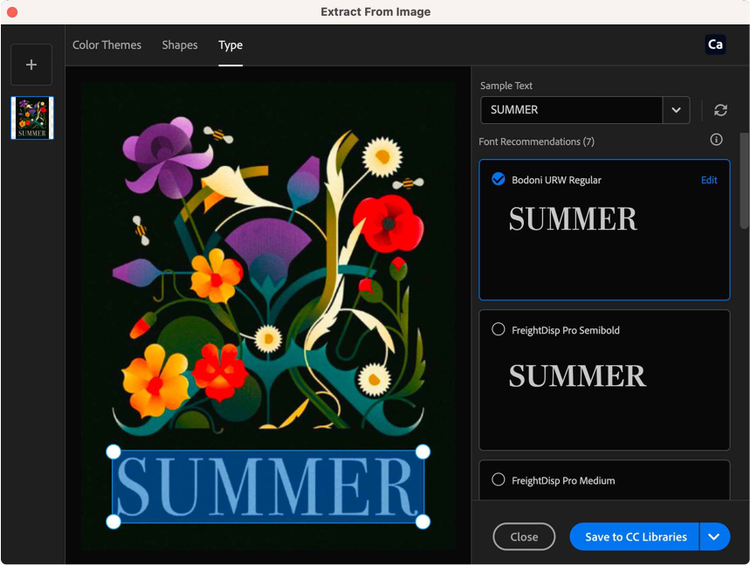
Bring in type inspiration from the wild or your desktop, and find similar fonts for your projects. The Type module allows you to find recommendations from Adobe Fonts and generate character styles or paragraph styles for your InDesign project. Simply place a line of text within the blue box or isolate a letter using the crop handles, and Capture extension will search similar fonts for you.
Pick the font you like from the recommendations and play around with Sample Text to get a feel of the font type across various strings. Use the Edit feature to play around with font properties such as leading, tracking, font size, and style by using the slider controls. Adjust as needed, and save the character style or paragraph style to your library. On saving a font, it is auto-activated from Adobe Font for direct use in your InDesign file.
Capture on the go
Inspiration can come from anywhere!
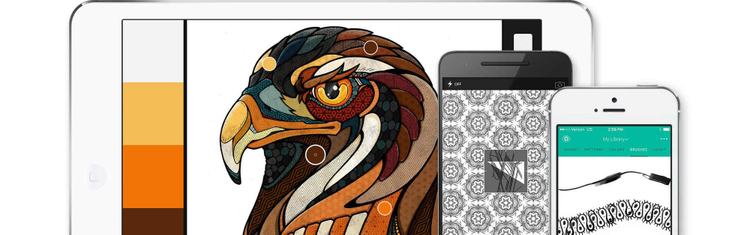
Use the Capture app on your mobile device to turn photos into color themes, patterns, type, materials, brushes, and shapes. Then find those assets in CC Libraries, located right in your favorite desktop and mobile apps — including Adobe Photoshop, Illustrator, Dimension and XD — to use them in all your creative projects.
Download the Capture app for iOS and Android using the QR code below.