How to capture aerial real estate photography

Image credit: Marc Weisberg / luxuryrealestateimages.com.
Aerial photography is a powerful asset in a photographer's tool kit. Here architectural and luxury real estate photographer Marc Weisberg explains what you need to know to effectively showcase properties using aerial photography, including drone photography.
In this article
- Shooting real estate aerial photography from a helicopter
- Best practices for aerial real estate photography
- Shooting real estate photography with a drone
- Enhancing aerial photos in post-production
- Learn the Window Pull
- Creating a “wow” factor with real estate aerial photography
My career started with photographing hundreds of weddings on yachts in different parts of the world — it was an incredible time in my life, but then the digital revolution put the power of photography in everyone's hands. While this can be a good thing, I wanted to explore a niche not just anyone could do, and that's why I immersed myself in real estate photography. I’ve always loved architectural photography, and it amazes me how these structures will supersede my lifetime. Like the structures I photograph, images that I’m creating for my clients are going to be around long after I’m long gone.
One of the first things I learned in the field was to use a tilt shift lens. A lot of photographers that shoot large buildings use a wide angle lens, but this requires you to angle your camera, which means all the verticals are off. A tilt shift lens allows you to keep your original perspective in the camera, meaning you can raise and lower the lens without changing the perspective; you can decide how much sky or ceiling, ground or floor are in your frame. A tilt shift lens is especially useful if you’re shooting interiors, too. It’s a remarkable tool that’s on my camera 99 percent of the time.
My business really took off when I started applying these techniques to construction companies and commercial real estate brokers. This is a huge sweet spot inside of architectural photography — and what do they want? Aerial shots. You have to work up to this field, as you really need to understand how to read light and what exactly is happening to the color and the environment, but when you get there it can be very lucrative and rewarding.
Here's how to forge a career in aerial photography, both from a helicopter (my specialty) and using a drone, with the help of Lightroom and Photoshop along the way.

Image credit: Marc Weisberg / luxuryrealestateimages.com.
Shooting real estate aerial photography from a helicopter
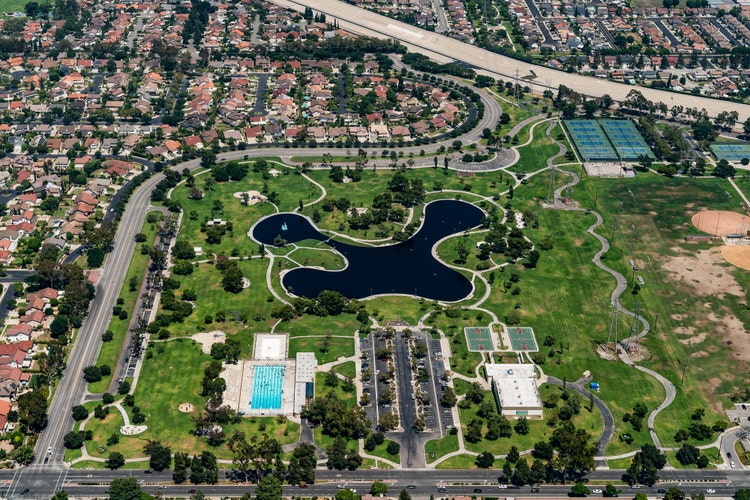
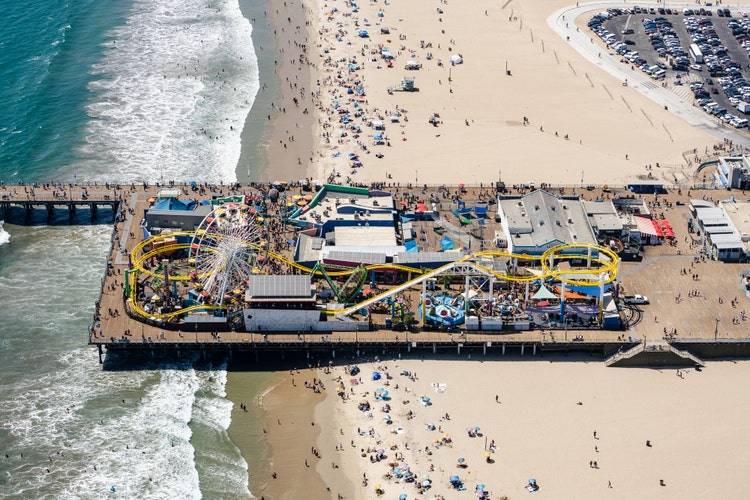
One of my early clients came to me because he needed an offering memorandum to attract external investors. His business didn’t just want to show a beautiful piece of real estate, but also what’s in the neighborhood, such as universities, shopping centers, restaurants, and access to freeways. If someone is investing hundreds of millions of dollars in a commercial property, they’ll want to know what’s in the vicinity.
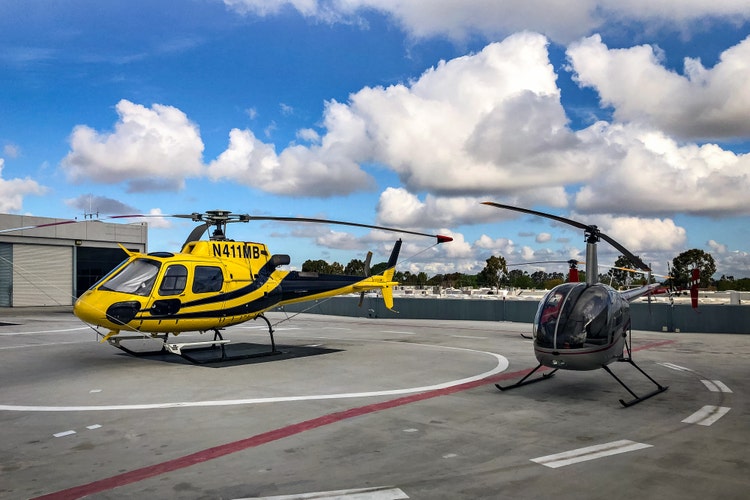
These types of projects require you to photograph not just the property but the surrounding neighborhood and infrastructure as well, which means you need to use a helicopter instead of a drone. Legally, a licensed drone pilot is only allowed to fly 400 feet above ground level, and there are restrictions for flying within two miles of an airport; if it’s too windy, you won’t be able to fly a drone. A helicopter, on the other hand, allows me to cover a large area and fly anywhere from 500 feet to more than 1,000 feet above ground level, for a birds-eye view.
The first time you do a shoot like this, it can be a bit scary. When I did it, I was nervous because you’re flying with the doors off! That aside, it’s such a fascinating way of creating aerial photography. You have to shoot at high shutter speeds to account for the vibrations the helicopter engine creates, and wind shear, which means increasing your ISO to at least 800 and dialing in your shutter speed from 1/1200th/sec to 1/2500th/sec to guarantee your images are razor sharp. I use Sony cameras for all my architectural photography, and when I’m shooting out of a helicopter, I typically use two lenses, a 24-70 and a 70-200, both G Master lenses, and two camera bodies, a Sony A9 and an A7R IV, and shoot in Manual mode.

Image credit: Marc Weisberg / luxuryrealestateimages.com.

Chartering a helicopter is very expensive, a Robinson 44 typically costs $550.00 per hour, so mapping out and pre-planning your flight path ahead of time is critical. The first step is to talk with your client and find out exactly what their needs are. I always ask for a full shot list of what they need photographed to be emailed to me. The last thing you want is your client asking for an image that you didn’t take when you were up in the air. I also look at Google Maps to scout the location, and if possible, drive through the neighborhood to get a good idea of where things are and make note of dominant landmarks. Once you are in the air, your visual perspective is very different, and it can be a bit disorienting. If you’ve done a drive through of the area, you’ll be able to more easily identify landmarks from the air. After reviewing Google Maps, I ask my client to send me a screenshot of the areas I’ll be photographing circled in red. This guarantees accuracy for their project.

Image credit: Marc Weisberg / luxuryrealestateimages.com.
Best practices for aerial real estate photography
Here are a few things to consider when planning aerial photography:
- Does the client need a north, south, east, and/or west view of the property?
- How far of a pull back do they want from the property? Some clients want both a closeup of the property as well as showing the surrounding area — sometimes one mile in each direction.
- Location almost always increases the price of real estate. Are there malls, universities, freeways or other large industrial areas that may add value to the property that they need to be photographed? Are there housing developments or commercial, industrial projects being built nearby? If so, these are areas that your client may want photographed.
- Keep a keen eye on the weather. You want clear skies and low winds to fly. You’ll need to watch out for the weather and particular patterns that are unique to the area. In Southern California, for example, it gets really hazy when it’s hot during the summer. I’ve had to put off aerial shoots for a week or more due to weather or closed air space when the vice president or president are in Los Angeles and flying in and out of local airports.
Always pre-plan with your pilot. I’ve found this to be invaluable. They’ve most likely flown in the area where you are headed. Also, they can map out your photography coordinates on their flight plan and get you right over the general area you need to photograph. Always listen to the pilot. When you are up in the air, they are in charge.
Before take-off your pilot will do a pre-flight check. You’ll be asked if you have any loose items with you, check that nothing — hat, glasses, or lens hoods — can fly off. The last thing you want is an object to fly out the door and hit the tail rotor. I always have my cameras on a strap, so they are secure and easily accessible and keep a small bag on the floor in between my feet with extra lenses. When doing aerial photography from a helicopter you're flying doors off. Inside the cockpit there is no wind but as soon as you stick your camera outside the open door, you can feel the wind shear and it’s very strong. This is why I don’t use lens hoods for doing this type of photography. A lens hood catches the wind right away and can jerk your camera away from you. It’s a team effort. While in the air you and your pilot are in constant communication regarding every aspect of getting the shot.
There are also many useful apps that help you plan outdoor photography with perfect precision:
-
Photo Ephemeris: Especially designed for photographers working with natural light, this app tells you everything you need to know about the sun, moon, and starlight at your location any time of the day.
-
PhotoPills: An all-in-one photography planning app that enables you to explore and manage your locations, discover vital information about the sun and the moon and visualize their position and path with augmented reality, and save your plans ahead of time.
-
LightTrac: LightTrac helps you find the perfect light conditions, time, and location for your photographs by plotting the angle of sun and moon on top of a map. You can save multiple locations and easily switch between them.
You won’t get a second chance to go up in the air, so be well-prepared — familiarize yourself with the capabilities of your gear. Also, always overshoot to make sure the client is happy. I’d rather give my client more than they asked for, instead of them having to ask for more. You’ll get the best results if you really understand what your camera will do and what you can do in terms of exposure, highlight recovery, and dynamic range in post-production with tools like Photoshop and Lightroom. This comes from the experience of shooting, experimenting, and rigorous testing of your equipment.
Shooting real estate photography with a drone
You don’t always have to charter a helicopter to create aerial real estate photography. Many times a drone is the perfect tool, especially if you want to show a different perspective and highlight the structure of a property.
I asked my friend, fellow photographer and drone specialist Chris Miller, for his tips on real estate drone photography. Here's what he shared:
“Most new drone pilots, even some seasoned ones, often make the mistake of shooting too high,” Chris cautions. “You shouldn’t just use drones to get photos of a roof. Most structures' best angles are actually at or just below the roofline. So you don’t get aerial photos per se, just slightly elevated angles without having to rent a lift or lug a ladder.”
Chris also reiterates that it’s important to check airspace restrictions at the shoot location ahead of time and to account for any airspace authorization that must be performed before your flight.
“Best practices for aerial photography are no different than for regular photography,” he says. “Focus on the light, angle, and compositional rules and apply the same strategy that you would consider when taking photos on the ground.”
In terms of equipment, Chris recommends the DJI Mavic Pro3 as it currently offers the best compromise between quality and size. The Autel Evo II Pro produces similar image quality, but it’s slightly larger and the controls are not quite as refined. Its great benefit, however, is that it doesn’t have the “geofencing” function found in DJI products that forces you to submit an authorization to fly in restricted airspace. Autel products simply trust that you have made the necessary flight authorizations.

Image credit: Chris Miller/Imagine Imagery.
Enhancing aerial photos in post-production
Once you’re back on the ground, the number one rule is to be really careful with your gear and your digital media cards. Losing images is the quickest way to lose a client. I always take all my gear with me to prevent it from being stolen out of the car, even if I just stop to go to a restaurant for a bite after a gig. And what I love about Sony is that there are two SD cards in each camera, so I’ll just take one card out and put it in my wallet.
When I get home, everything is backed up three times straight away: on my computer, an auxiliary external hard drive, and Dropbox. That’s before I even do anything to the pictures, and when I’m finished, they get backed up a fourth time to Backblaze. It may seem like overkill, but I’ve never lost my client’s work. As they say: “Better safe than sorry!”
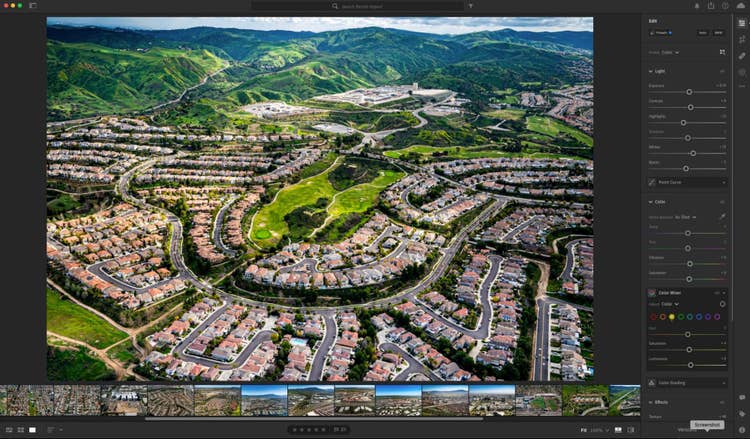
I then organize the images in my desktop folder (which has sub-folders like ‘RAW 1’, ‘RAW 2’, ‘Panorama’, ‘Optimize for Print’, ‘Optimize for Web’), and I rename them in Photo Mechanic and delete the ones I’m not going to use. I then feed everything into Lightroom. I tweak photos accordingly for exposure and color and output them as a JPEG. I use Photoshop for anything that’s for print so I can scrupulously look at the sharpness and potential color issues (on a color-calibrated monitor) or any enhancements I may need to do for retouching.
Lightroom is part of my daily workflow. People often ask me how I ensure the images that I share on Facebook are so beautiful and crisp, and to a large degree that’s due to Lightroom. I have a preset that I use and output my images for sharing on Facebook and social media at 2,000 pixels on the longest side at 100dpi and Output Sharpening is set for Screen > Standard. If I need to retouch something, I can bring it into Photoshop, but Lightroom has advanced so much that I usually don’t need to, unless there’s something specific the client has asked for or if I need to do some more heavy edits.

Image credit: Marc Weisberg / luxuryrealestateimages.com.
I have used Lightroom since its inception, and the most recent iteration is fantastic. The Masking tools help you make very precise color or luminance range adjustments and give you control over specific areas in a photo. I have presets set up to tweak the clarity and vibrance a little, too.
Lightroom also allows me to correct color, tweak the density, make sure vertical and horizontal lines are perfect, dehaze, use curves to control highlight shadow and blacks, and so much more. I love how much control I have over the processing of my images. If you are shooting in RAW and expose properly, you’ll be amazed at the nuances that Lightroom can coax out of your images.
Learn the Window Pull
In real estate photography, there’s an important technique called the “Window Pull” that all aspiring real estate photographers should know. When photographing the inside of a room, it's common to get a perfect exposure inside the room but the view from the window will be completely blown out (because it’s so much brighter outdoors).

The original image — the interior is perfectly exposed but the window is not. Image credit: Marc Weisberg / luxuryrealestateimages.com.
To deal with this, expose one of the frames for the outside view, and use a flash to expose the interior surrounding the window or door frame about a full stop above the interior’s exposure. Then, bring your images into Lightroom, adjust them and then export them to Photoshop as layers where you can place the flash layer on top, and then set the layer to Darken in Blending Mode.

Exterior ambient exposure window flash frame. Image credit: Marc Weisberg / luxuryrealestateimages.com.
The use of the Blending Mode — Darken, with a mask — allows Photoshop to do its magic and seamlessly blend the properly exposed outdoor view with the perfectly exposed interior view exposure.

Using a mask to apply the exterior ambient frame to remove reflections. Image credit: Marc Weisberg / luxuryrealestateimages.com.

Image credit: And the final image, complete with masking using Darken mode in Adobe Photoshop.
Creating a “wow” factor with real estate aerial photography
I’ve been a photographer for more than 20 years and still always look at every project as a challenge. Clients hire you to make things look beautiful, whether it’s on the ground or in the air. And some aerial photographs have a “wow” factor that just can’t be achieved on the same level from the ground.
There is so much amazing training available today, both in person and online, but if you really want to get good at your craft, find a mentor. It’s invaluable. It will accelerate your career by light years, and I can’t emphasize it enough. Having a mentor changed my life forever, and I hope this article gets you on your way.