How to use light fall-off for natural vignetting

Image credit Caroline Jensen.
My career in photography began in 2008. In the time since, I’ve shot an eclectic range of genres, but I’ve really honed in on macro nature and garden photography, specifically with flowers. I’m a photographer by trade, but I think the practice of photography is a stress reliever more than anything for me. Teaching is my vocation, and I love being able to pass along the things I learn in my practice through workshops and blog posts.
I’ve been passionate about the topic of light fall-off since I came to understand its ability to help me communicate how I want my viewers to experience my images. As a photographer, especially having worked in portraiture quite a bit, that’s really the ultimate goal, and light fall-off really allows me as a photographer to guide the viewer's eye to where I want it to be.
In photography, light is what creates that visceral, emotional reaction for people. It can make any subject endearing and really draw people in. A pencil on the table can be attractive with the right light. Flat lighting — no shadows or vignette, no fall-off — doesn’t tend to elicit a very strong emotional reaction in viewers.

As a photographer, keeping the principles of light fall-off top of mind as you shoot is setting a solid foundation so that by the time you get to processing with Adobe Lightroom and Photoshop, you’re already a long way towards your vision.
What is light fall-off?
I first learned about light fall-off, with all its patterns and varieties, through studying classic paintings with my kids. We would look for light patterns together and I realized light fall-off always caught my eye.
In photographic terms, we often talk about the inverse square law — where you put a very large, bright light source close to your subject, expose for the subject, and then the light will fall-off quickly, minimizing background distractions. You can intensify or diminish this effect based on the distance at which you place your light source and the harshness of the light itself. By manipulating the image this way — whether in shooting or post — the viewer sees exactly what you want them to see..

When I photograph outside of my studio — for example, in the city, I use a flash and work with light falloff to reduce distractions. With this light fall-off trick, I’m able to make my images look exactly the same whether they’re in a studio on a black background, or outside. It’s really convenient for consistency.
Best practices for using light fall-off to achieve natural vignetting
I recently started using a strobe, set to full power, when I want to create dark backgrounds for my garden shots. I use a 40 inch plus size umbrella and bounce the lighting using a diffusion panel across the front, so the strobe is shooting into the umbrella and then back out through the diffusion material. I place the umbrella very close to the subject so that it’s almost perpendicular to the face of the flower or person or whatever I’m shooting so that the light skims across the face of the subject.

Whether you're using a strobe, like this, or another light source, there are some key ways you can use light fall-off to achieve your goal. Here are some of the most important factors to pay attention to.
The size of the light source
Make sure you have a very large light source compared to the size of the subject so that the light is soft wrapped around the subject.

The reason I use such a large light source is that I can introduce more of the background if I want to and let the light fall off more gradually as we reach the corners of the frame.
The distance from your subject
Getting close to your subject will make the entire background behind the subject fall off into darkness.
Depth of field
I usually shoot at ƒ14 to ƒ22 which is a very deep depth of field. I shoot this way because, particularly with nature, I want every last little detail. I want every ant and stamen and pistil and petal to be as sharp as possible.
Light fall-off for moving, candid subjects
I have had to train my brain to see natural vignettes, and so can you. I look for people in alleyways, doorways, porches. Anything where the subject is standing in the gap between a non-illuminated and an illuminated space. This can help you achieve the light fall-off effect when you're shooting candid shots "in the wild."
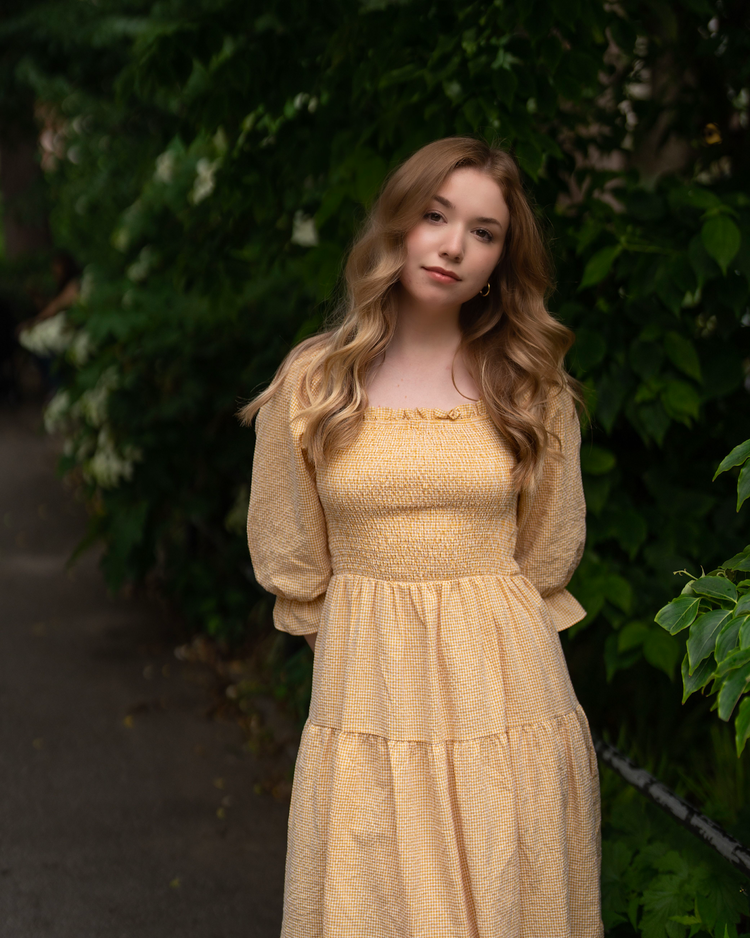
A good example of this idea is when my daughter and I were in Central Park in New York City. I asked her to stand right on the edge of the shade cast by the trees behind her. I was standing on the bright and sunny path. By placing her in the shadow cast by the trees, I took advantage of the natural light fall off that happened as a result of the heavy canopy of leaves.
By having her stand on the very edge of that transition I kept the sunny light on her face but also made sure that she pops off the background due to the abrupt transition from light to shade.
By having my daughter stand on the very edge of the light transition I kept the sunny light on her face but also made sure she pops off the background due to the contrast from light to dark falloff.
I’ll always meter for the subject’s face and that helps me know the background is going to be minimized because of that. I’m always looking for subjects in those sort of alcove situations, since I know this will make for the most incredible shots.
Editing for light fall-off
When it comes to post, I use both Lightroom and Photoshop to make sure my images turn out exactly as I want them. To start, I bring the image into Lightroom (where I am head over heels in love with the new masking features.) I select the subject then work on that mask to enhance the subject. I then duplicate the subject mask and invert it to select the background and reduce the exposure, or bring the highlights down, or open the shadows a little — anything to minimize the effect of the background and achieve my ideal vignette. You can also reduce contrast or just kind of knock the background back slightly so it’s less "contrasty" than the subject.

Flower photography using the light fall-off technique, edited in Lightroom (but before Photoshop).
Next, I take the image over to Photoshop where I continue that process. I add a linear gradient from whichever direction I want to go. So, let’s say I'm editing a photograph of a rose, I might pull it up from the bottom using a color, pulled from the image, then I will use the object selection tool to select my subject and go back to my gradient. There, I'll use a brush of the opposite color to remove my subject from the gradient, and that will isolate the subject.

The final flower shot, further edited in Photoshop.
I also love to feather things until they’re soft. Then I repeat the process from various angles, dragging different colors in from the top or the sides.
Why use light fall-off for natural vignetting?
At the heart of it, composing and enhancing your photographs this way allows you to control the viewer’s attention and create an image that draws people in. Using light fall-off and pulling some darkness unevenly from upper right or lower left can create a more natural vignette that the eye doesn’t even see. And the result is sure to leave an impact on anyone looking at the photograph.

The most valuable skill a photographer can learn is how to direct a viewer’s eye. When I take a photo I like to ask myself what I see first, where does my eye go? That is how I create images that leave a lasting impression. Using light fall-off is just one really handy and simple way of achieving that vision.
