Inside Lens Blur

Our next installment of the “From the ACR Team” series is all about the Lens Blur feature in Adobe Camera Raw (ACR), Lightroom Classic, and Lightroom on Windows, Mac, iOS, Android, and Web.
I’m Josh Bury, a Senior Computer Scientist on the ACR team and lead engineer for the Lens Blur feature. I’ve been with the ACR team and Adobe for 12 years and some of my past projects include Masking "2.0", Merge to HDR and Panorama; and Color, Luminance I also have a background in physics, and I was excited to work on a feature that emulates real-world optical effects.
Before I dive into Lens Blur, I want to acknowledge the significant contributions to Lens Blur by my colleague Richard Case, who developed the initial implementation of our Lens Blur rendering algorithms. On the research side, Simon Chen, Yifei Fan, Soo Ye Kim, Simon Niklaus, and Jianming Zhang for their work on the depth estimation models that are essential for Lens Blur to work on any photo.
What is Lens Blur
The Lens Blur feature enables you to create realistic shallow depth-of-field effects at edit time. All with control over what is in focus, how much out-of-focus areas are blurred, and even bokeh styles, which determine the "look and feel" of the applied blur.
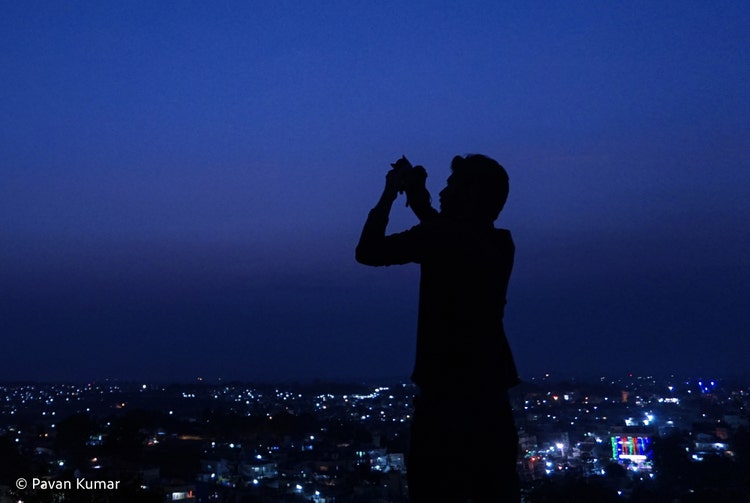
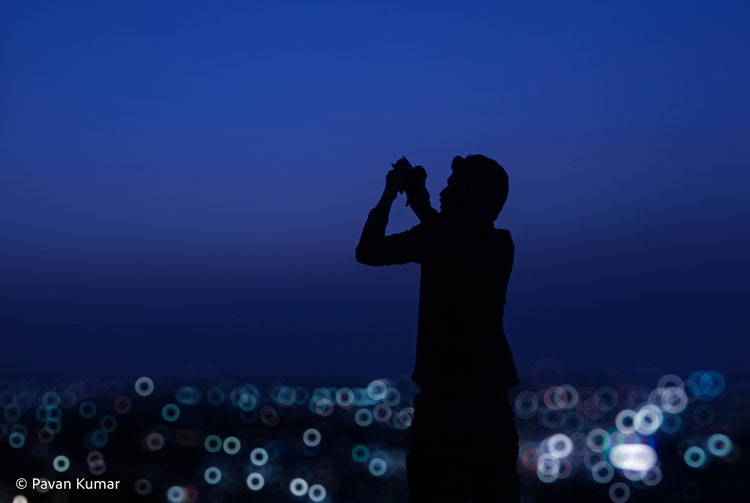
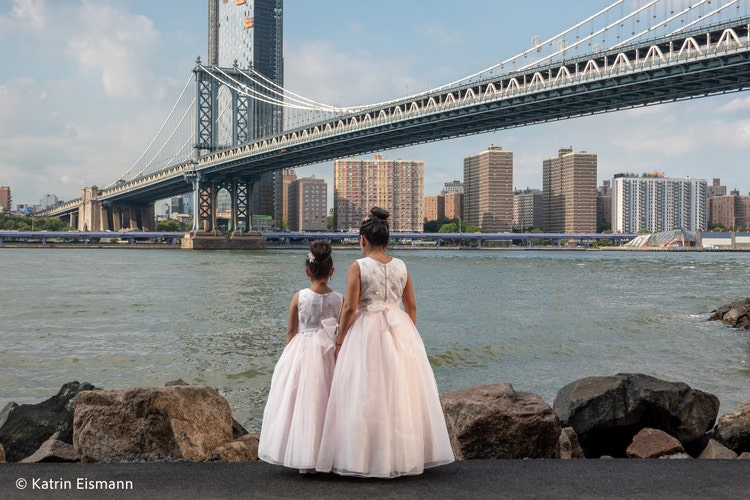

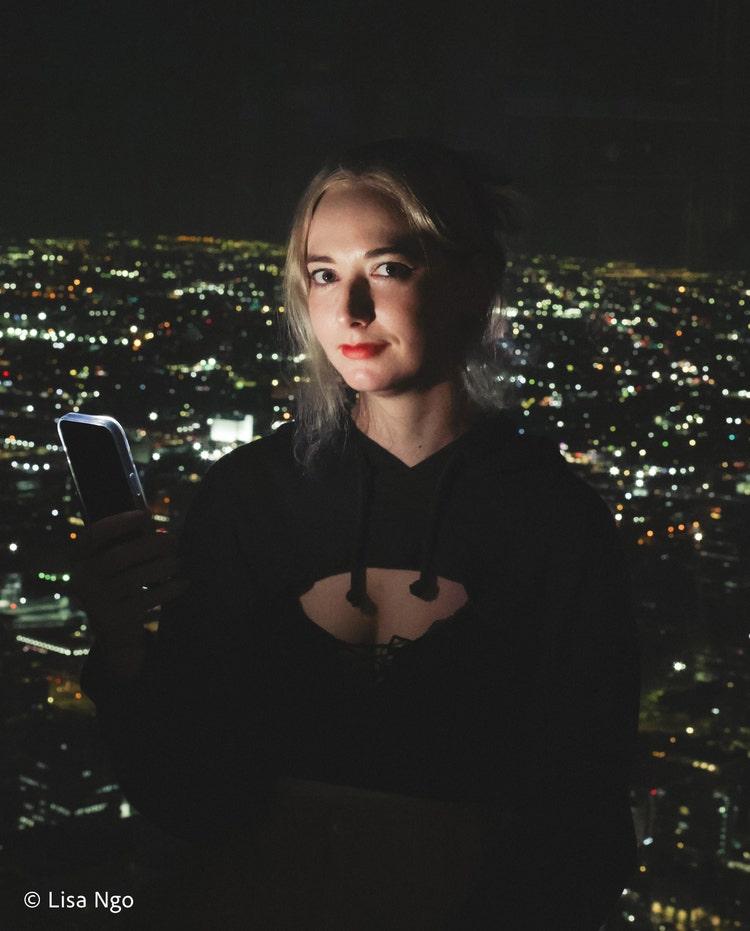
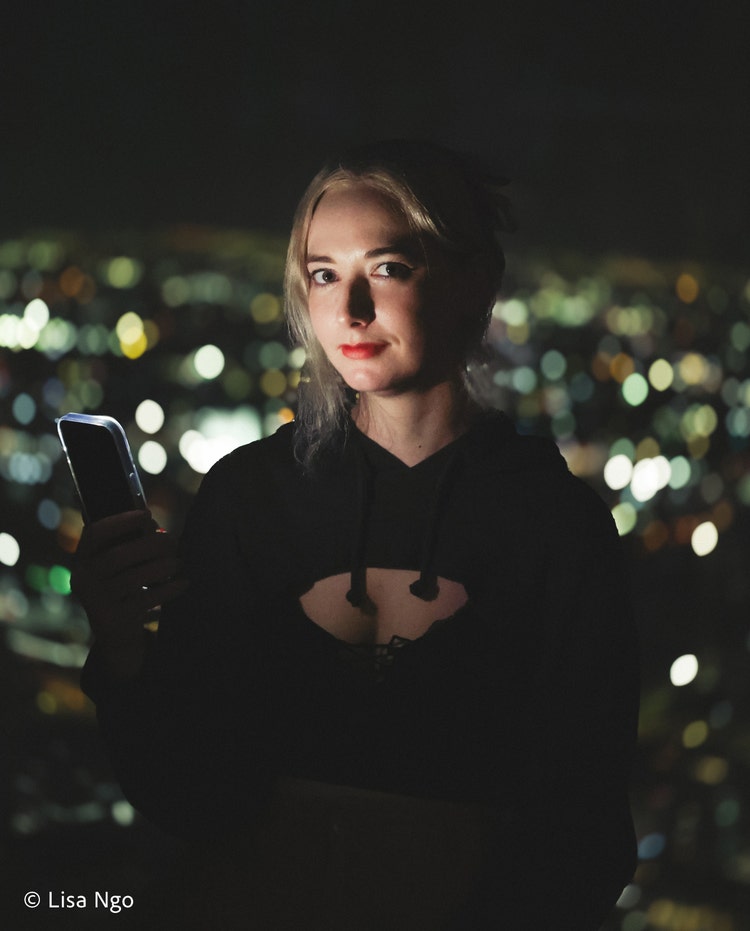
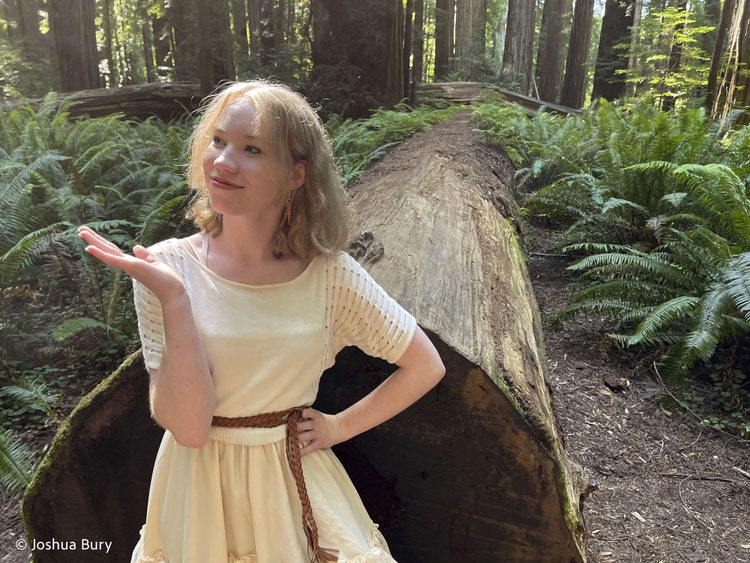
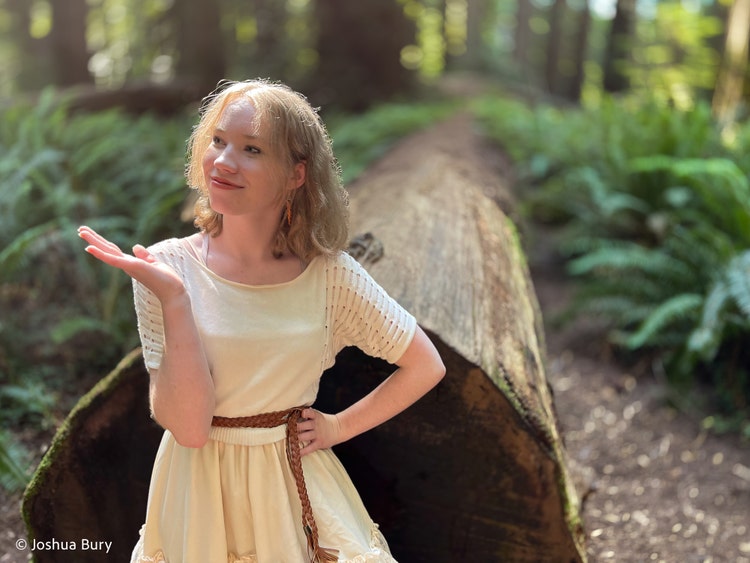
Before and After examples with Lens Blur applied. © Pavan Kumar, © Katrin Eismann © Lisa Ngo, © Joshua Bury
Before I get into how we made this possible and some best practices, let's first unpack why adding blur to some photographs is desirable, as well as cover a few related photography terms such as depth-of-field, aperture, and bokeh.
Compose with focus and blur
An important principle that I use when composing a photo revolves around simplification. The goal is to compose the photo only with elements that contribute to the story. One way to do this is to only focus on the subject and let the unimportant areas be softer and blurrier. When viewing an image, our eyes are naturally drawn to the sharper areas, not the softer, blurry areas.
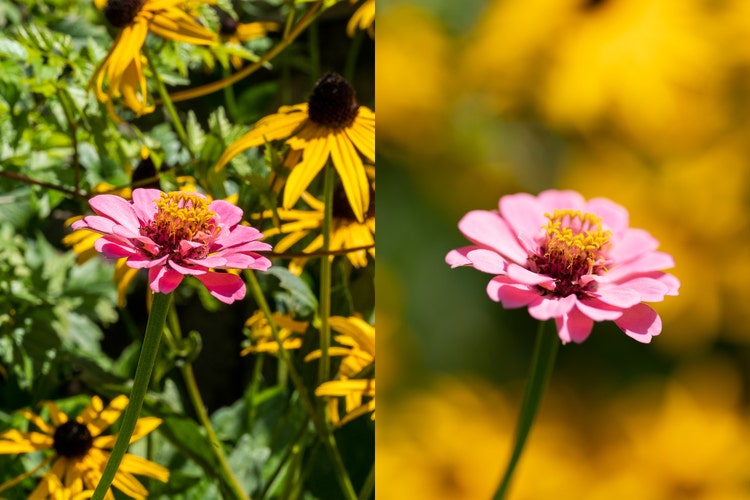

Photographed with a deep (ƒ 22) and shallow depth of field (ƒ 1.8). © Katrin Eismann
Focus and depth of field (roughly how much of the scene is in focus) are best set at capture time, and there are a couple of ways to control it. Using a longer focal length lens, or a wider aperture, can go a long way towards blurring less-important image areas and creating a more successful composition. I will be covering these terms in the next section.

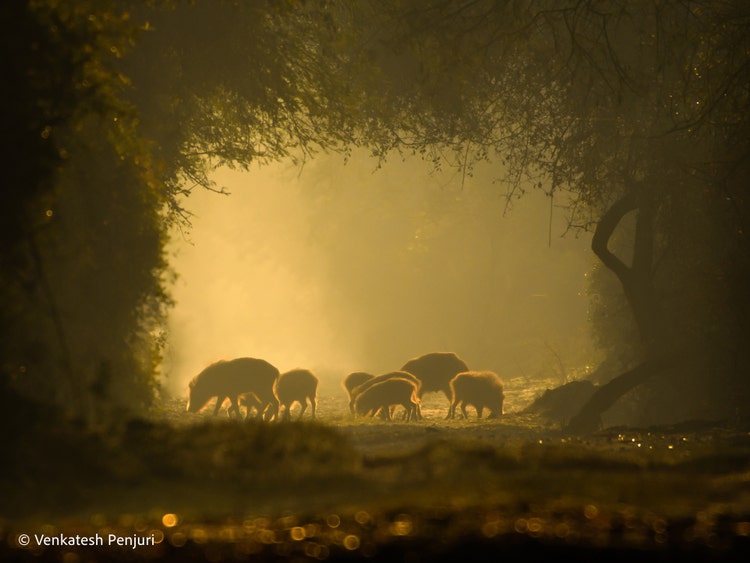


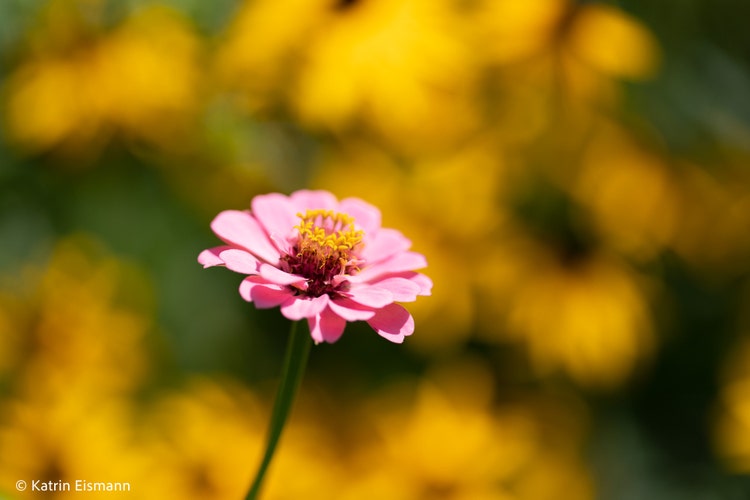
Gallery of images with shallow depth of field created with a wide aperture and/or longer focal length lens. © Venkatesh Penjuri © Venkatesh Penjuri © Katrin Eismann © Katrin Eismann
Blurring parts of the scene that are not essential to the composition make the subject of the photo, and the story it tells, much clearer. This is most often used in portrait photography, where the person or people are crisp and the details in the background may be distracting, so they are blurred out.
Lens Blur Essentials
Depth and shallow depth-of-field
Photographers use the term "depth" to describe the distance of the subject or part of the scene from the camera. Each area in a photo has a "depth" value, which is the distance from the camera in that specific direction.
With that in mind, the term "depth-of-field" is used to describe how much of the scene's depth is in-focus (i.e., sharp and detailed). More relevant to Lens Blur, "shallow" depth-of-field is used to describe images where only a small range of the scene depth is in focus. Parts of a scene will appear blurrier the further away they are from the camera's current focus distance.
Aperture
A larger aperture in a camera lens lets in more light and is capable of creating more blur effects. Lenses that are great at shallow depth-of-field are usually larger and, consequently, much more expensive. Many of us use our smartphones to capture photos every day, but they have optical limitations. Smartphone camera lenses are tiny and have very small apertures, which explains why most phone pictures are in focus from the subject to the background. Standard phone cameras can’t replicate the shallow depth-of-field that you get with dedicated larger lenses.

With the focus on the golf ball the shallow depth of field abstracts the athletic golfer. © Katrin Eismann.
The art & science of bokeh
"Bokeh", pronounced "boh-keh" is a Japanese word describing the blur produced when something is out-of-focus. Having a term specifically for out-of-focus blur is convenient because it's not the only kind of blur encountered in photography, with motion blur being a notable example. Bokeh is much more than an "out-of-focus blur" though, it's about the quality and character of that blur and how it affects different parts of the scene in a photo. Depending on the amount of light, different lenses render out-of-focus blur in unique ways, for example, the bokeh can be crisp, creamy, or soft with circular effects.
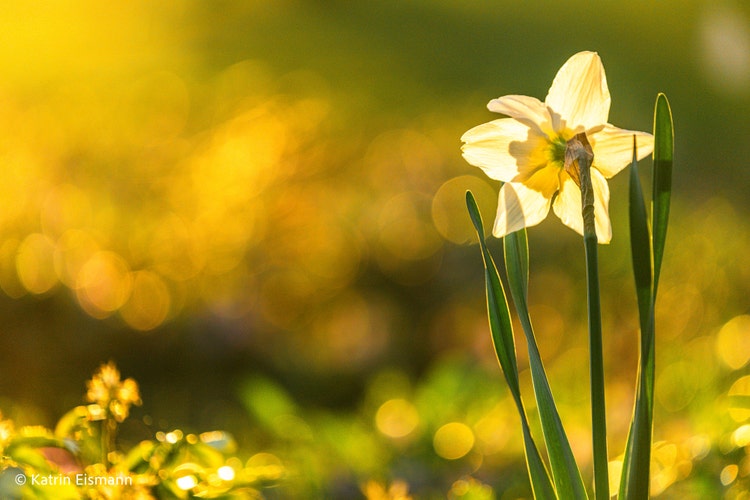
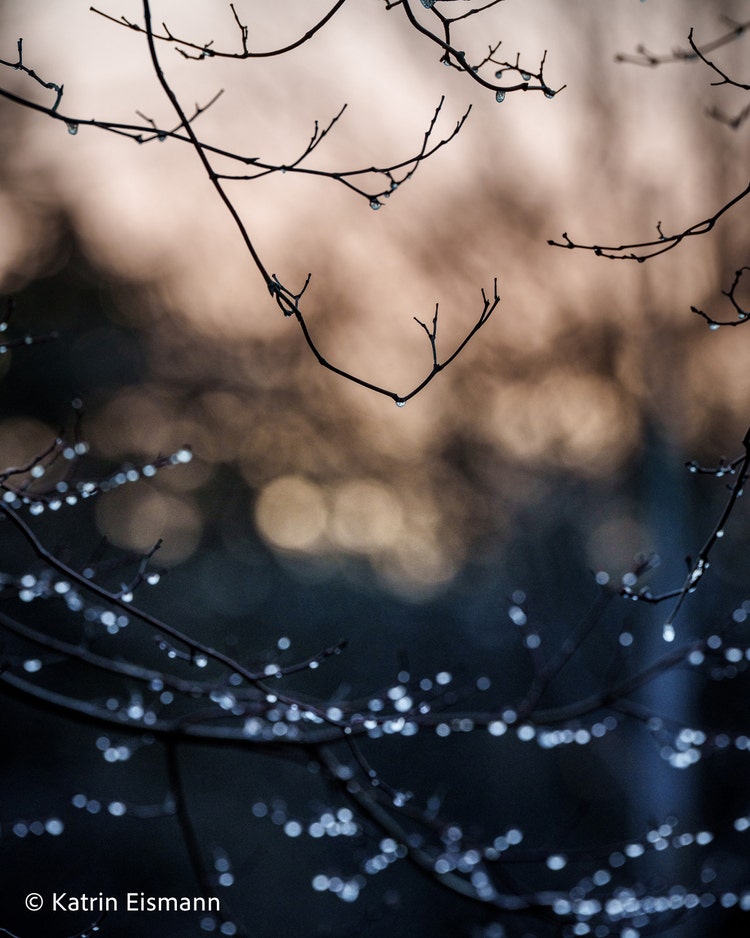

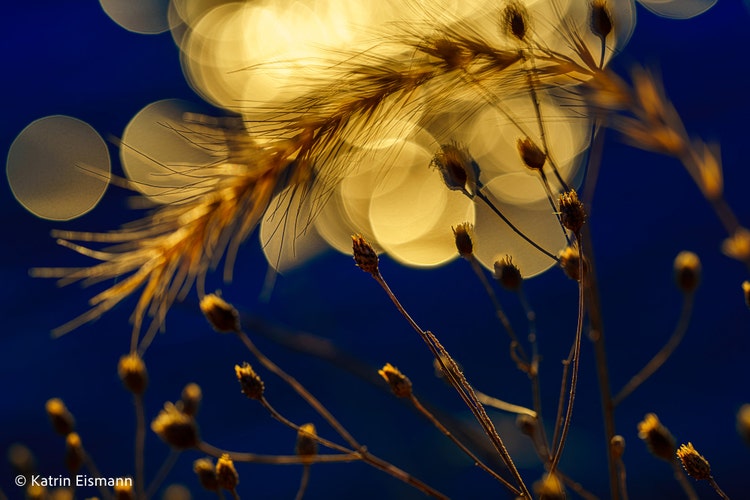
Photographed with a variety of lenses and cameras, the shallow-depth-of field and bokeh create intriguing moods. © Katrin Eismann
When a point-like light, or other specular highlight, is out of focus, the effect can be especially dramatic. Why is that? It's not that lenses treat the light any differently when it's coming from a specular highlight — the same blur "shape" is applied to all light passing through the lens. The difference is with the amount of light. When focused, specular highlights occupy a very small spot on the photo, which is quickly saturated because the light is concentrated. However, when defocused, the light from specular sources spreads out. The highlight values are no longer clipped, but they are still brighter than the surrounding parts of the scene, so the distinctive bokeh shape produced by the lens tends to stand out.
Some lens designs produce an effect where the bokeh even changes shape depending on how far, and in what direction, it is from the center of the photo. The is commonly known as the "cat eye" effect because the shapes are similar to the pupils of cat's eyes. It's also sometimes referred to as "swirly" bokeh because it tends to have a radial symmetry that draws the eye towards the center of the photo, even without specular highlights in the composition.

Cat eye bokeh creates swirly, abstract shapes in the image highlights, as seen especially well on the right side of this image. © Pavan Kumar.
Given the dramatic and varied effects of different bokeh, it was clear from the beginning of the project that emulating these effects needed to be part of Lens Blur.
Lens Blur deep dive
Distilling the complexity of light and optics into an intuitive feature, with creative control, that creates realistic high-quality results, was quite challenging!
Works on any photo
Probably the most fundamental challenge in developing Lens Blur is that we wanted it to be applicable to any kind of photo that can be edited in ACR and Lightroom. A big part of this challenge is that focus-based blur is dependent on scene depth. It's becoming more common for smart phone cameras to capture scene depth (a so-called "depth map"), even when the image is not captured in portrait mode. But mirrorless and digital SLR cameras don't measure depth because they see the world through a single lens. In general, at least two "views" of a scene are required to measure the distance to each part. This is why humans and animals have two eyes: it allows us to see depth and, for example, determine whether something is within arm’s reach or not.
When you only have a single photo of the scene, you need to use other techniques to estimate depth. This is a great example of a problem that "AI" technologies are a great fit to solve. Fortunately for Lens Blur, researchers at Adobe had already been working on solving the problem of building a depth map using machine learning. Similar technology is also used in Select Subject and some of our other masking features.
Realistic results
We set high quality standards for the image editing features we add to ACR and Lightroom, and Lens Blur is no exception. The Lens Blur imaging pipeline had to be complex to achieve realistic results, which starts with depth estimation. Here we were able to utilize innovations coming out of Adobe Research to produce depth information that’s more sophisticated than a basic depth map image. This extra information is used while rendering Lens Blur to increase precision and detail along subject edges. We also have a dedicated step for detecting out-of-focus light sources, allowing us to make them stand out, and even make their brightness adjustable via the Bokeh Boost slider (more on that below).
Performance vs quality
When we click the shutter at 1/125th of a second, the light is captured and the bokeh effects are rendered. To emulate the effects of real-world lenses, Lens Blur needs to do lot of complex math, which doesn’t happen at 1/125th of a second! The computing power of modern devices continues to increase every year, but so does the mega-pixel count of sensors in new cameras, and we needed to use almost every trick in the book to make Lens Blur fast enough for interactive editing on the devices we support.
To set expectations though, adjusting Lens Blur will never be as fast as , for example , adjusting Exposure or adding Clarity. Fundamentally, certain image processing algorithms used by Lens Blur require far more computation steps, which compound as images get larger.
A tour of Lens Blur
Lens Blur is in a dedicated section of the primary edit stack interface. On desktop, add Lens Blur to a photo by checking Apply. On mobile, drag the blur slider to activate. There will be a short delay as we estimate the scene depth. Once that’s done though, the photo will update with our default Lens Blur settings applied.

Lens Blur in Adobe Camera Raw.
One of our design goals was to have Lens Blur give good results for most photos just by turning it on. To that end, we developed a solution that takes advantage of Select Subject to set the initial focus range setting for the subject of the photo, which is what is desired for most photos (especially portraits).
For a stronger or weaker effect, use the Blur Amount slider, which is at the top of the Lens Blur controls. If you are not getting as much blur as you’d like, or you want to change which areas are most affected, Focus Range is an effective tool (more on that below) to widen, narrow, or shift the blur.
Below the Blur Amount, you will find the Bokeh controls. The five bokeh styles (modern circular, bubble, 5-blade, ring, and cat eye) represent a cross-section of what can be found with real lenses. Click or tap each one to see its effect on the photo. The icon used for each button is a preview of the effect each would have when used to blur lights and other specular highlights in the scene. Not all photos have background lights, but the character of the blur will still change with each of these options, though in ways that are more subtle.
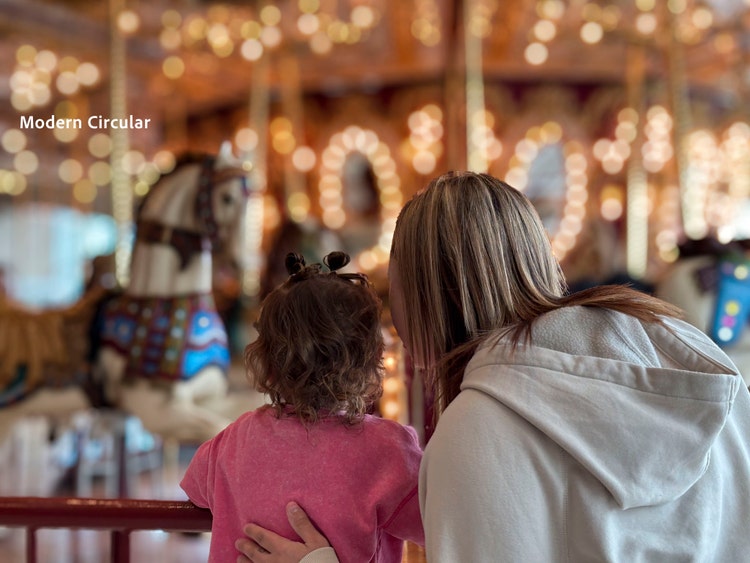
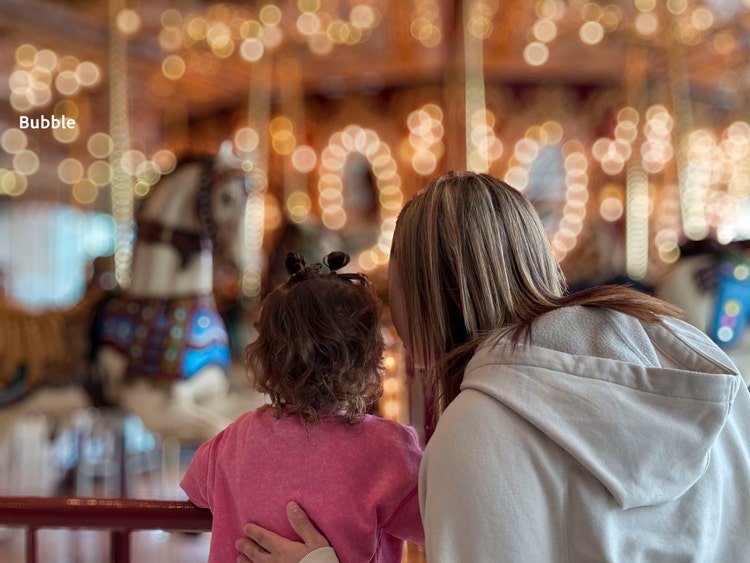
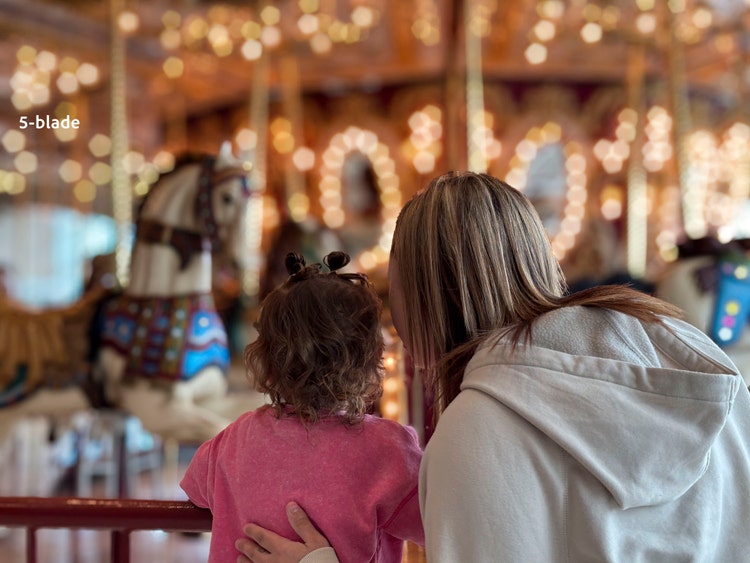
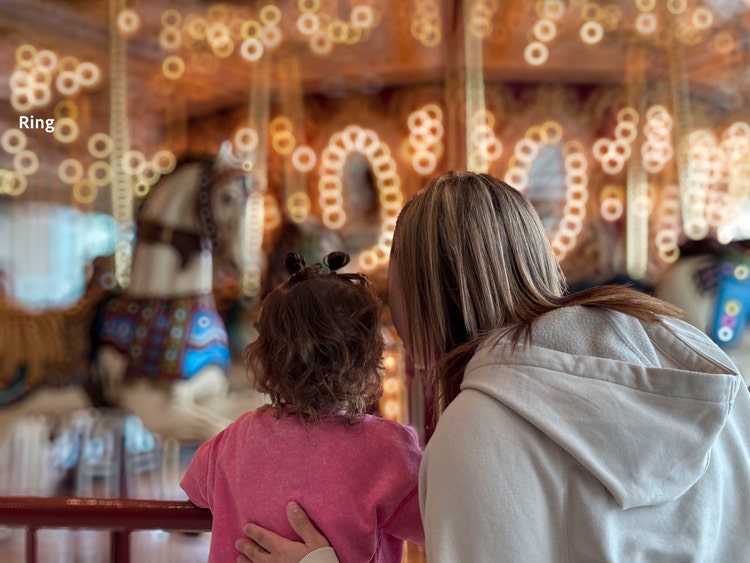
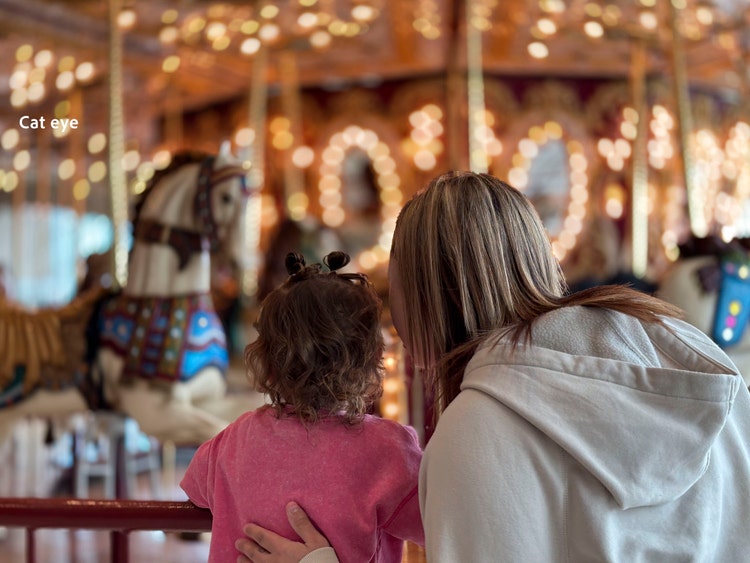
The five bokeh styles include modern circular, bubble, 5-blade, ring, and cat eye.
Below the Bokeh style buttons, is the Bokeh Boost slider. This slider is specifically targeted to adjust the brightness of blurred light sources. This is great for making bokeh effects more or less prominent. Note that for photos that don’t have any point-like light sources, this slider will not have much effect.

Use the boost slider to control the intensity of the highlight bokeh effects.
Customize what is in-focus with Point Focus to click/tap on a location in the photo to focus on. For greater control, use the Focus Range slider. For example, you can increase the amount of background blur in a photo by moving the right side of the focus range to the left. This narrows the focus range, which is roughly equivalent to decreasing the depth-of-field.
To see the range of depth values that are in-focus, use the Visualize Depth option. When active, Visualize Depth will show the depth map overlaid on the photo. Depth values are color-coded to make it easier to distinguish between near and far parts of the scene. When you adjust Focus Range while Visualize Depth is active, we highlight the in-focus depth values in white, simplifying precise focus adjustments.
Refining blurred areas
AI-based solutions, such as the depth estimation model used by Lens Blur, often feel like magic. However, like magic, they can be a little mysterious and opaque. Knowing that we can’t make a depth estimation model that produces perfect results for every photo, part of our design included making manual corrections to the AI-estimated depth map.
When a tweak to the Focus Range can’t fix part of the subject getting blurred with the background, or vice versa, we offer refinement brushes in Lightroom on desktop, Lightroom Classic, and ACR. At the bottom of the Lens Blur panel, expand Refinement to show the depth refinement controls.

Lens Blur Focus Range and Refinement options in Adobe Camera Raw.
There are two brush-based tools available here: Focus and Blur. Selecting Focus and brushing on a part of the photo that was blurred by Lens Blur will update the depth map to bring the brushed area within the current Focus Range. Brushing with Blur will cause the depth values in the brushed area to match the background depth in that part of the photo. Both the Focus and Blur brushes also support our usual brush options: size, feather, flow, and Auto Mask. Turning on the Visualize Depth option will give a more direct view of how the depth map changes when these tools are used.
The depth refinement brushes also each have an Amount slider that can be used to tune the effect after adding a Focus or Blur adjustment. The refinements you make are also adaptive to changes in the Focus Range . For example, if you use the Focus brush to cause an area to be in-focus, you don’t need to redo it if you later tweak the Focus Range, those depth values will update accordingly to keep that area in-focus.
Getting the most out of Lens Blur
Lens Blur is a great option for any photo were using a shallow depth-of-field would help focus attention on the subject. This is especially useful in scenes with busy backgrounds.
- If you know ahead of time that you want to use Lens Blur on the photo you are capturing, it’s best if you keep everything mostly in-focus. This will maximize the amount of creative control you have with Lens Blur.
- Use Lens Blur on images with background lights to make them stand out with the Lens Blur bokeh effects.
- While Lens Blur is great at adding blur to parts of a photo, it cannot remove existing blur, or bring areas into focus that were out-of-focus at capture time.
- Building a depth map on finely detailed or narrow subjects such as ropes, fly-away hair, or foliage is challenging. We are aware of this and are always looking to improve the AI models to achieve more realistic results.
- Applying a hint of Grain to blurred areas creates a less smooth and more realistic look. For greater control, use a mask to control where the Grain is applied to the blurred area to make the blur appear more natural.
- Some photos captured on smart phone cameras include a depth map as part of the file. These can be quite accurate because they are often created using information from multiple cameras. You can use these depth maps with Lens Blur by choosing "Use Device Depth" in the Lens Blur panel. However, if you do want to use these photos with Lens Blur, it’s best to turn off the portrait mode blur effect before importing the photo into Lightroom or opening it in Camera Raw since preexisting blur cannot be removed by Lens Blur.
We built Lens Blur to expand your creative options, no matter which camera and lens combination or smartphone used. We hope you enjoy exploring bokeh and blur, as much as we do. Please make sure to share your favorite examples with Lens Blur on the Lightroom Community page.