Adobe XDをもっと使いこなすヒント! 第62回 3種類のテキストエリアを使い分ける
この連載では、Adobe XDを便利に使うための様々なテクニックを、Adobe XDチームのツイートからピックアップしてご紹介します。今回は、3種類のテキストエリアの特徴を紹介する5つのツイートを紹介します。
Tip 1. 幅が自動調整されるテキストエリア
#AdobeXD #ProTip Create a new auto-width text box (formerly “point text”) by selecting the text tool and single clicking on the canvas. Auto-width text boxes are fixed to the content, so pulling the single handle on the text box will resize the content. @AdobeXD pic.twitter.com/ehTTuxiKQp
— Elaine Chao (@elainecchao) January 13, 2021
テキストツールを選択して、カンバスの任意の場所をクリックすると、点滅するカーソルが表示されます。そのままテキストを入力すると、改行するまで自動的に幅が広がるテキストエリアが作成されます。
このテキストエリアは、下の線の中央にある小さな円をドラッグすると、テキストエリアが拡大し、同時に中のテキストも拡大されます。また、プロパティインスペクタでフォントサイズを変更すると、テキストエリアの大きさがそれに合うよう変更されます。
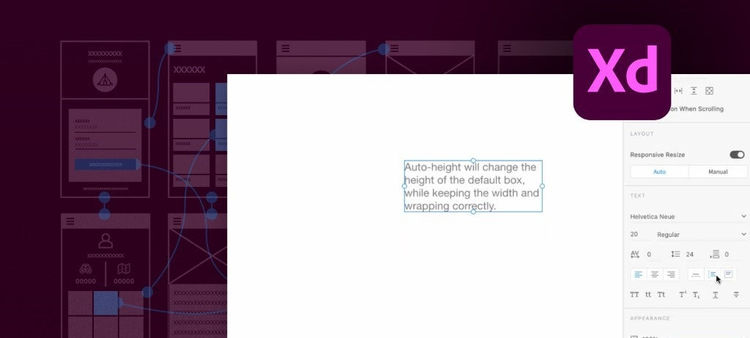
Tip 2. 高さが自動調整されるテキストエリア
#AdobeXD #ProTip With the text tool selected, click and drag on the canvas to create an auto height text box. This text box will clip to the size of the contents, but will auto-wrap text. Resizing the width of this box will cause the text to reflow. @AdobeXD pic.twitter.com/6FLcLfpzQC
— Elaine Chao (@elainecchao) January 14, 2021
テキストツールを選択して、カンバスの任意の場所をクリックし、そのまま横にドラッグします。すると長方形の領域が描画されます。ドラッグした領域内に点滅するカーソルが表示されたらテキストを入力すると、幅が固定されたテキストエリアが作成されます。
幅が固定のテキストエリアは高さが自動調整されます。長いテキストを入力すると、所定の幅に達したら自動的に下の行にカーソルが移動し、テキストエリアの高さが広がります。
左右の辺の中央にある小さな円をドラッグすると横幅を変更できます。
Tip 3. 固定サイズのテキストエリア
#AdobeXD #ProTip Changing the height of an auto height text box will convert it to a fixed size text box (formerly “area text”), which will always stay the same size, regardless of the content. If there is overflow content, a red filled dot will show on the bottom. @AdobeXD pic.twitter.com/HYkA68Xhjs
— Elaine Chao (@elainecchao) January 15, 2021
高さが自動調整されるテキストエリアの上下どちらかの辺の中央にある小さな円をドラッグすると、固定サイズのテキストエリアになります。
固定サイズのテキストエリアでは、エリア内に表示しきれない文字がある場合、下の辺の中央に赤い円が表示されます。この円をダブルクリックすると、自動的に高さが調整され、すべてのテキストが表示されます。
Tip 4. テキストエリアの種類の切り替え
#AdobeXD #ProTip Auto-height text is now the default for click-and-drag text objects, and will automatically set the text box to fit all content. @AdobeXD pic.twitter.com/eVOA4N3RYp
— Elaine Chao (@elainecchao) January 25, 2021
プロパティインスペクタのアイコンを操作して、テキストエリアの種類を切り替えられます。
固定サイズのテキストエリアから高さが自動調整されるテキストエリアに切り替えると、上の動画のように、テキストエリアの高さが自動的に調整されます。
#AdobeXD #ProTip If you switch from a text object that automatically flows to auto-width, XD will add carriage returns to ensure visual fidelity. Switching to auto-height or fixed-width afterward will retain those carriage returns. @AdobeXD pic.twitter.com/8tdsLA7Dac
— Elaine Chao (@elainecchao) January 26, 2021
幅が固定のテキストエリアを幅が自動的に調整されるテキストエリアに変更した場合は、各行に自動的に改行が挿入されます。その後、幅固定のテキストエリアに戻しても改行はそのまま残ります。
いかがでしたか?
これは便利そうだ!という使い方はあったでしょうか?
次回をお楽しみに!